My Current Wildlife Photography Kit

Whenever I show my photography work to just about anyone on Instagram, my website, or in print, one of the most common (if not THE most common) questions I receive is “what camera did you use to take that?”

It can be a bit off-putting to be entirely honest, as it seems to indicate that the “gear” is responsible for the quality image vs the photographer.

I’ll give you an example that is honestly a bit dumb, but somewhat illustrates what I mean: Imagine watching a major-league baseball player hit a record number of home-runs, and then in the post-game interview, the reporter was only focused on asking him about the bat that he used to hit those home-runs. “Excuse me Aaron Judge, what bat did you just use to hit homerun 62?” Kind of discounts the amount of hard work, training, practice, and determination it takes to become a master of his profession if the only thing anyone could focus on was the specific tool he used to get there, right?

But at the same time, I get it. I’m constantly tweaking my own photography kit, and sometimes it helps to know what others are using that helps them create the amazing images that they are capturing as artists. So I’ll quit my belly-aching about the gear inquiries, and just lay it out with links included.


**Note: I’m not fancy enough to have a following that warrants affiliate links and all that jazz, so I’m just linking to my local camera shop which is a great place, and way cooler than Amazon.

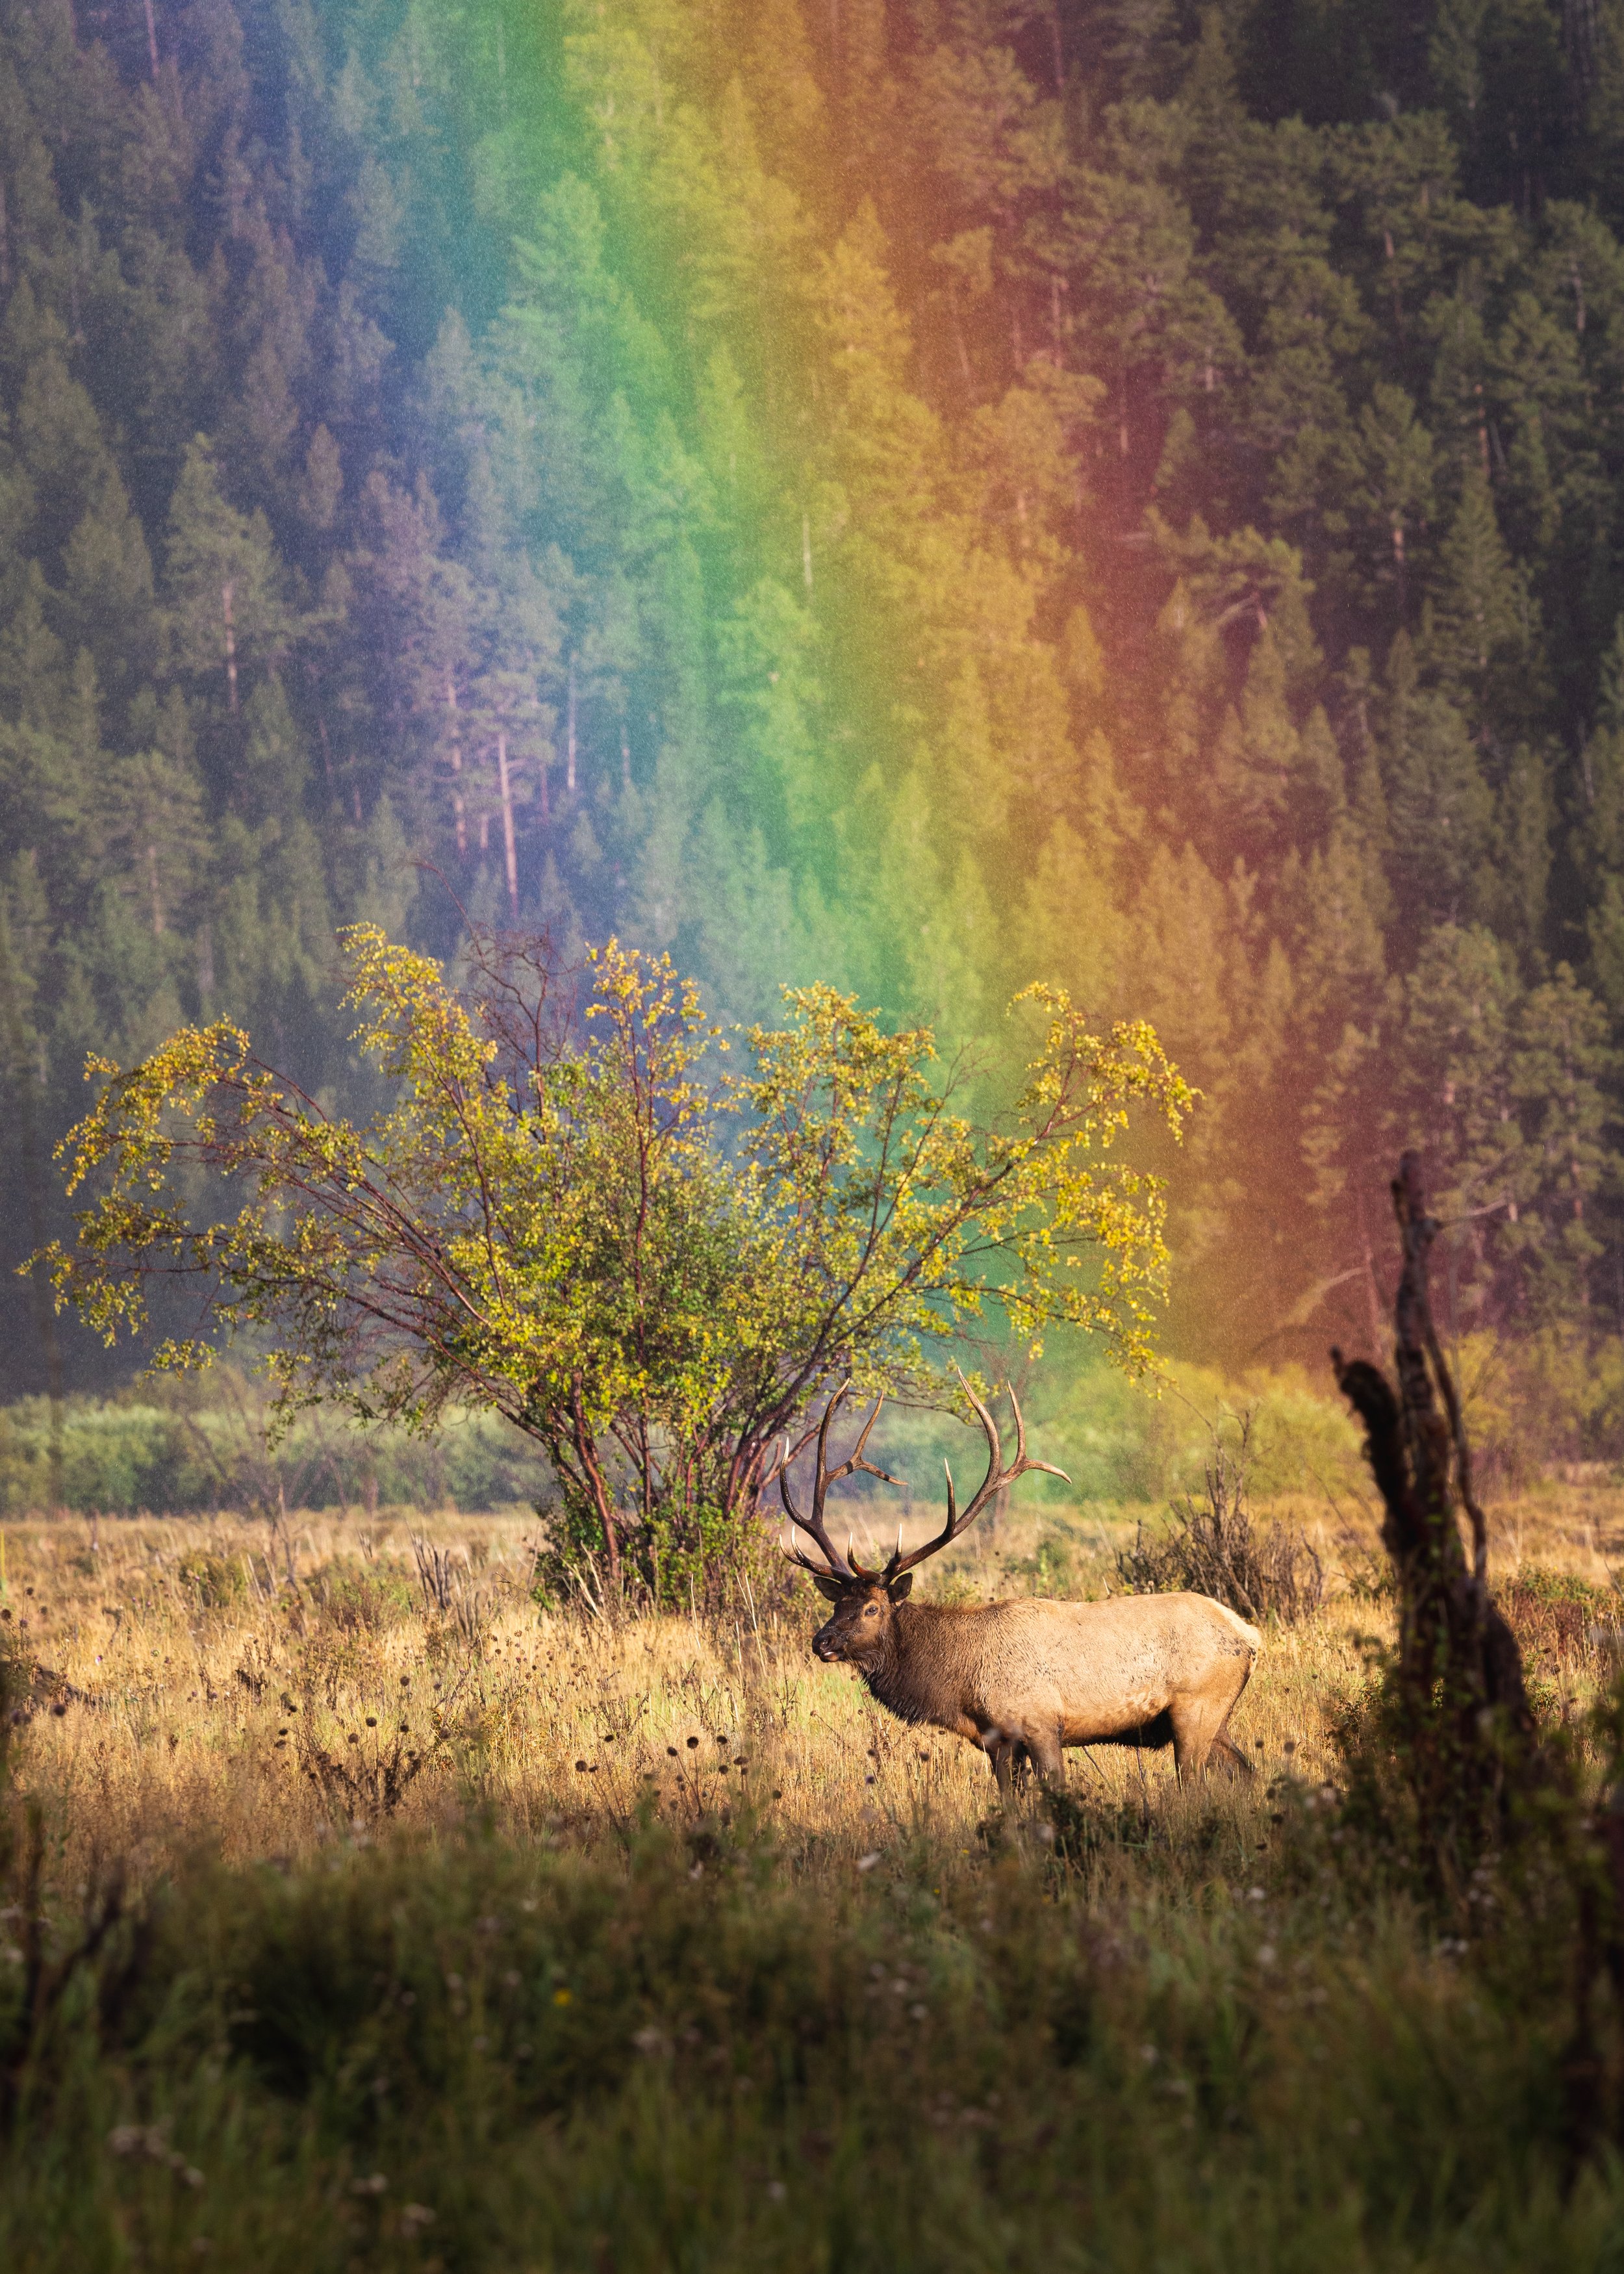
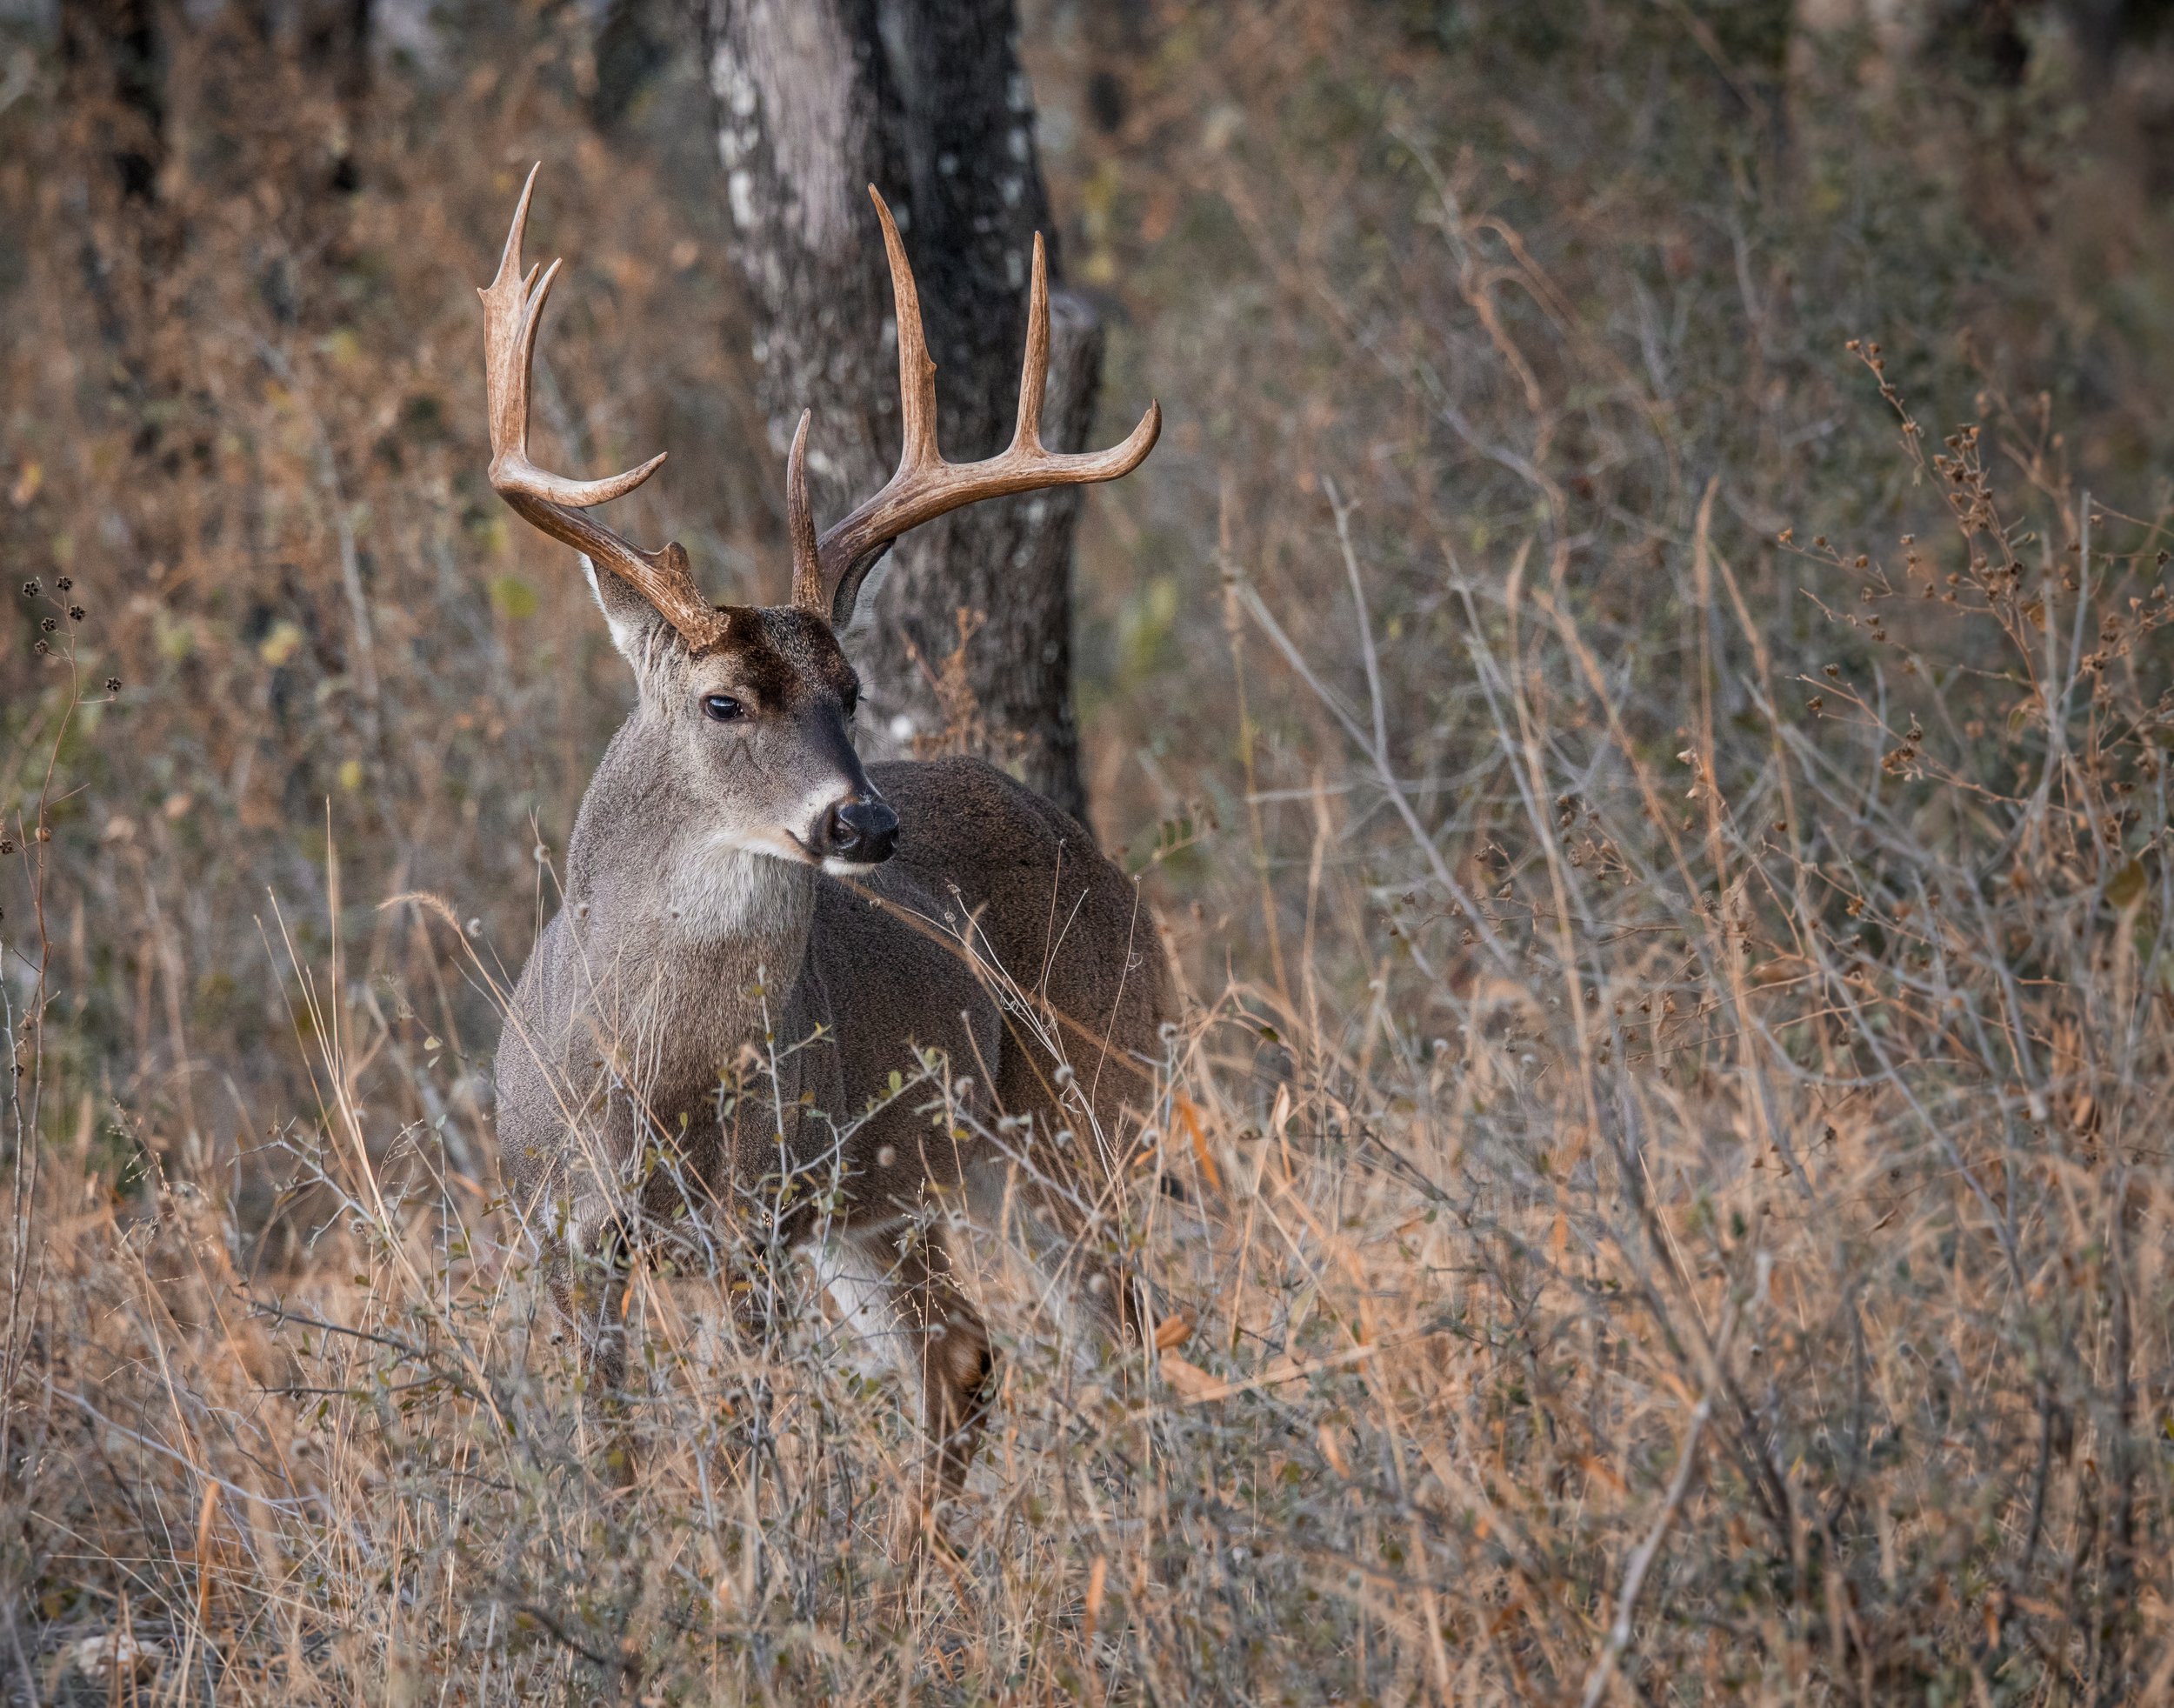
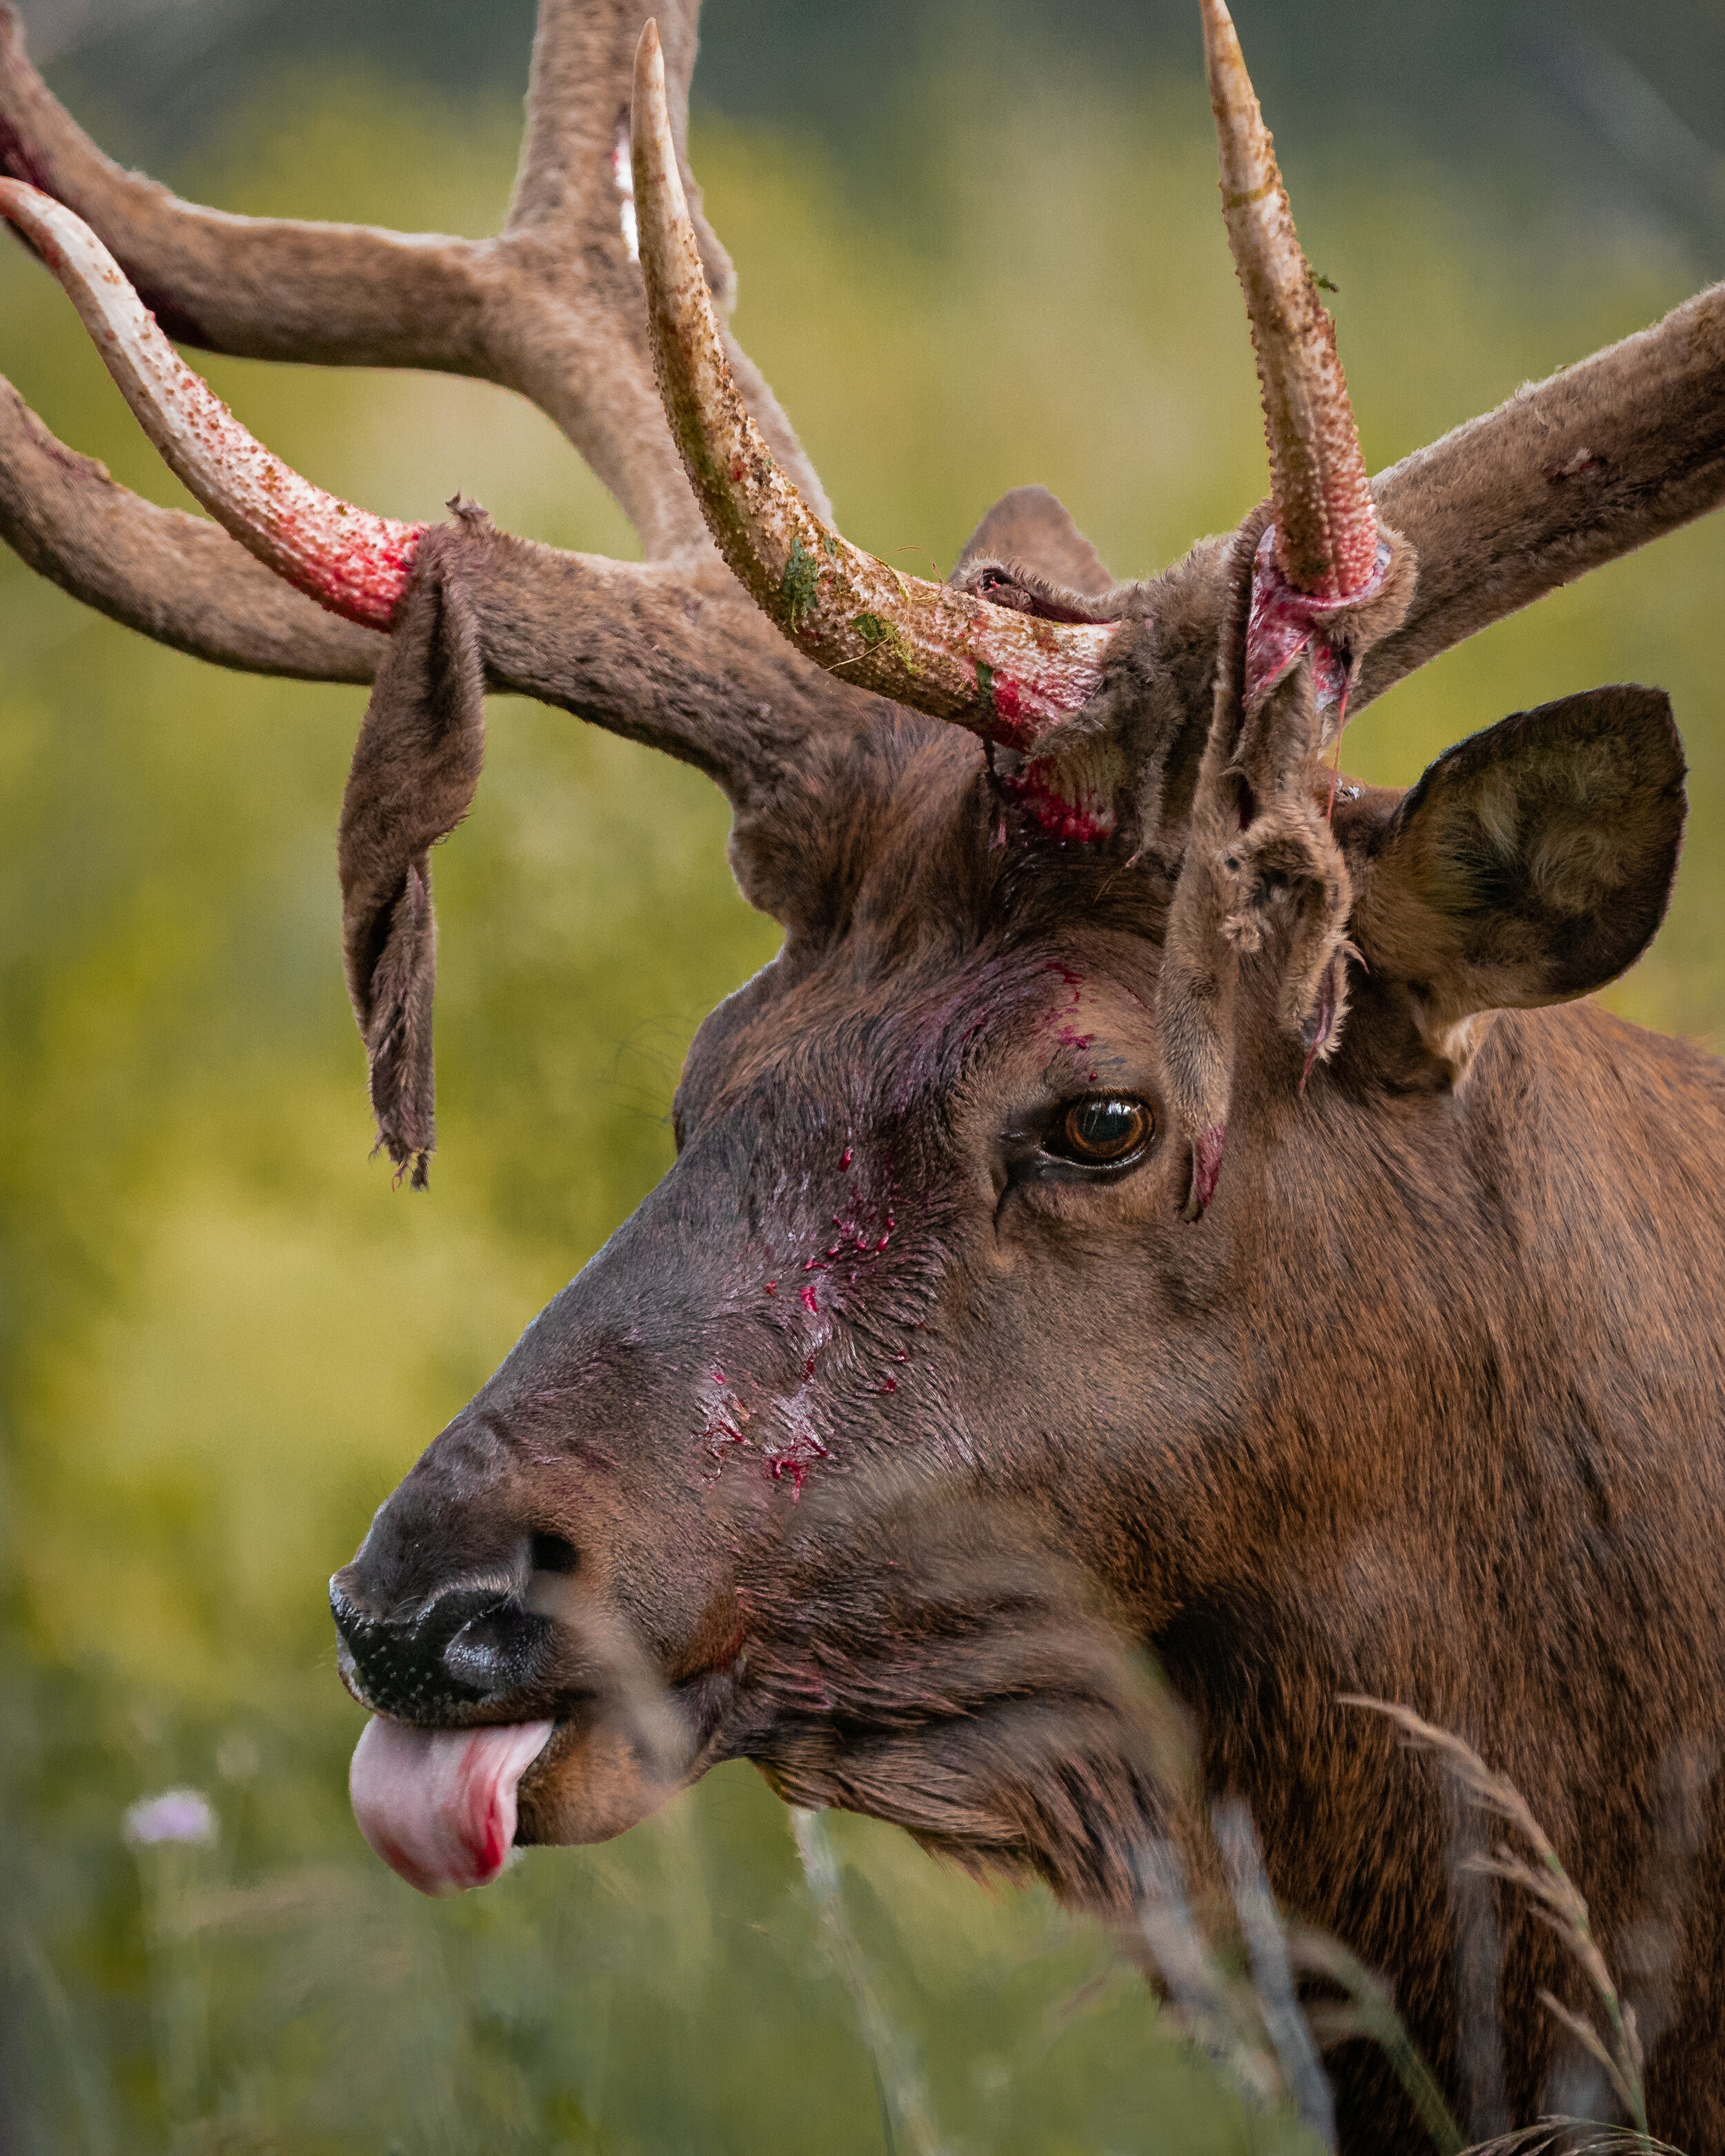
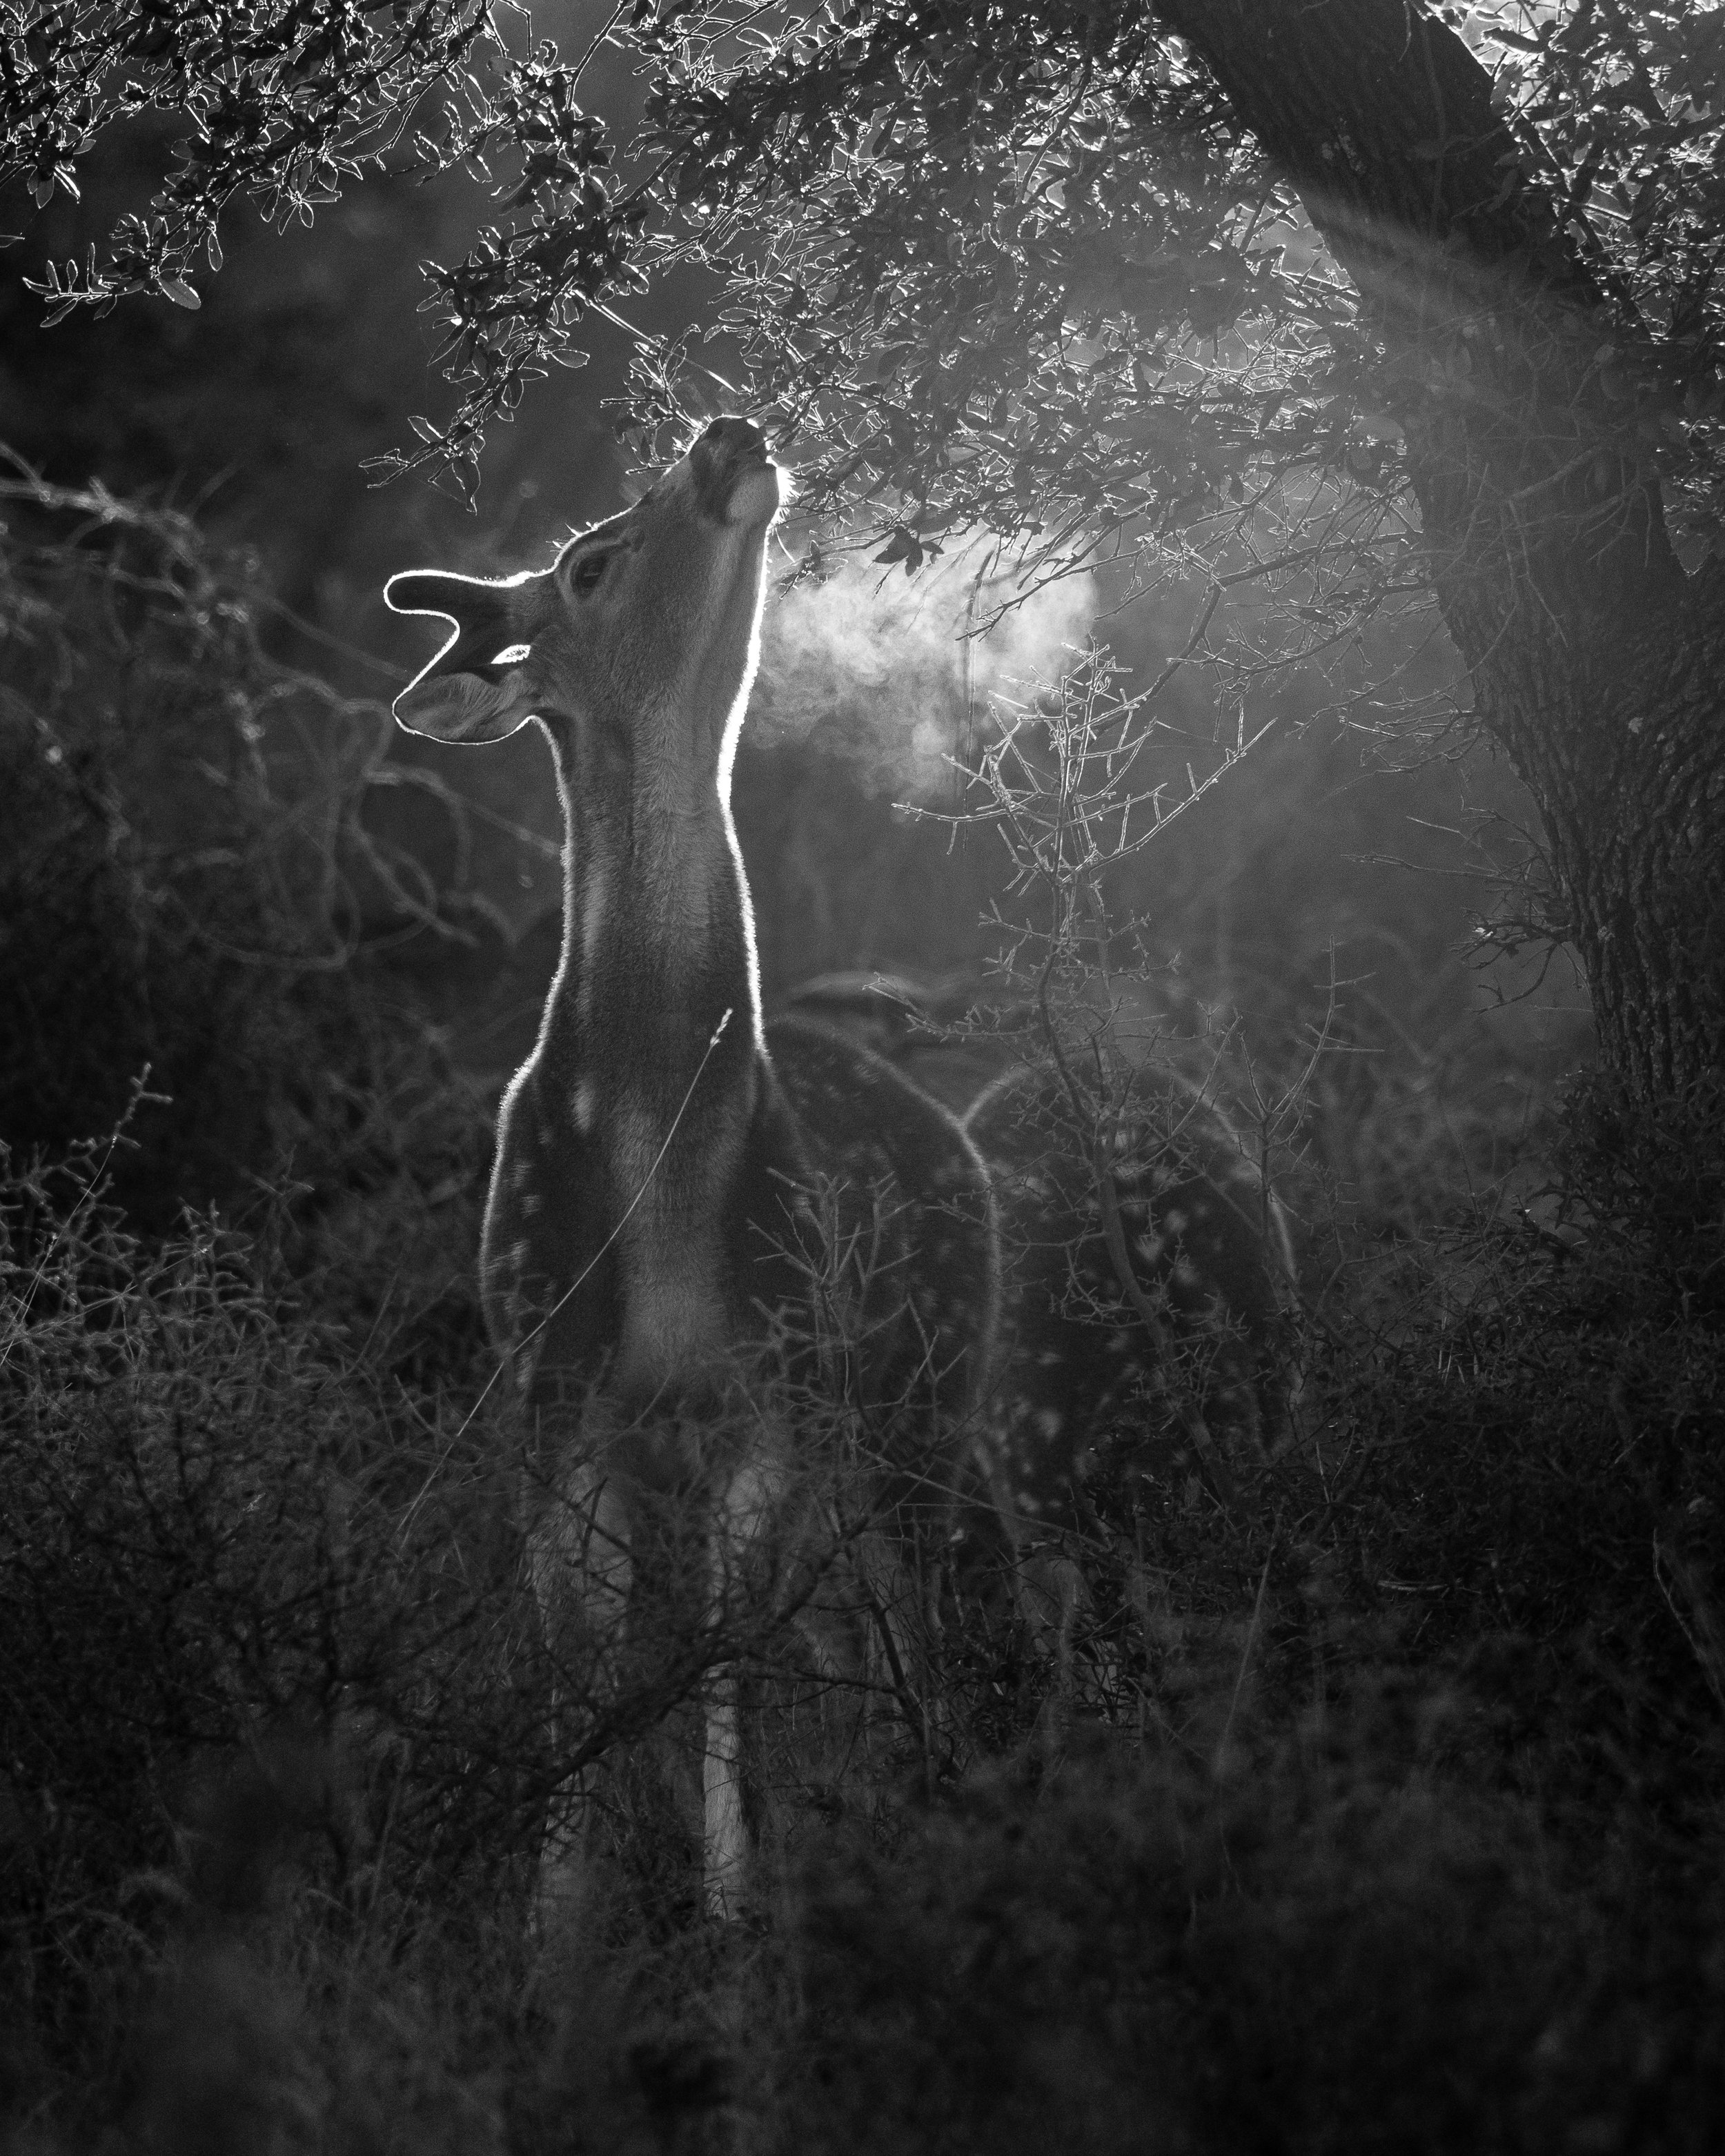
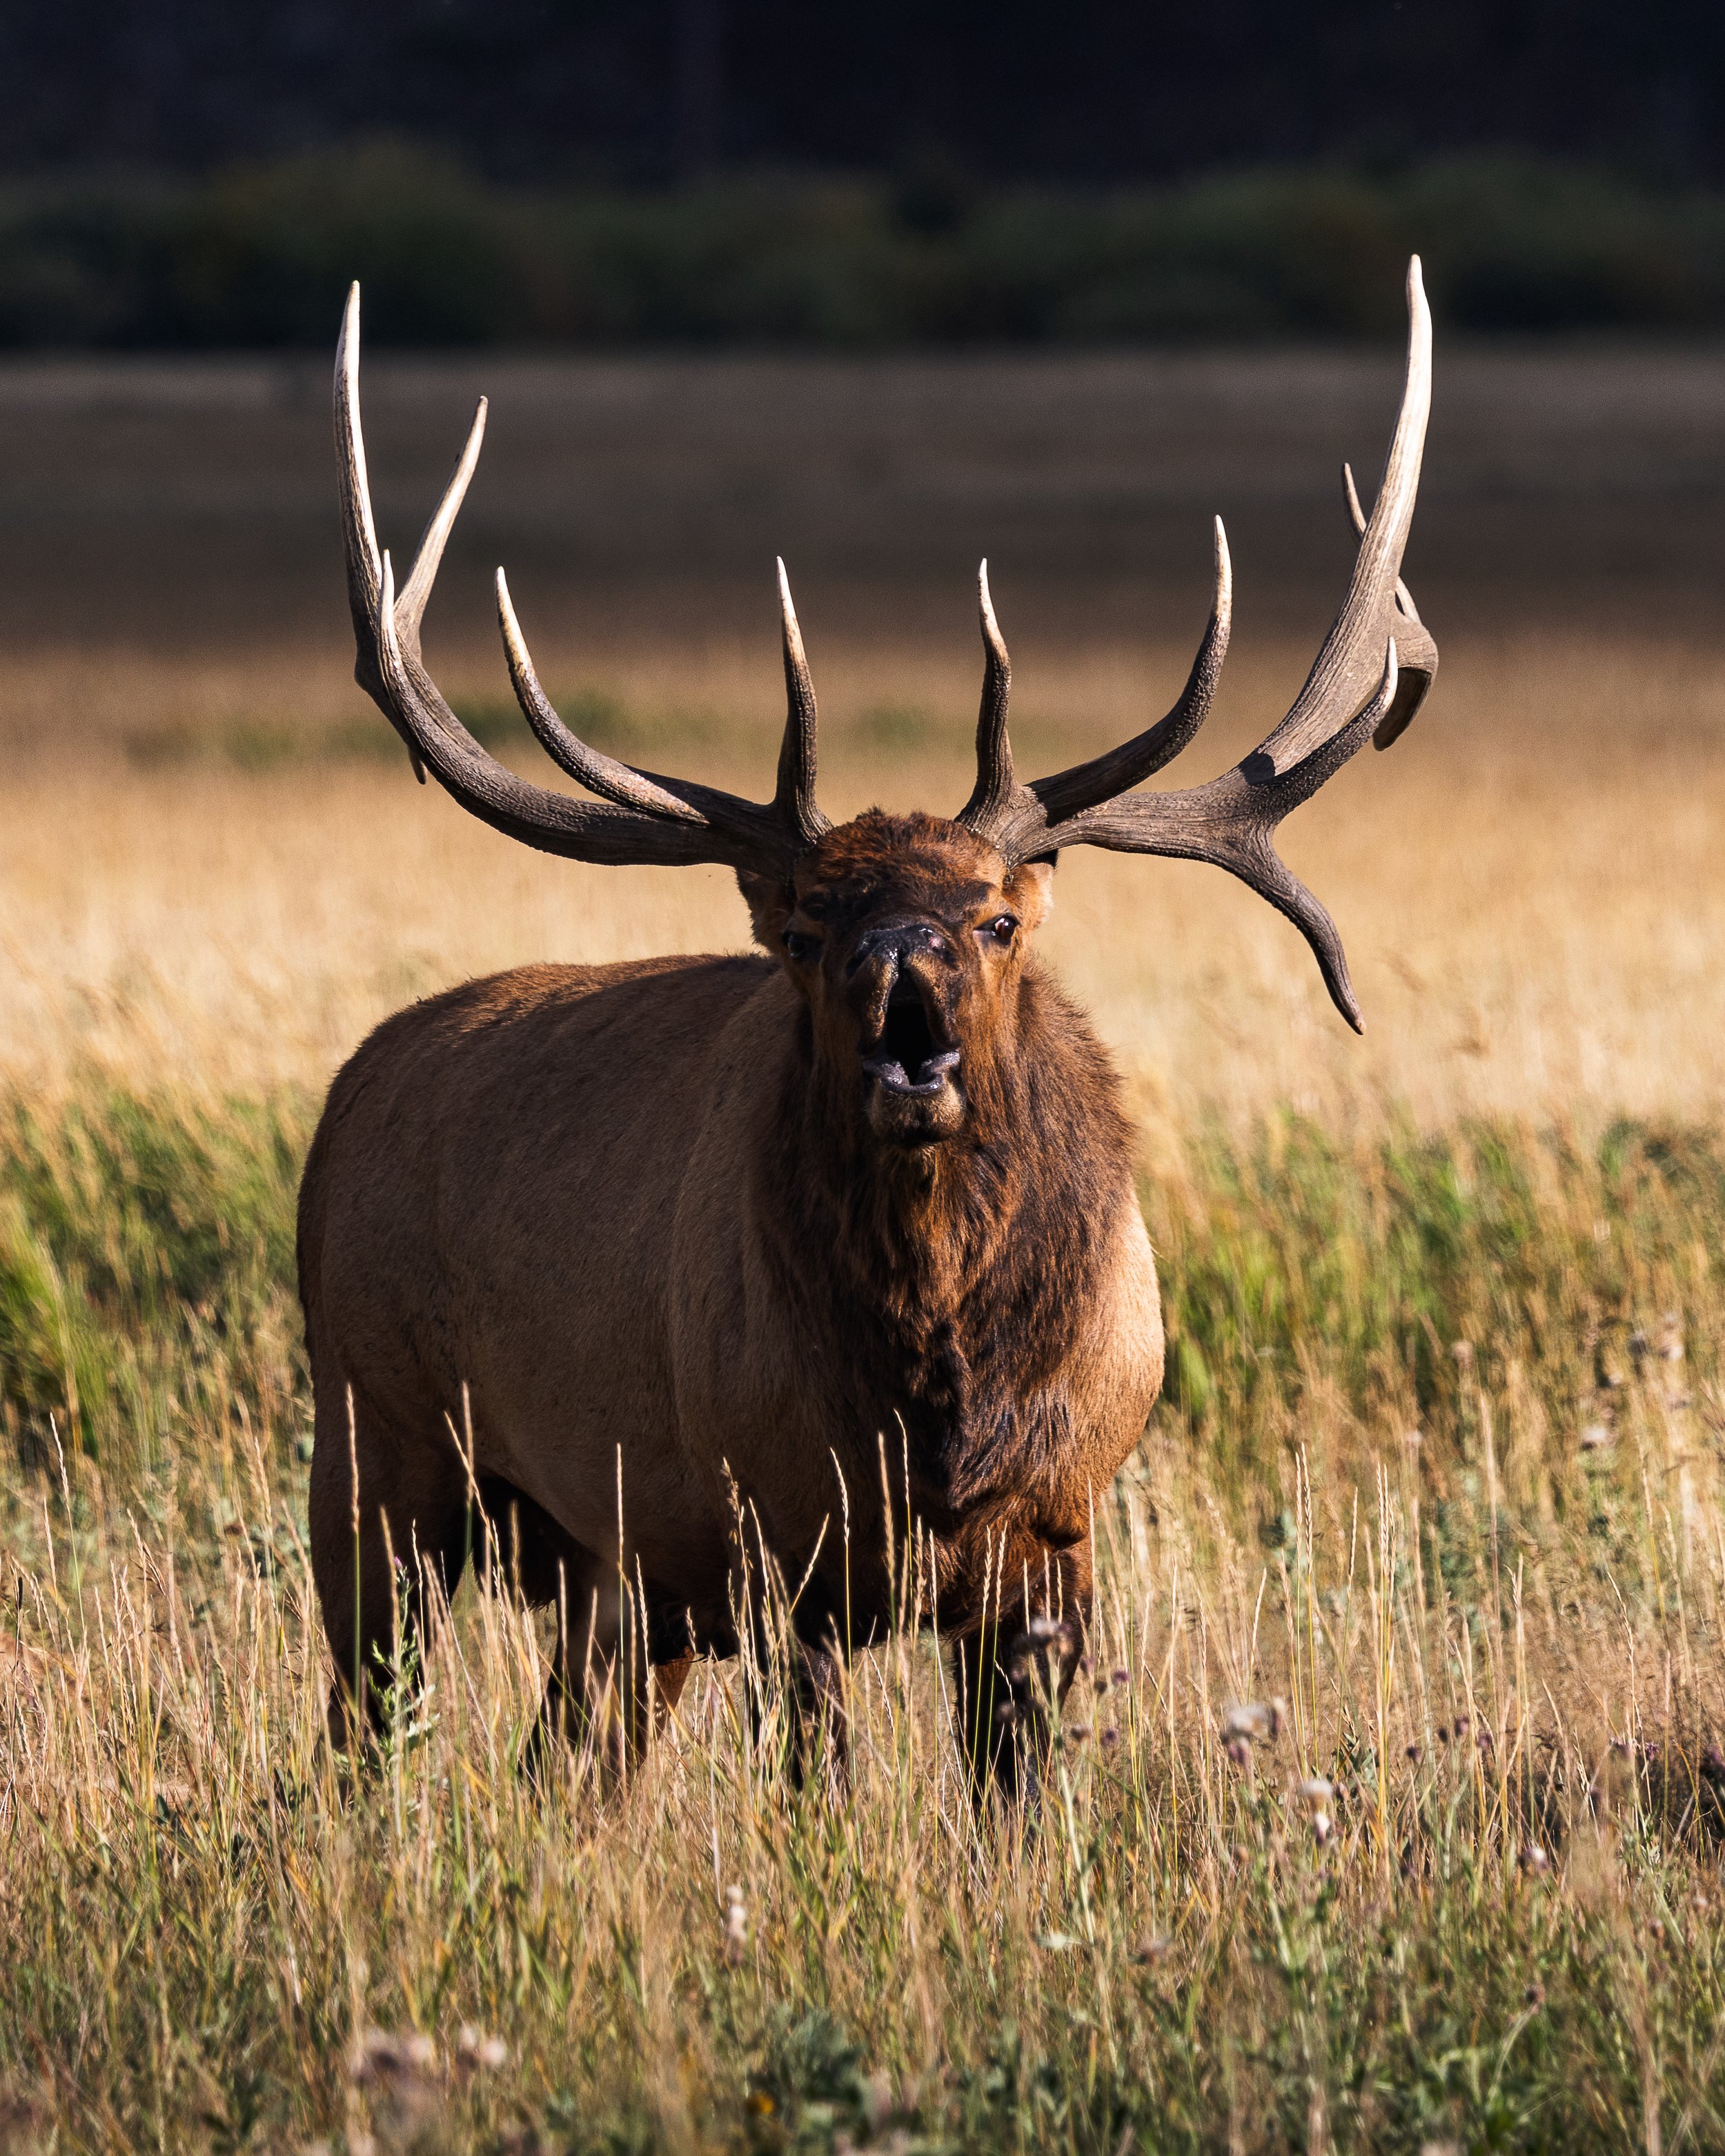
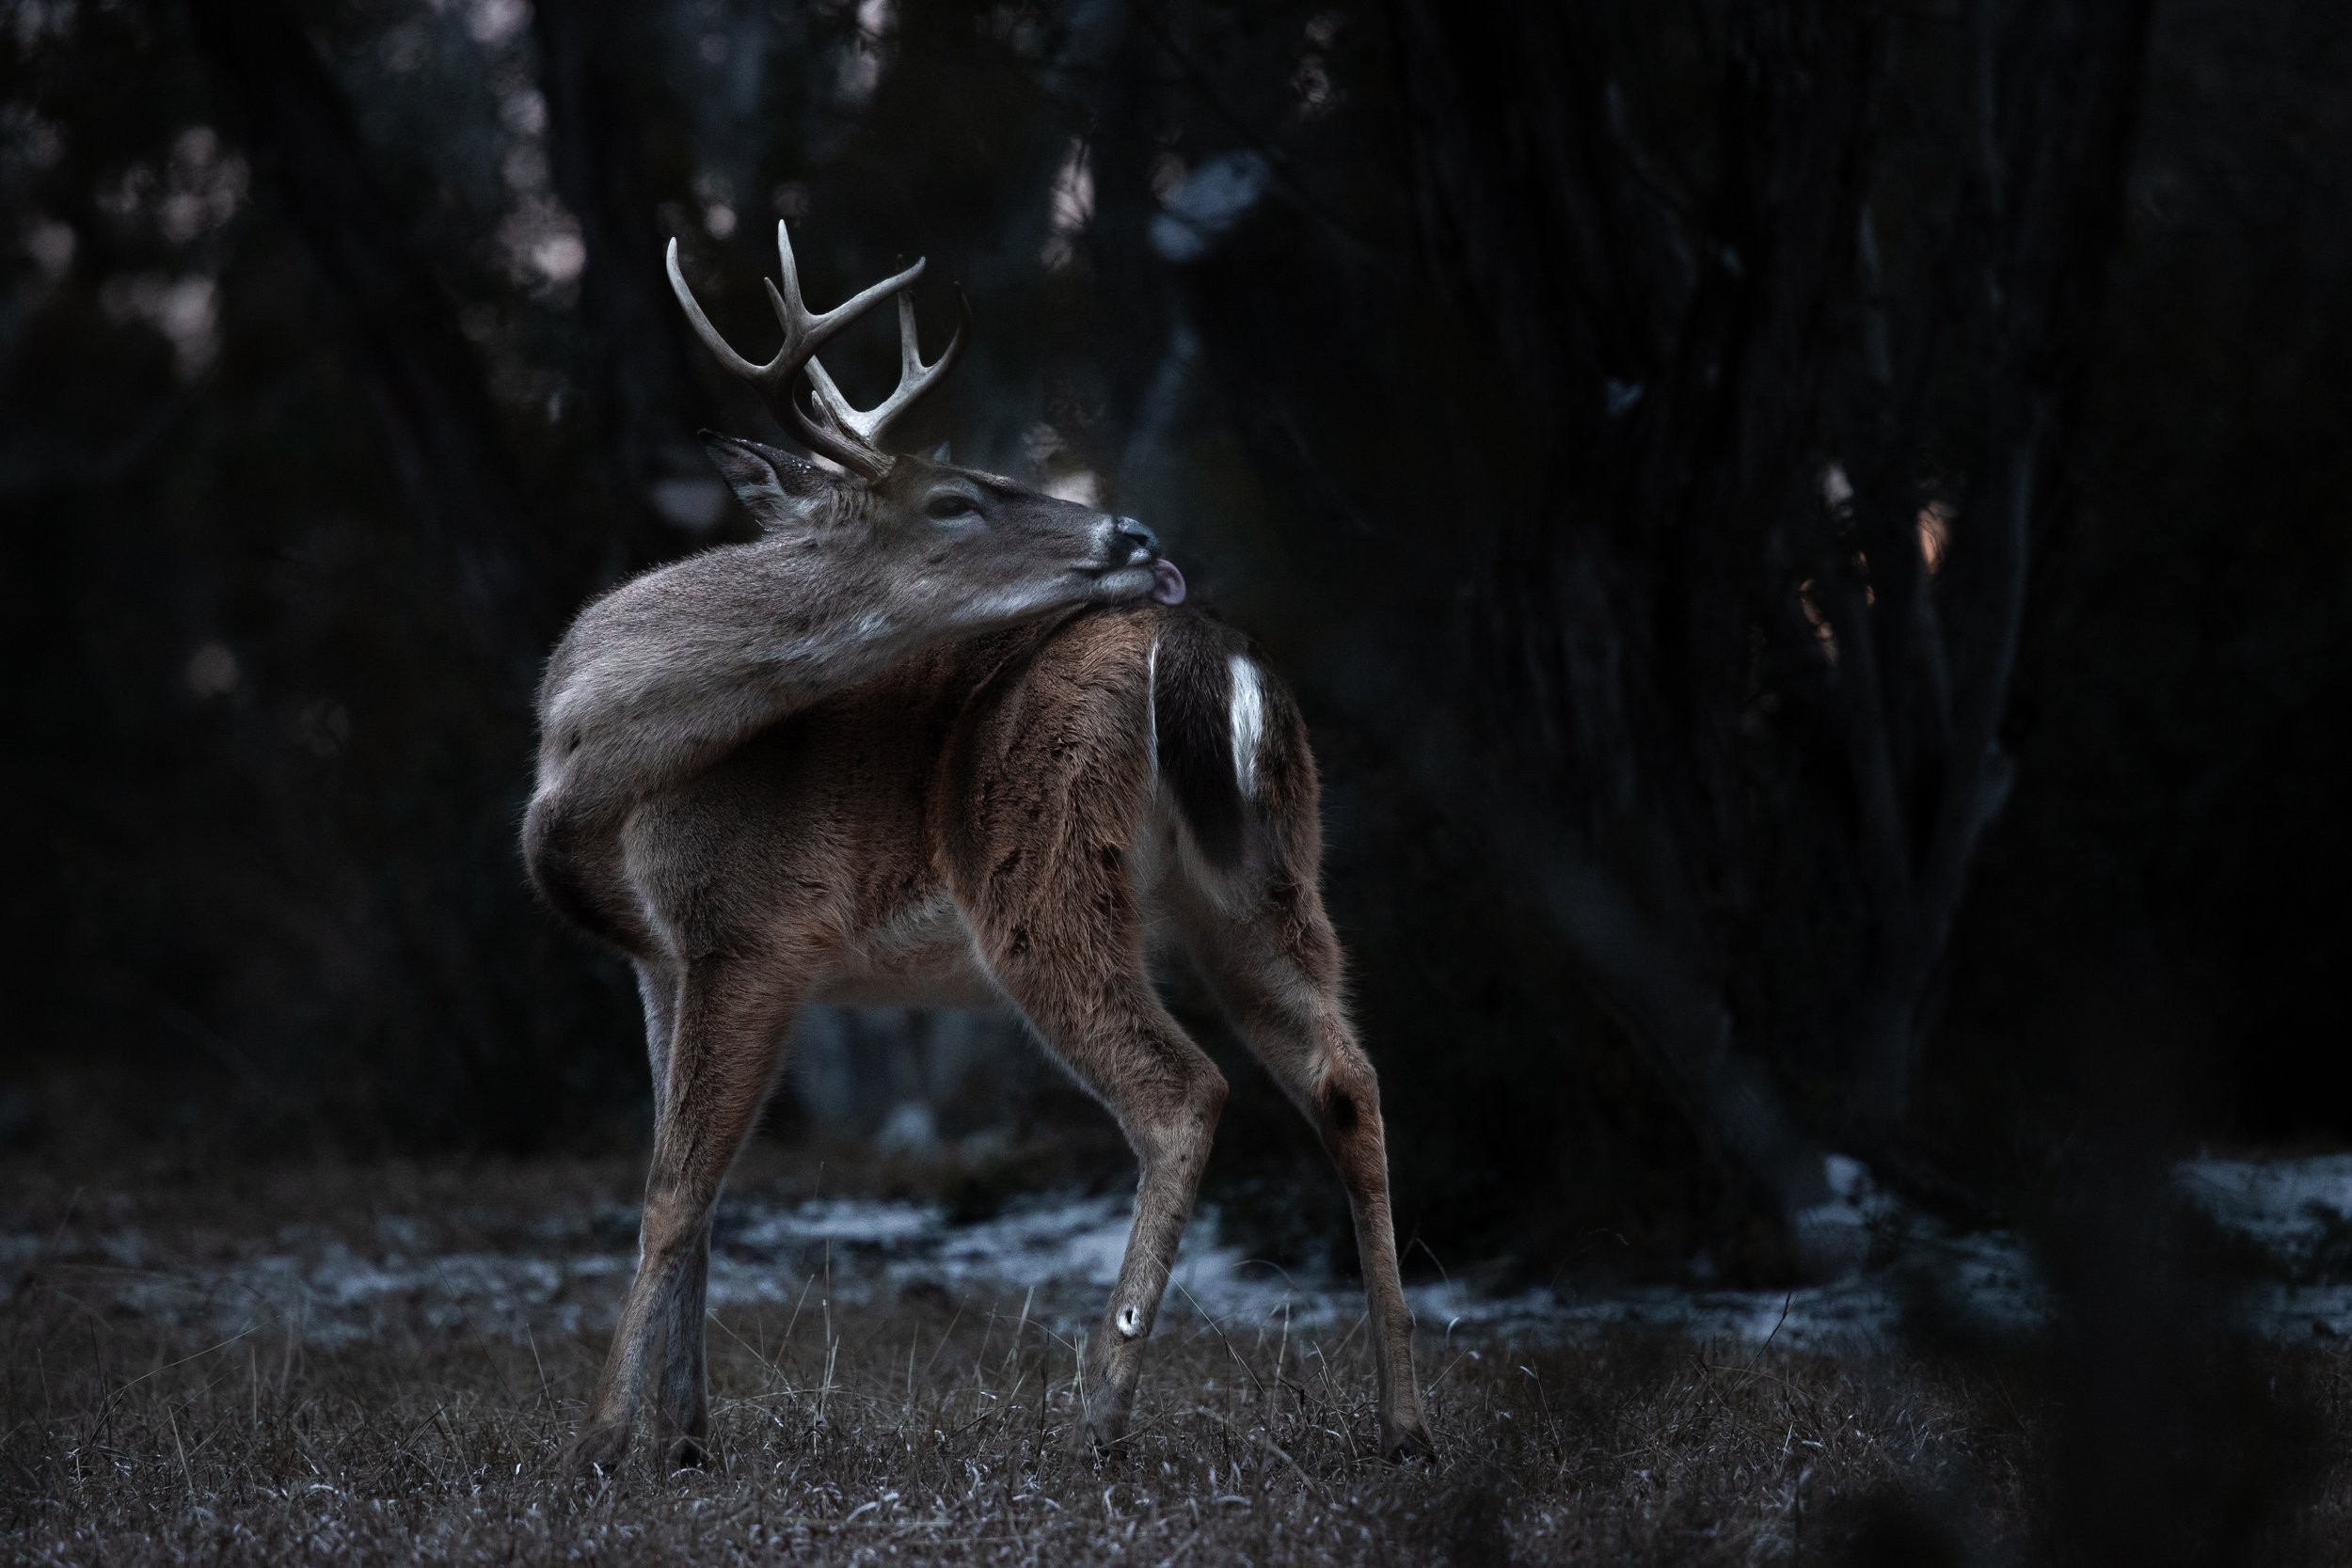
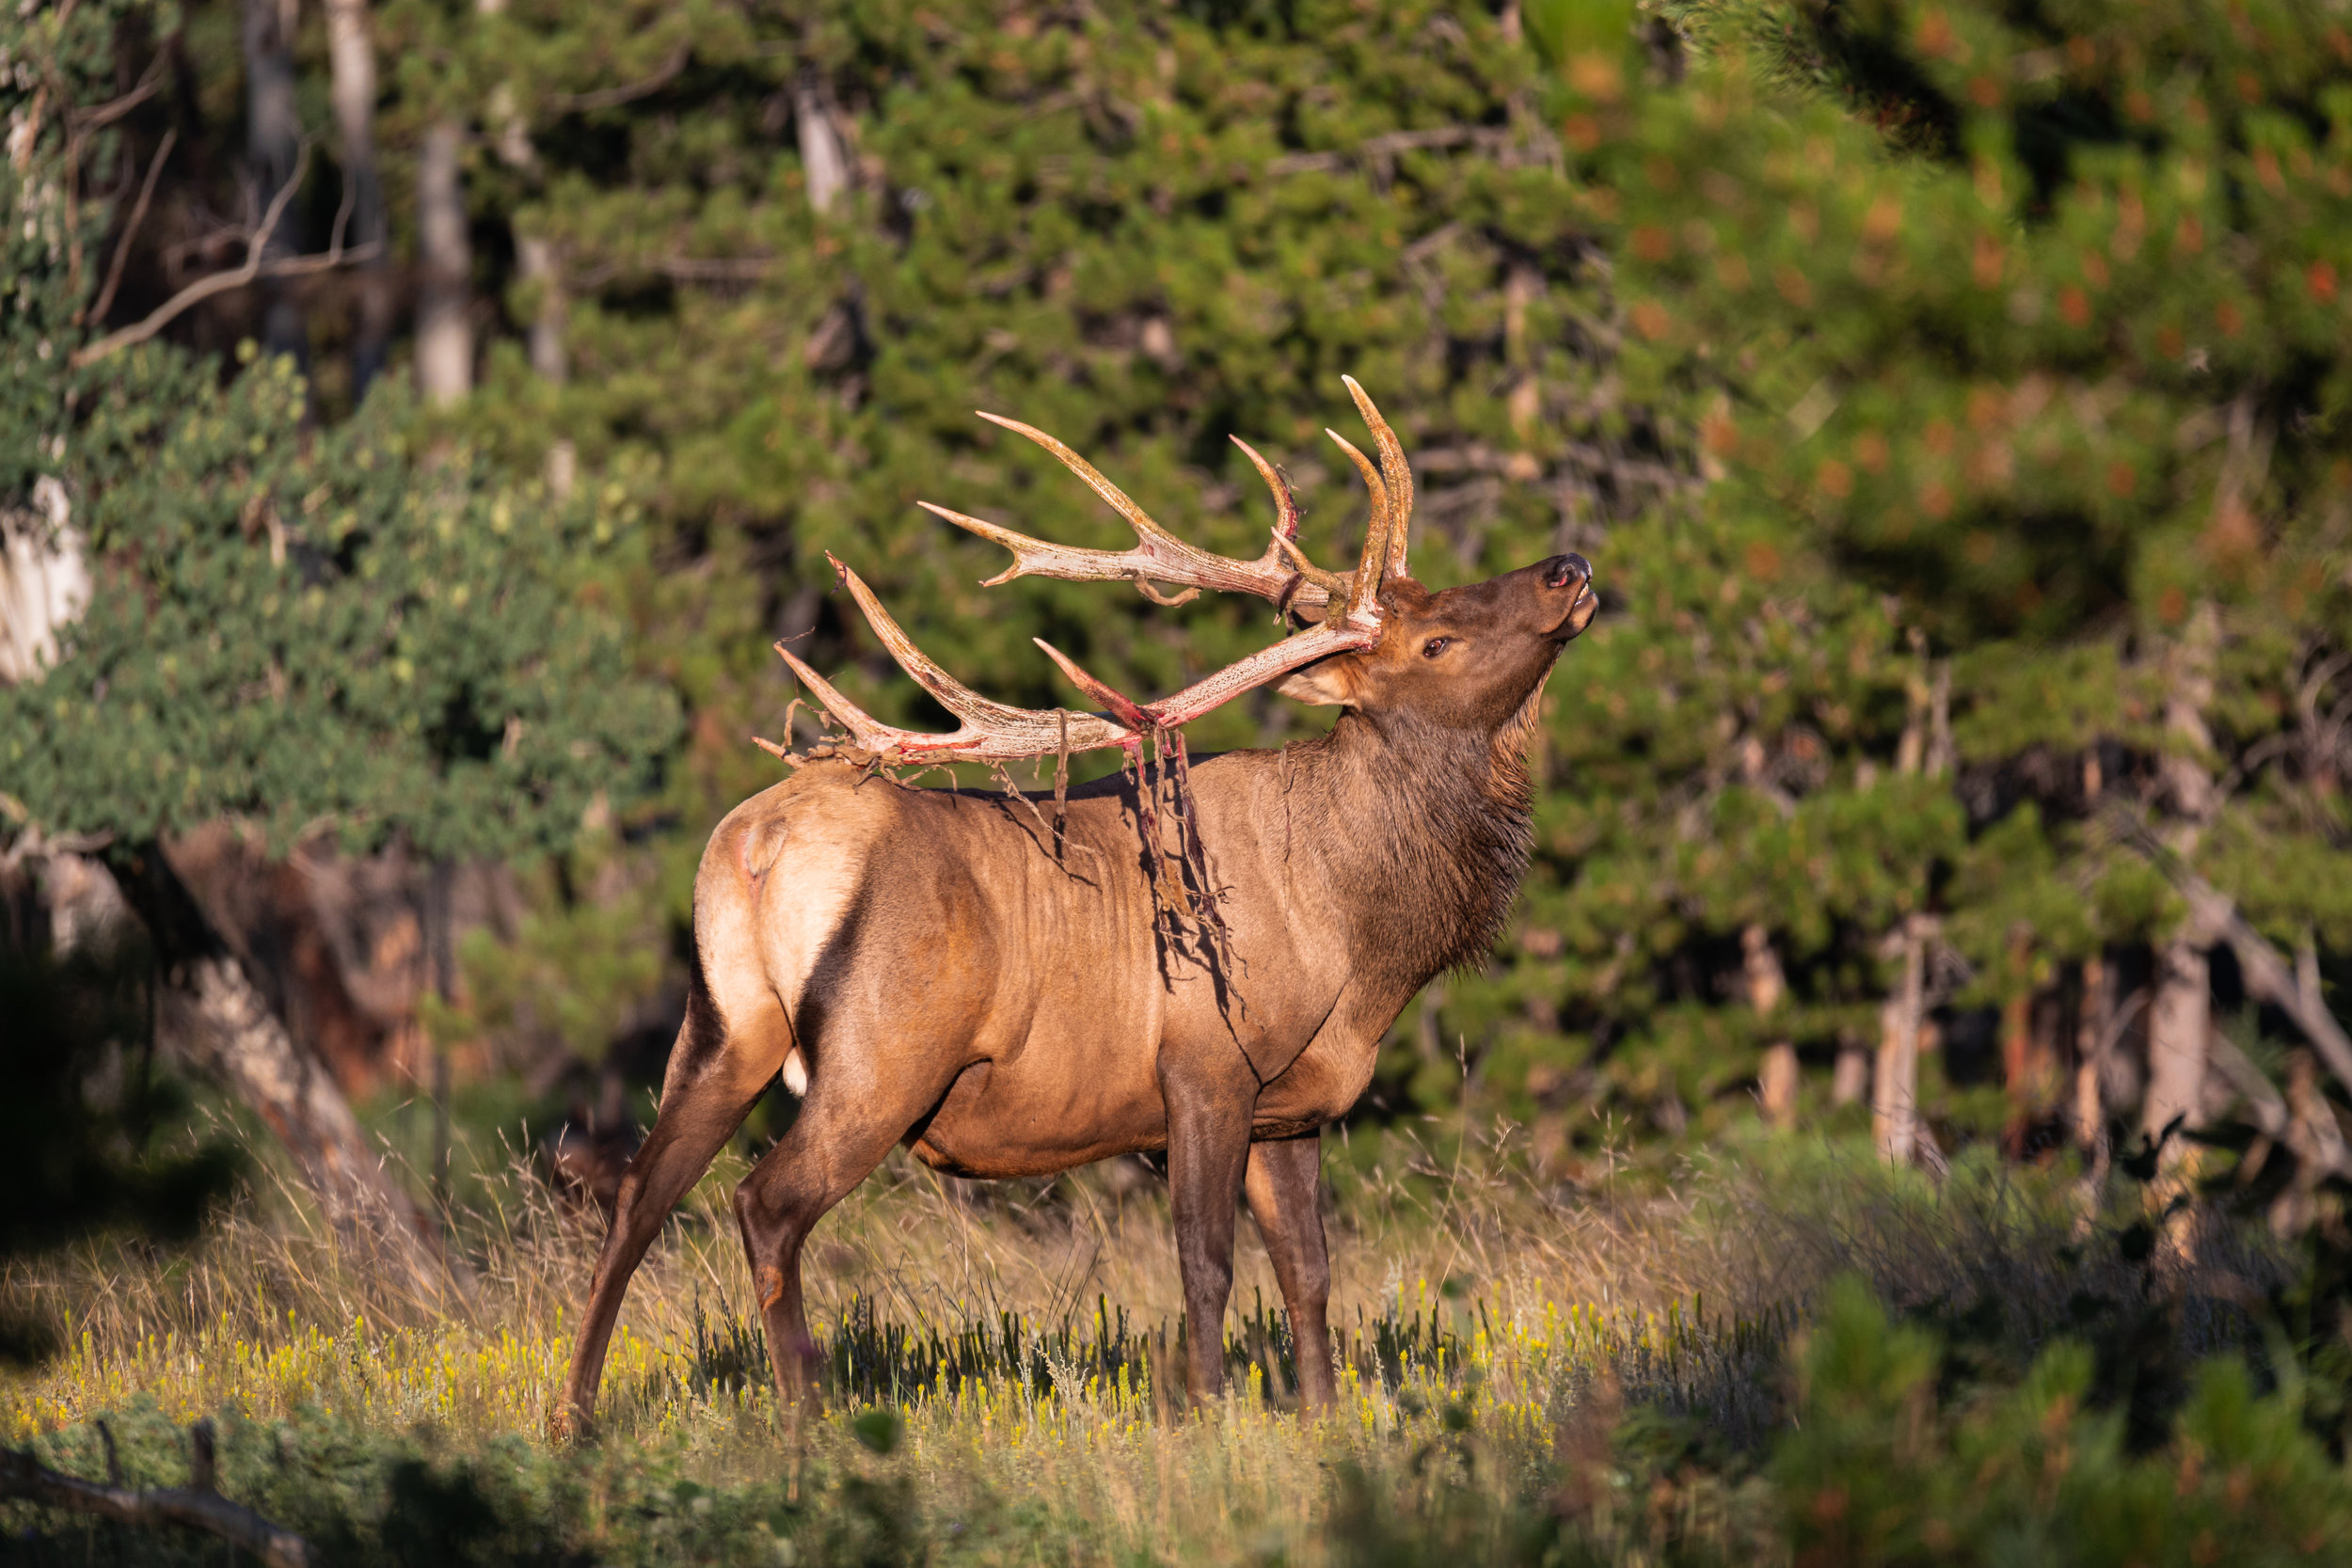
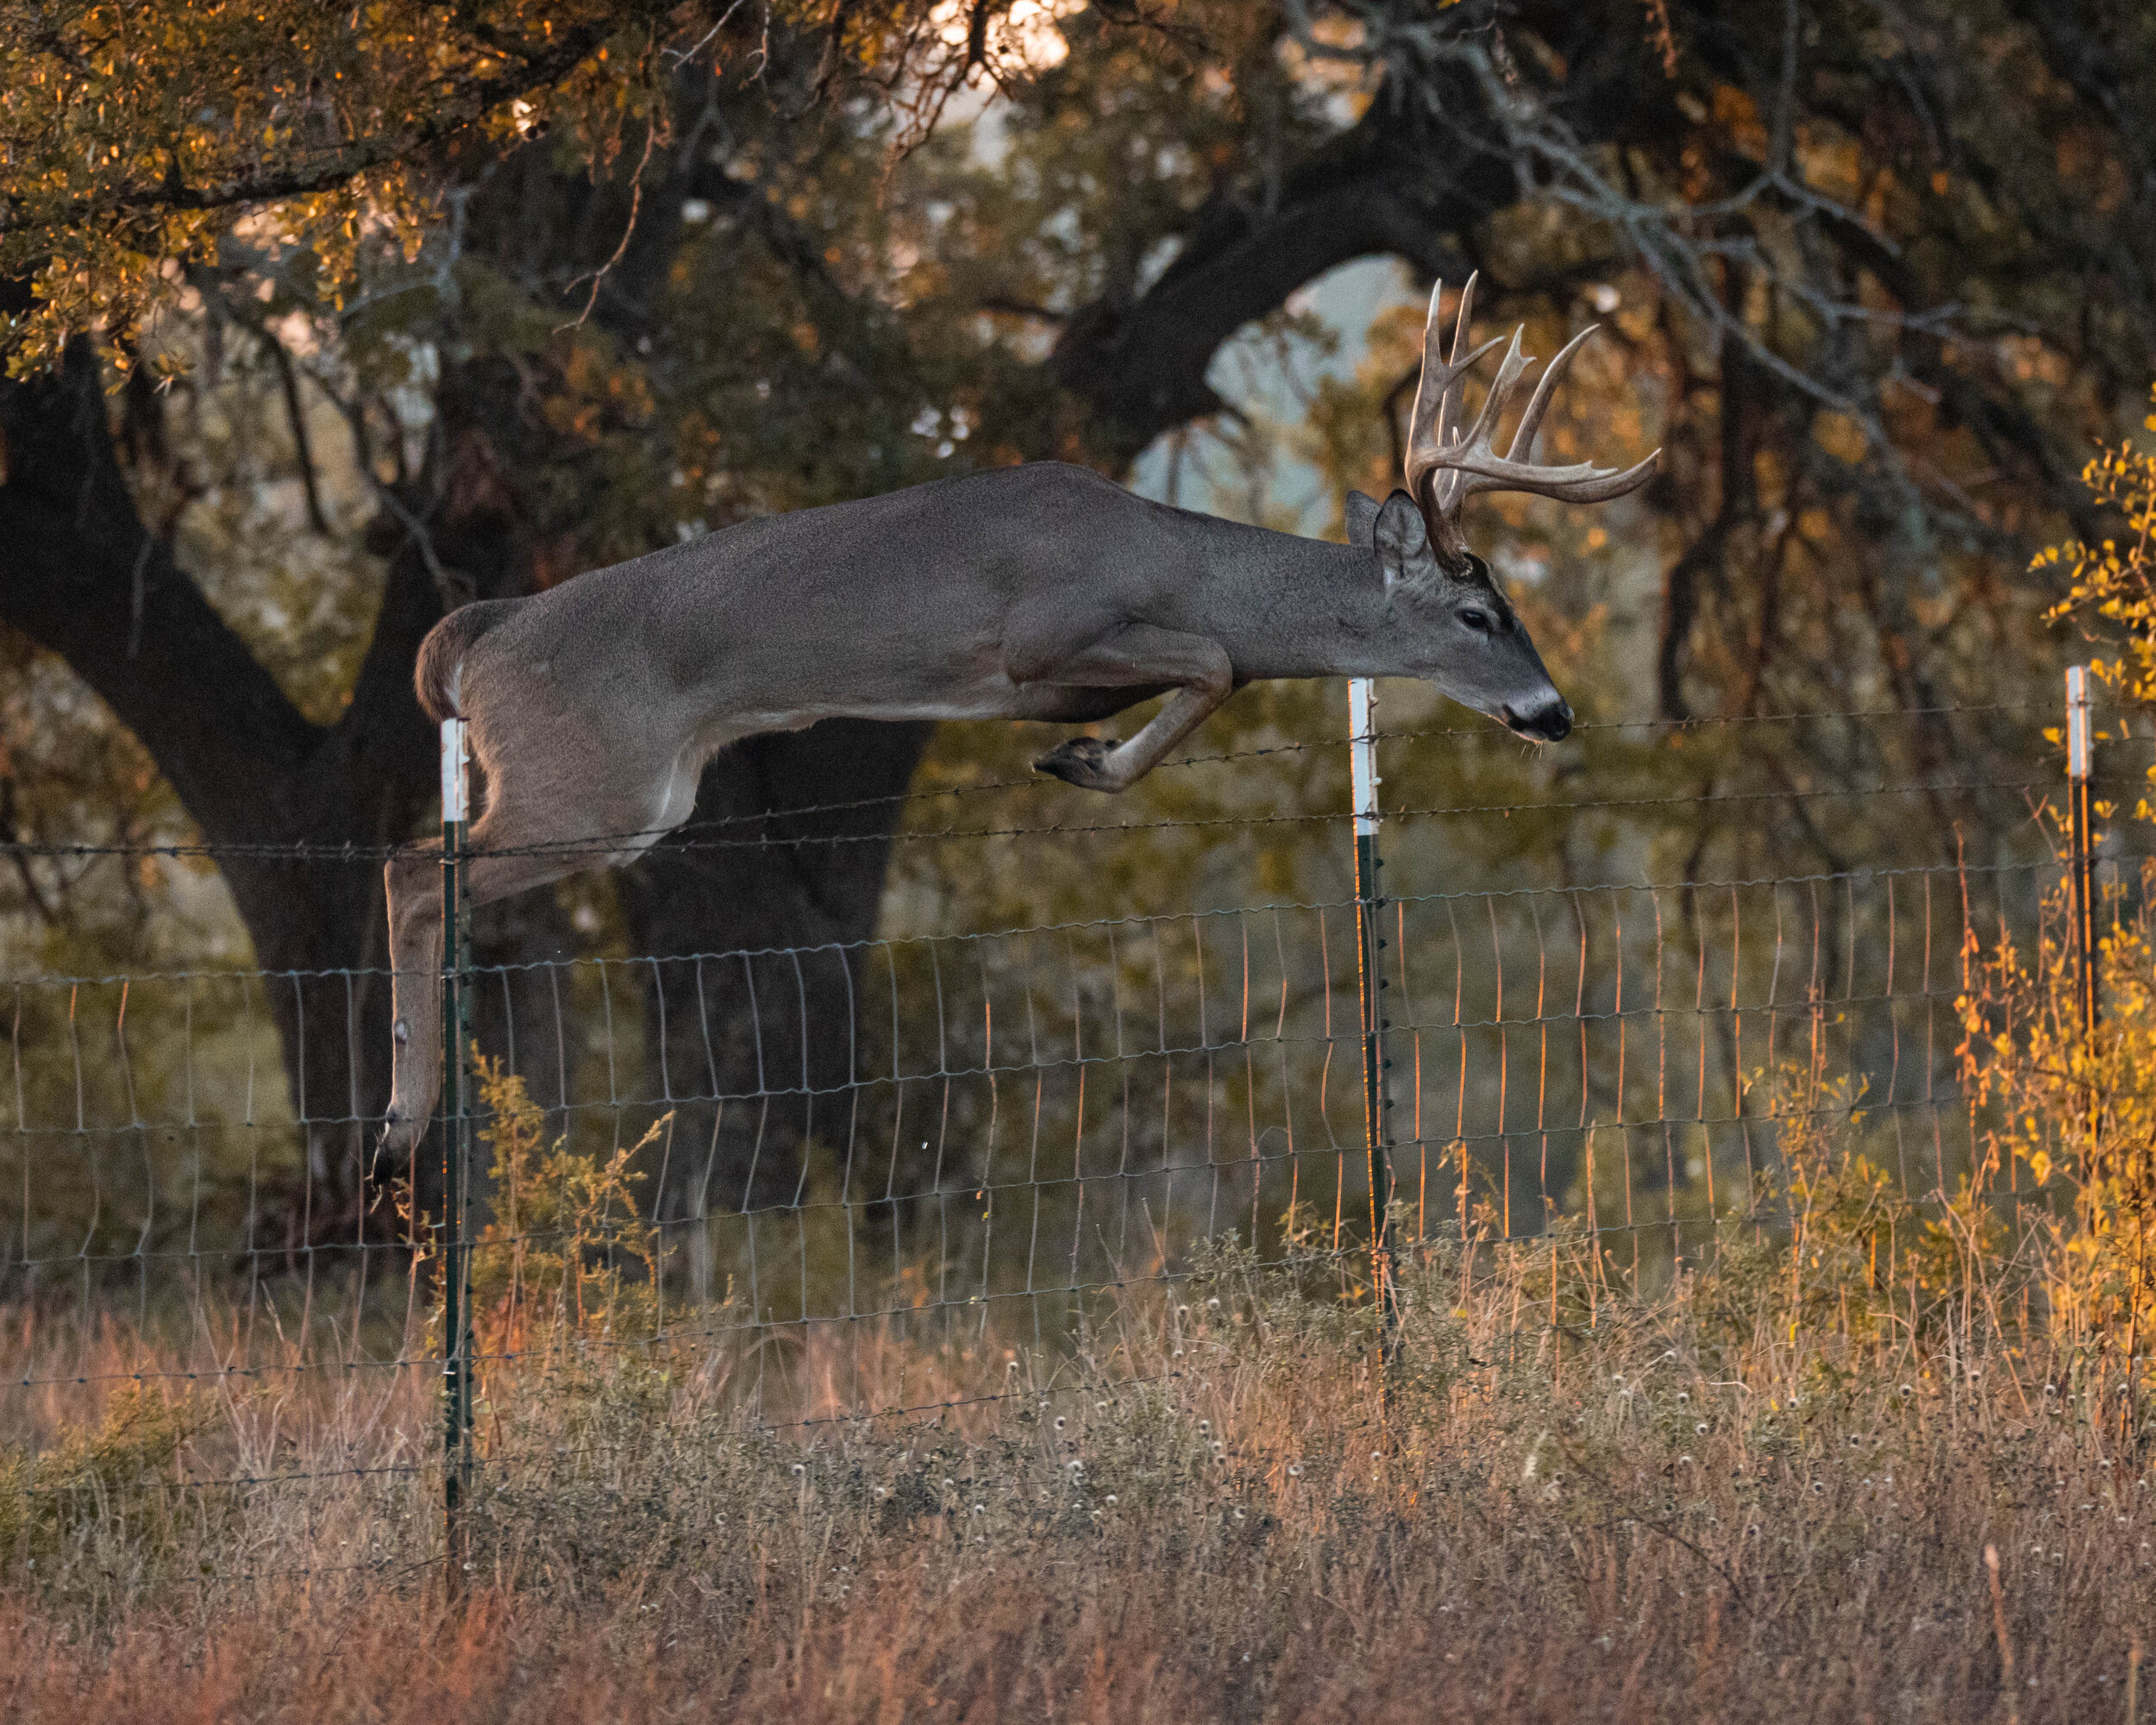
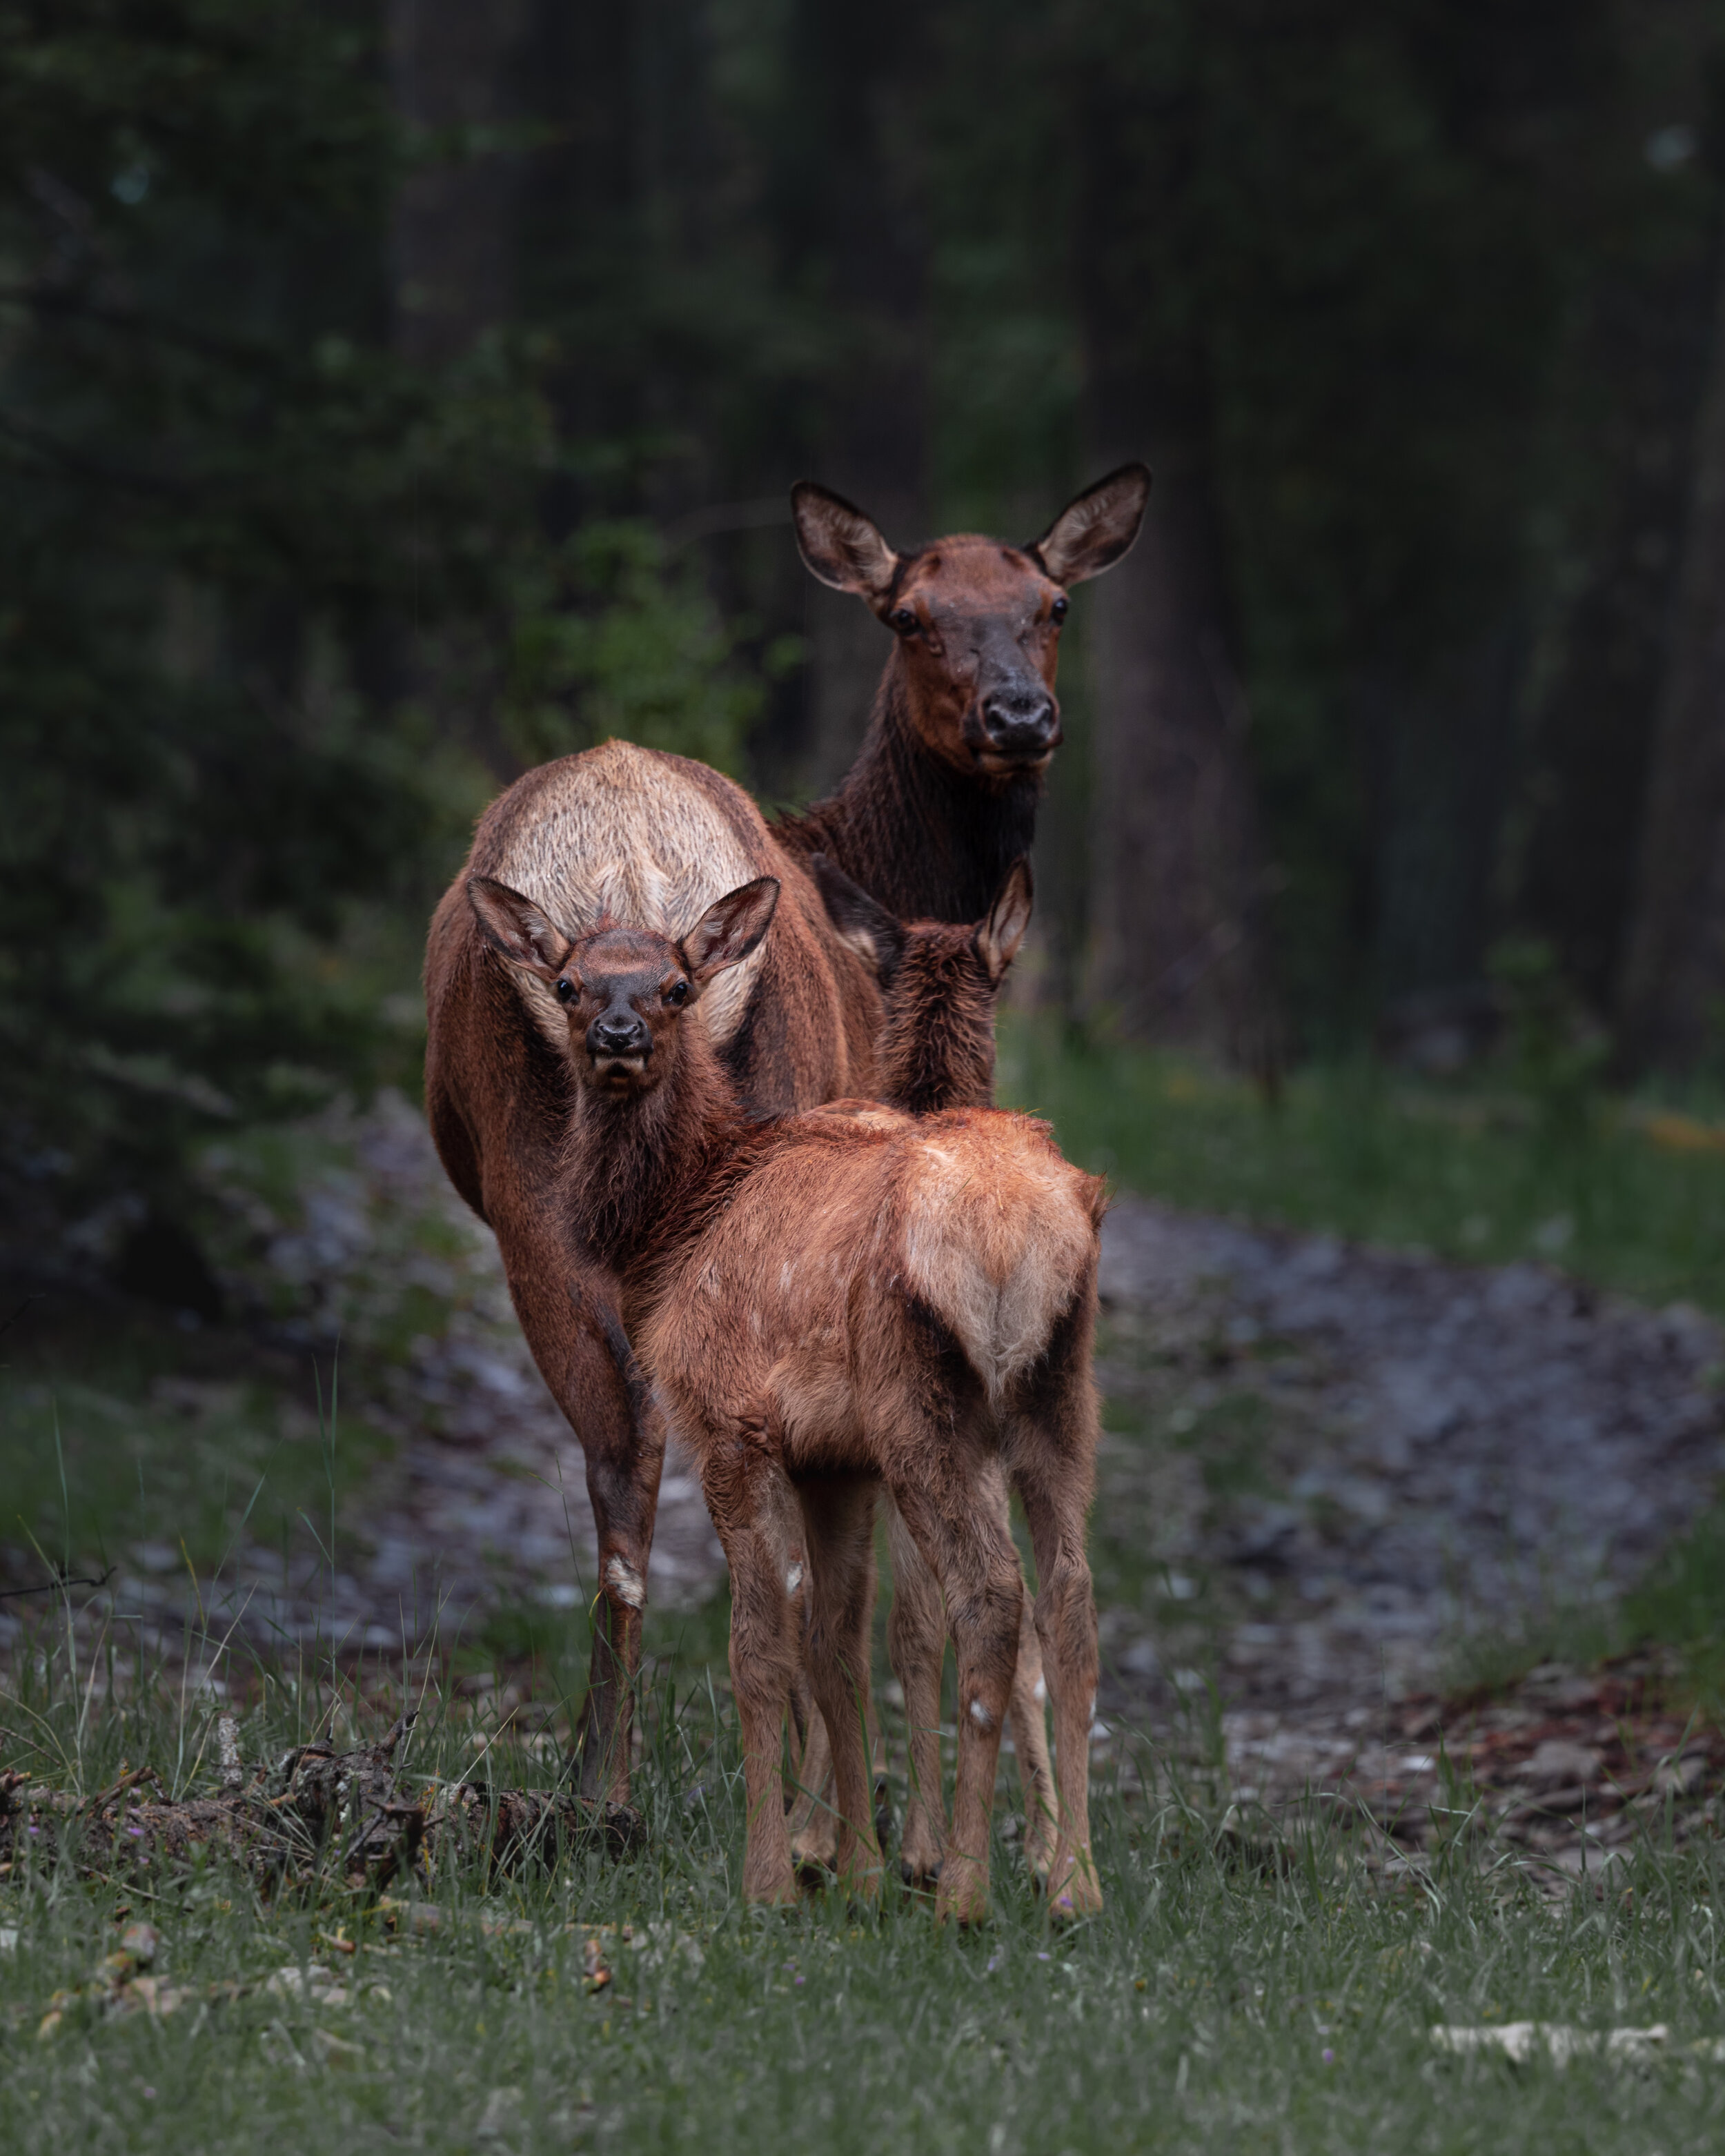
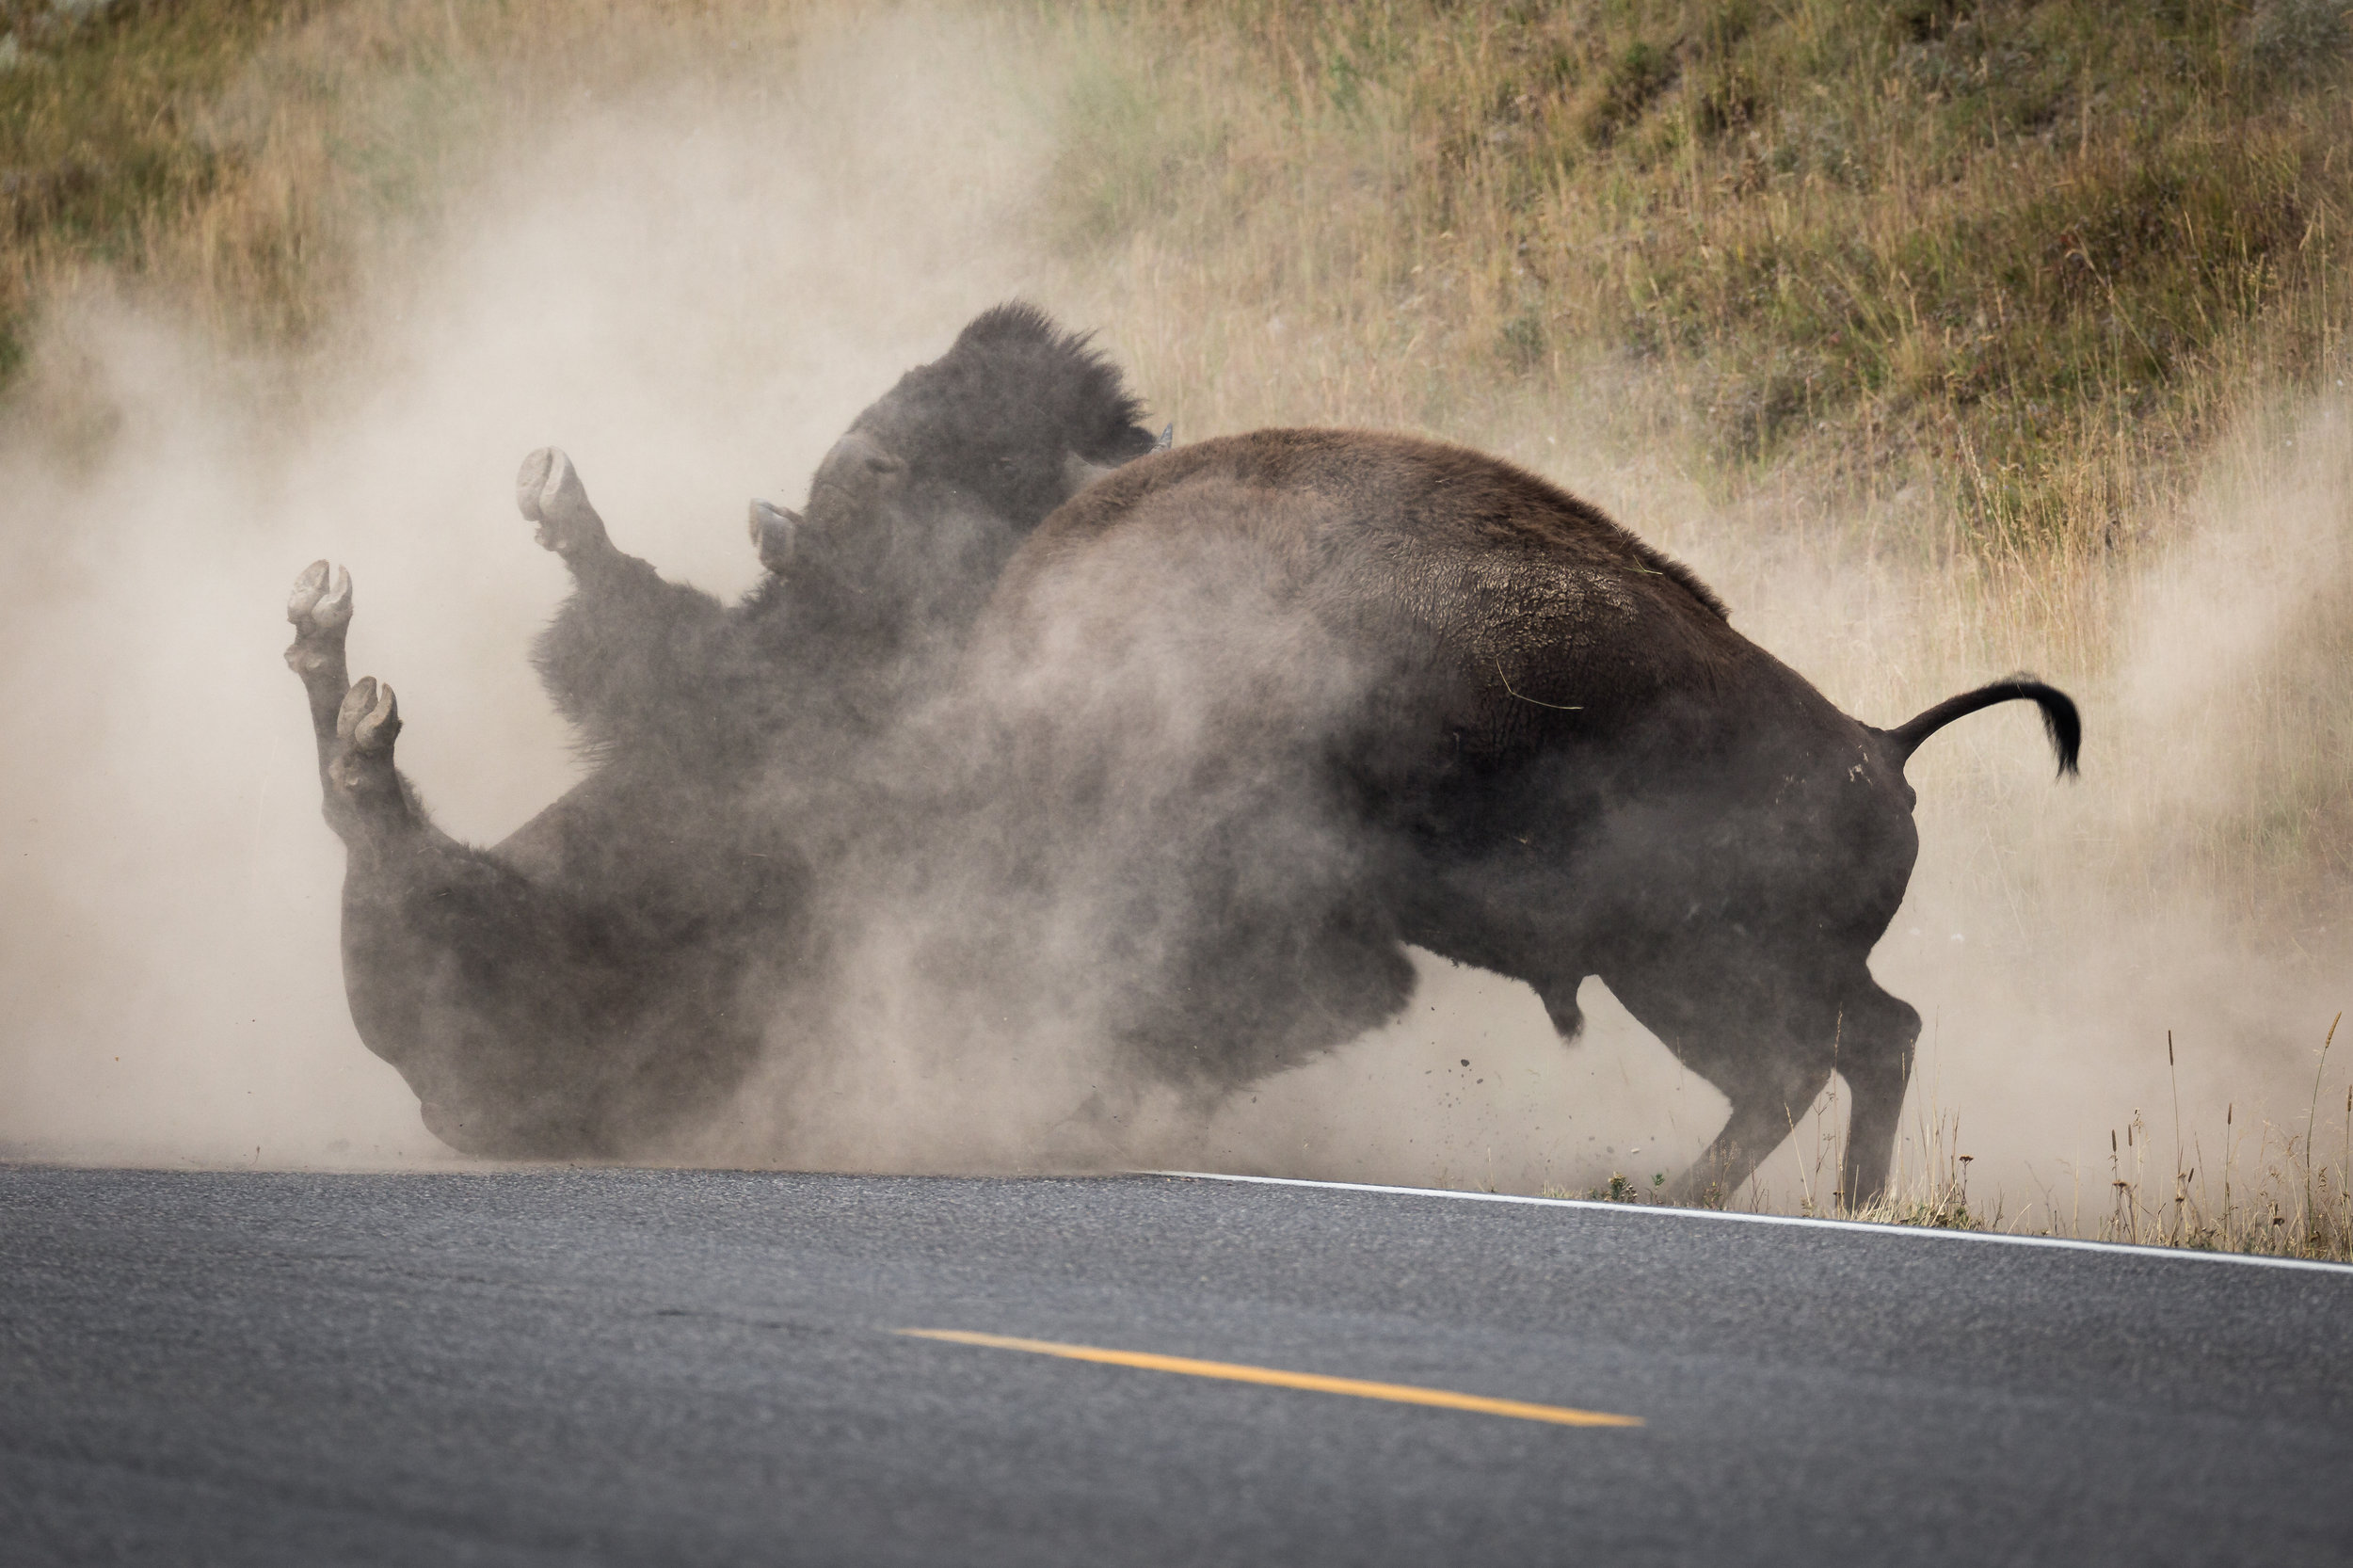
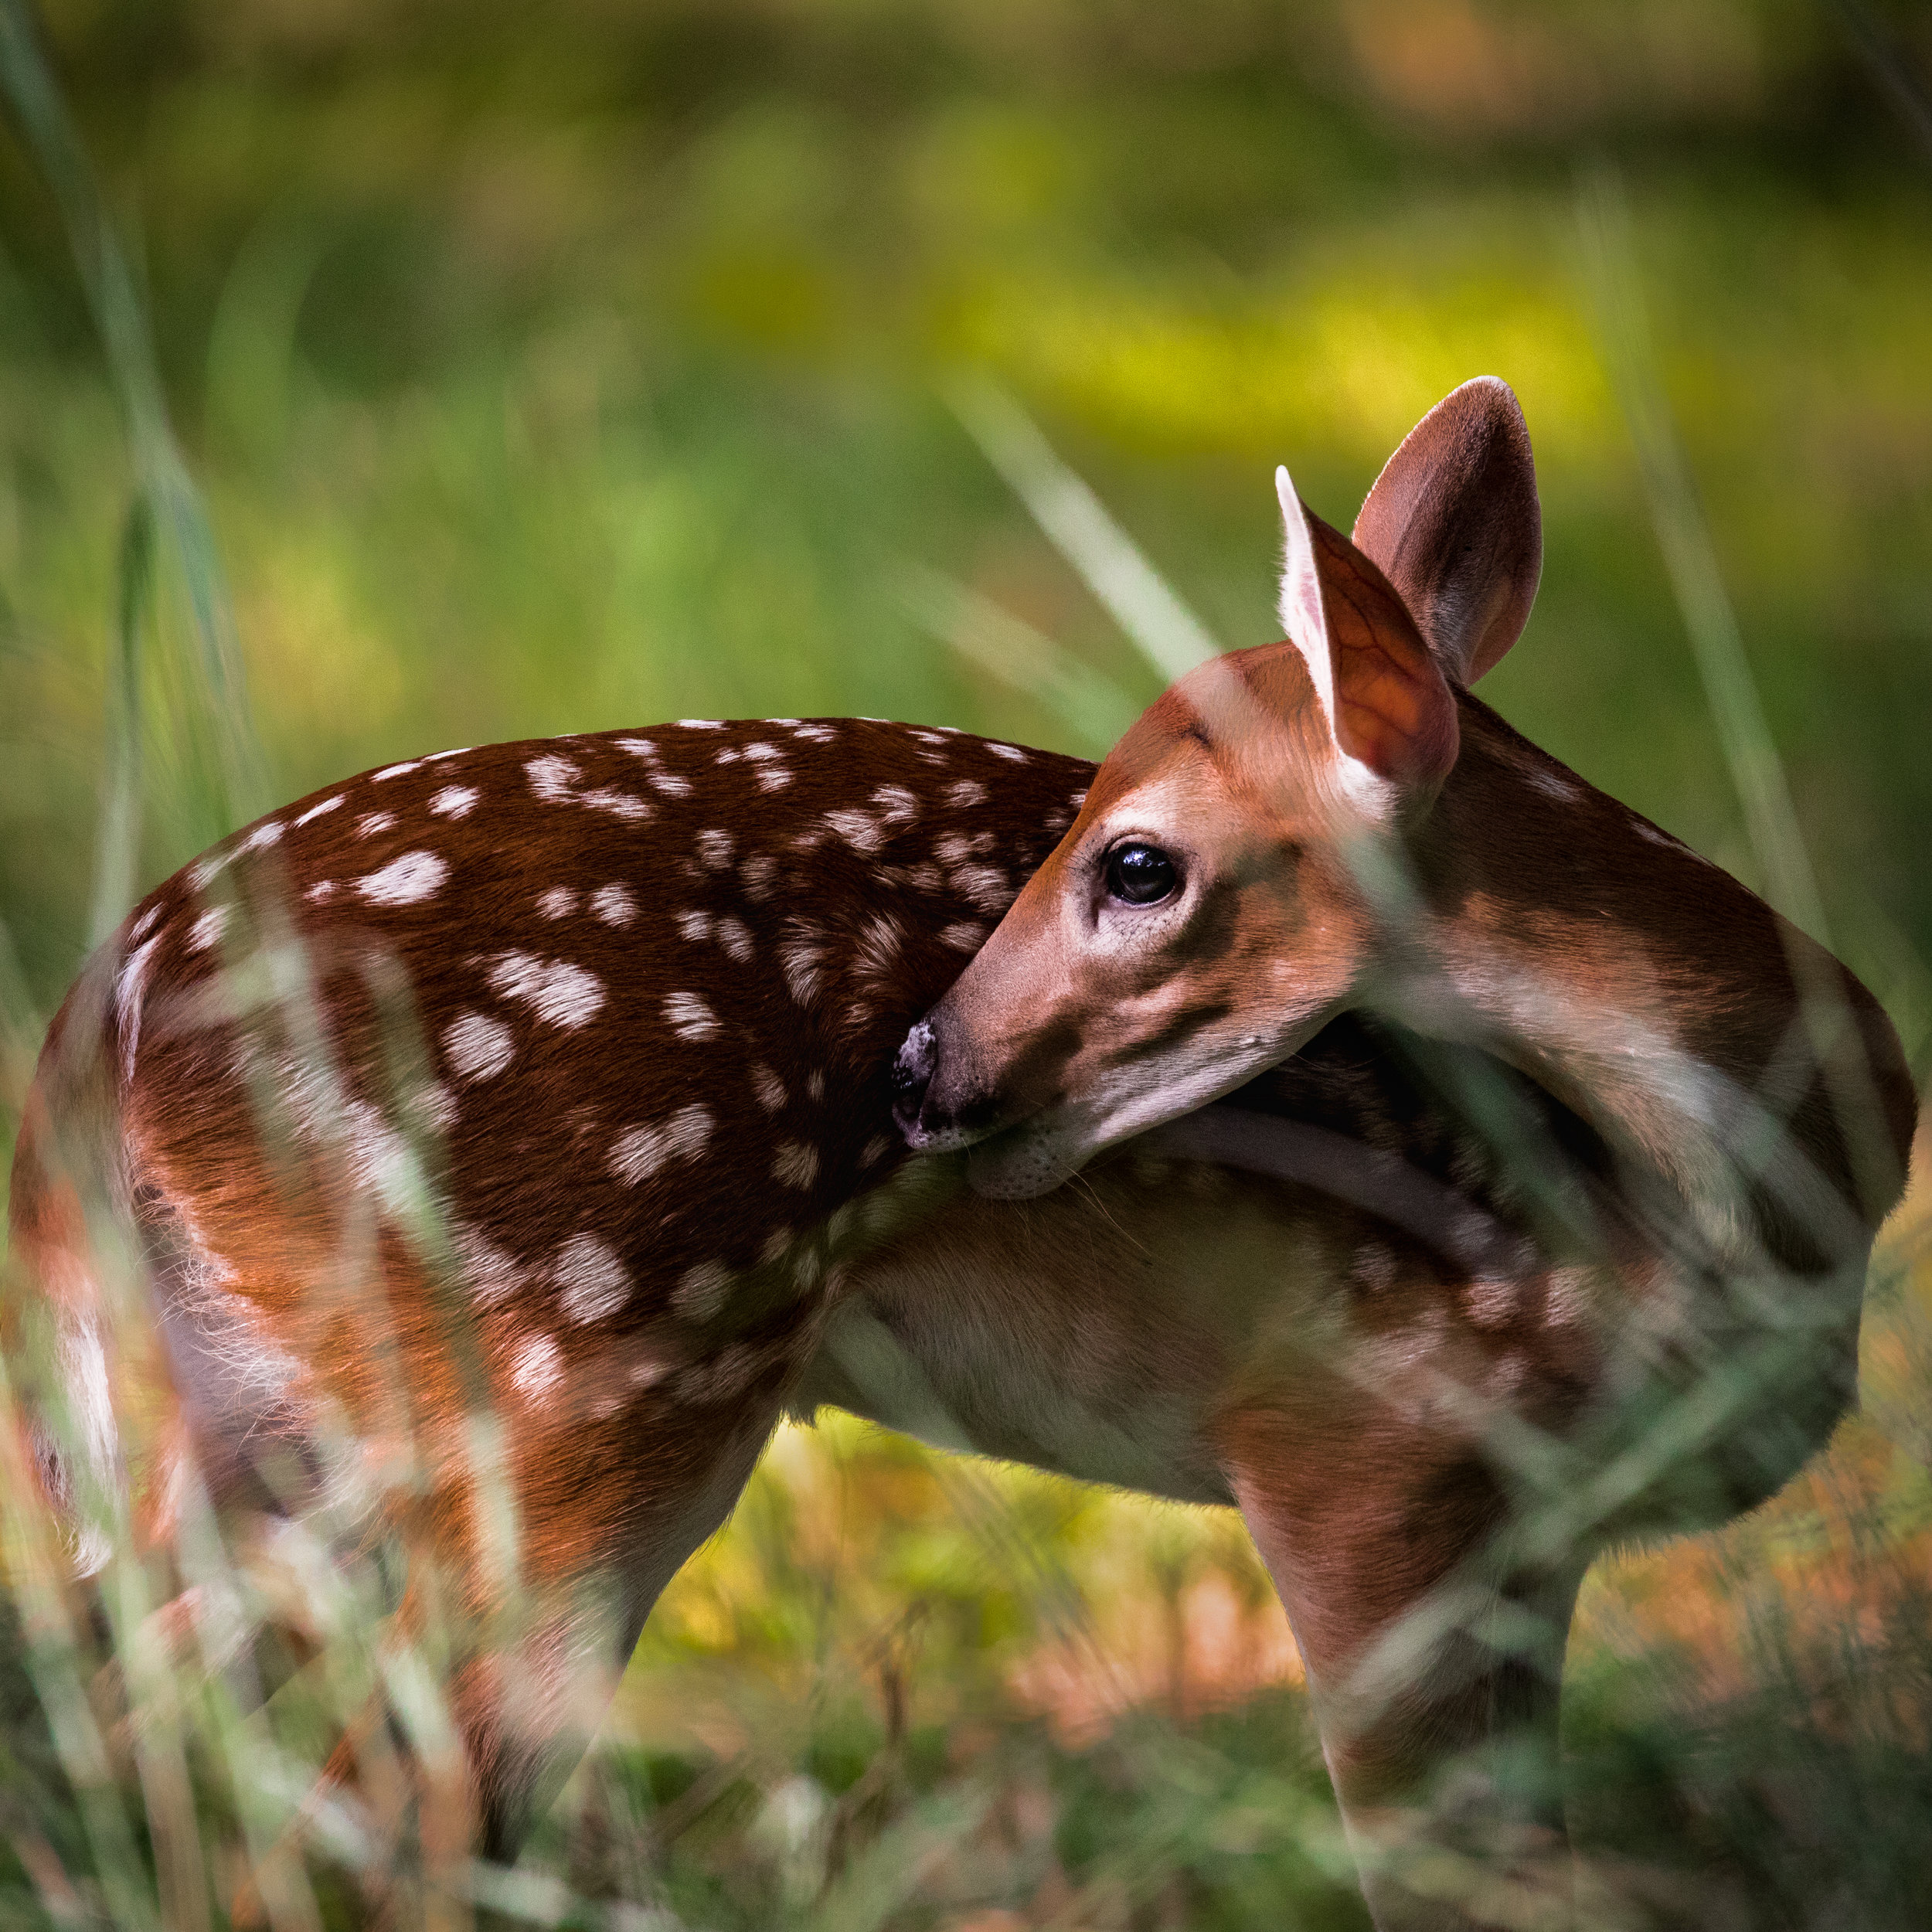
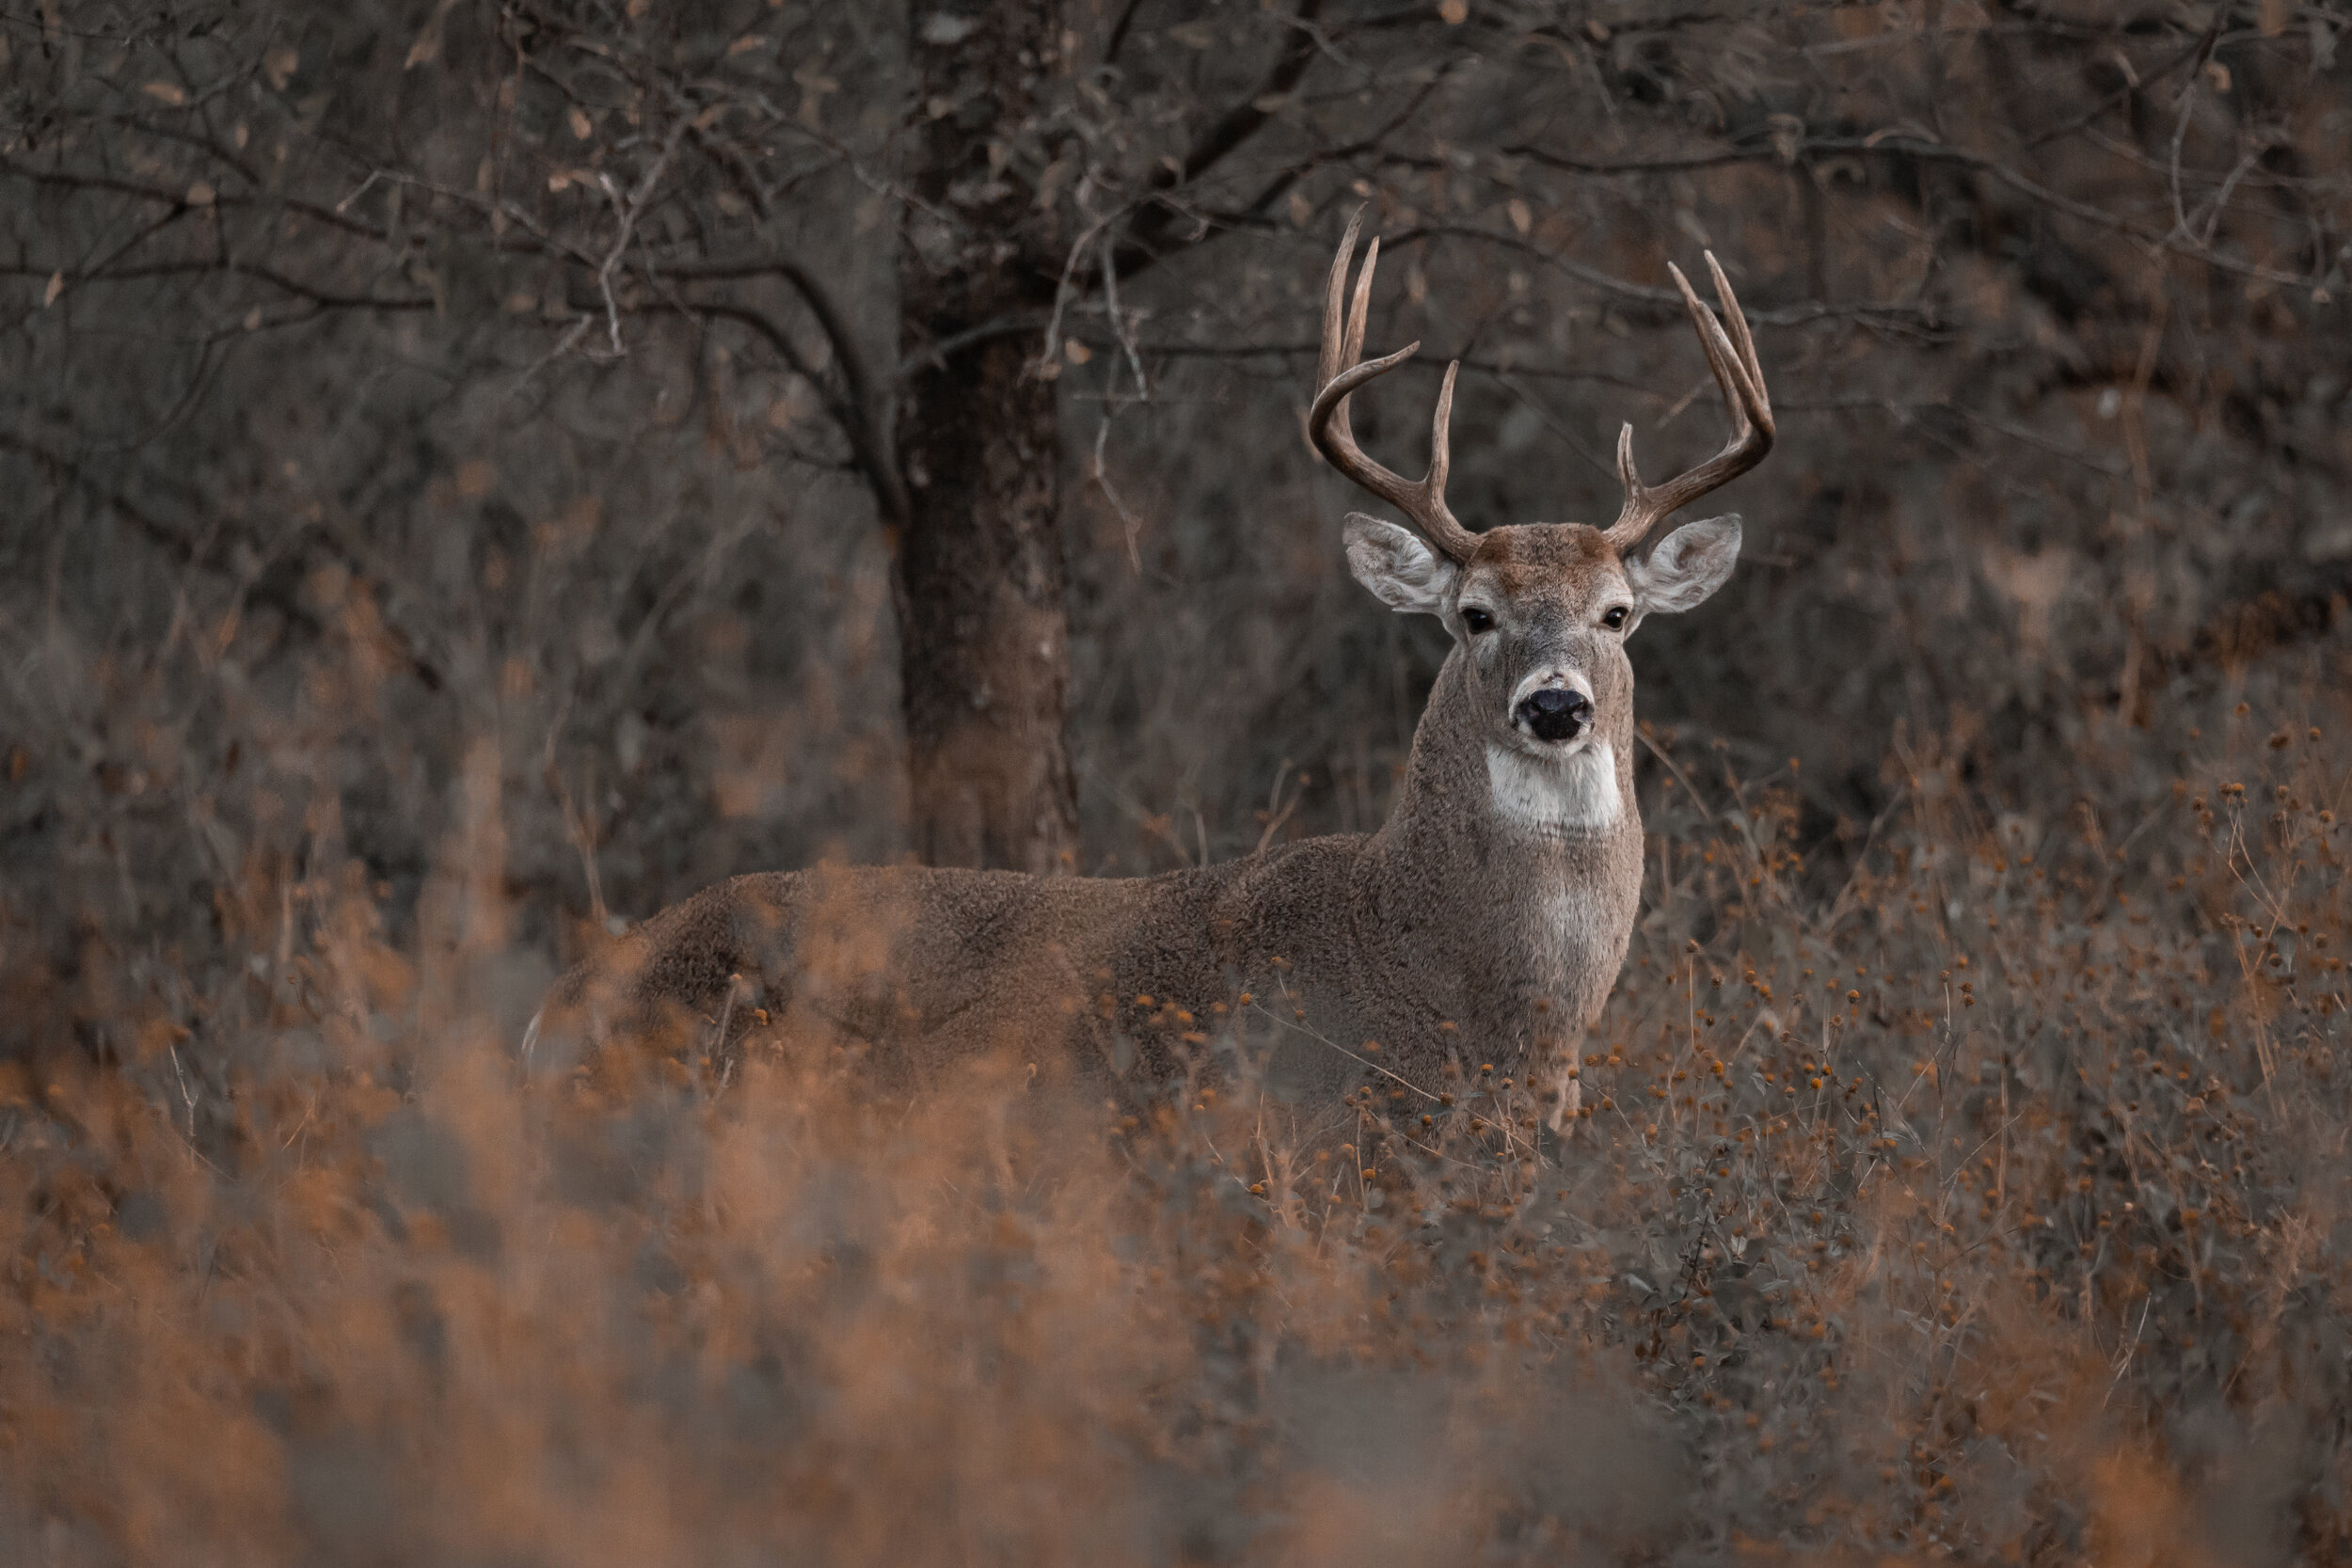
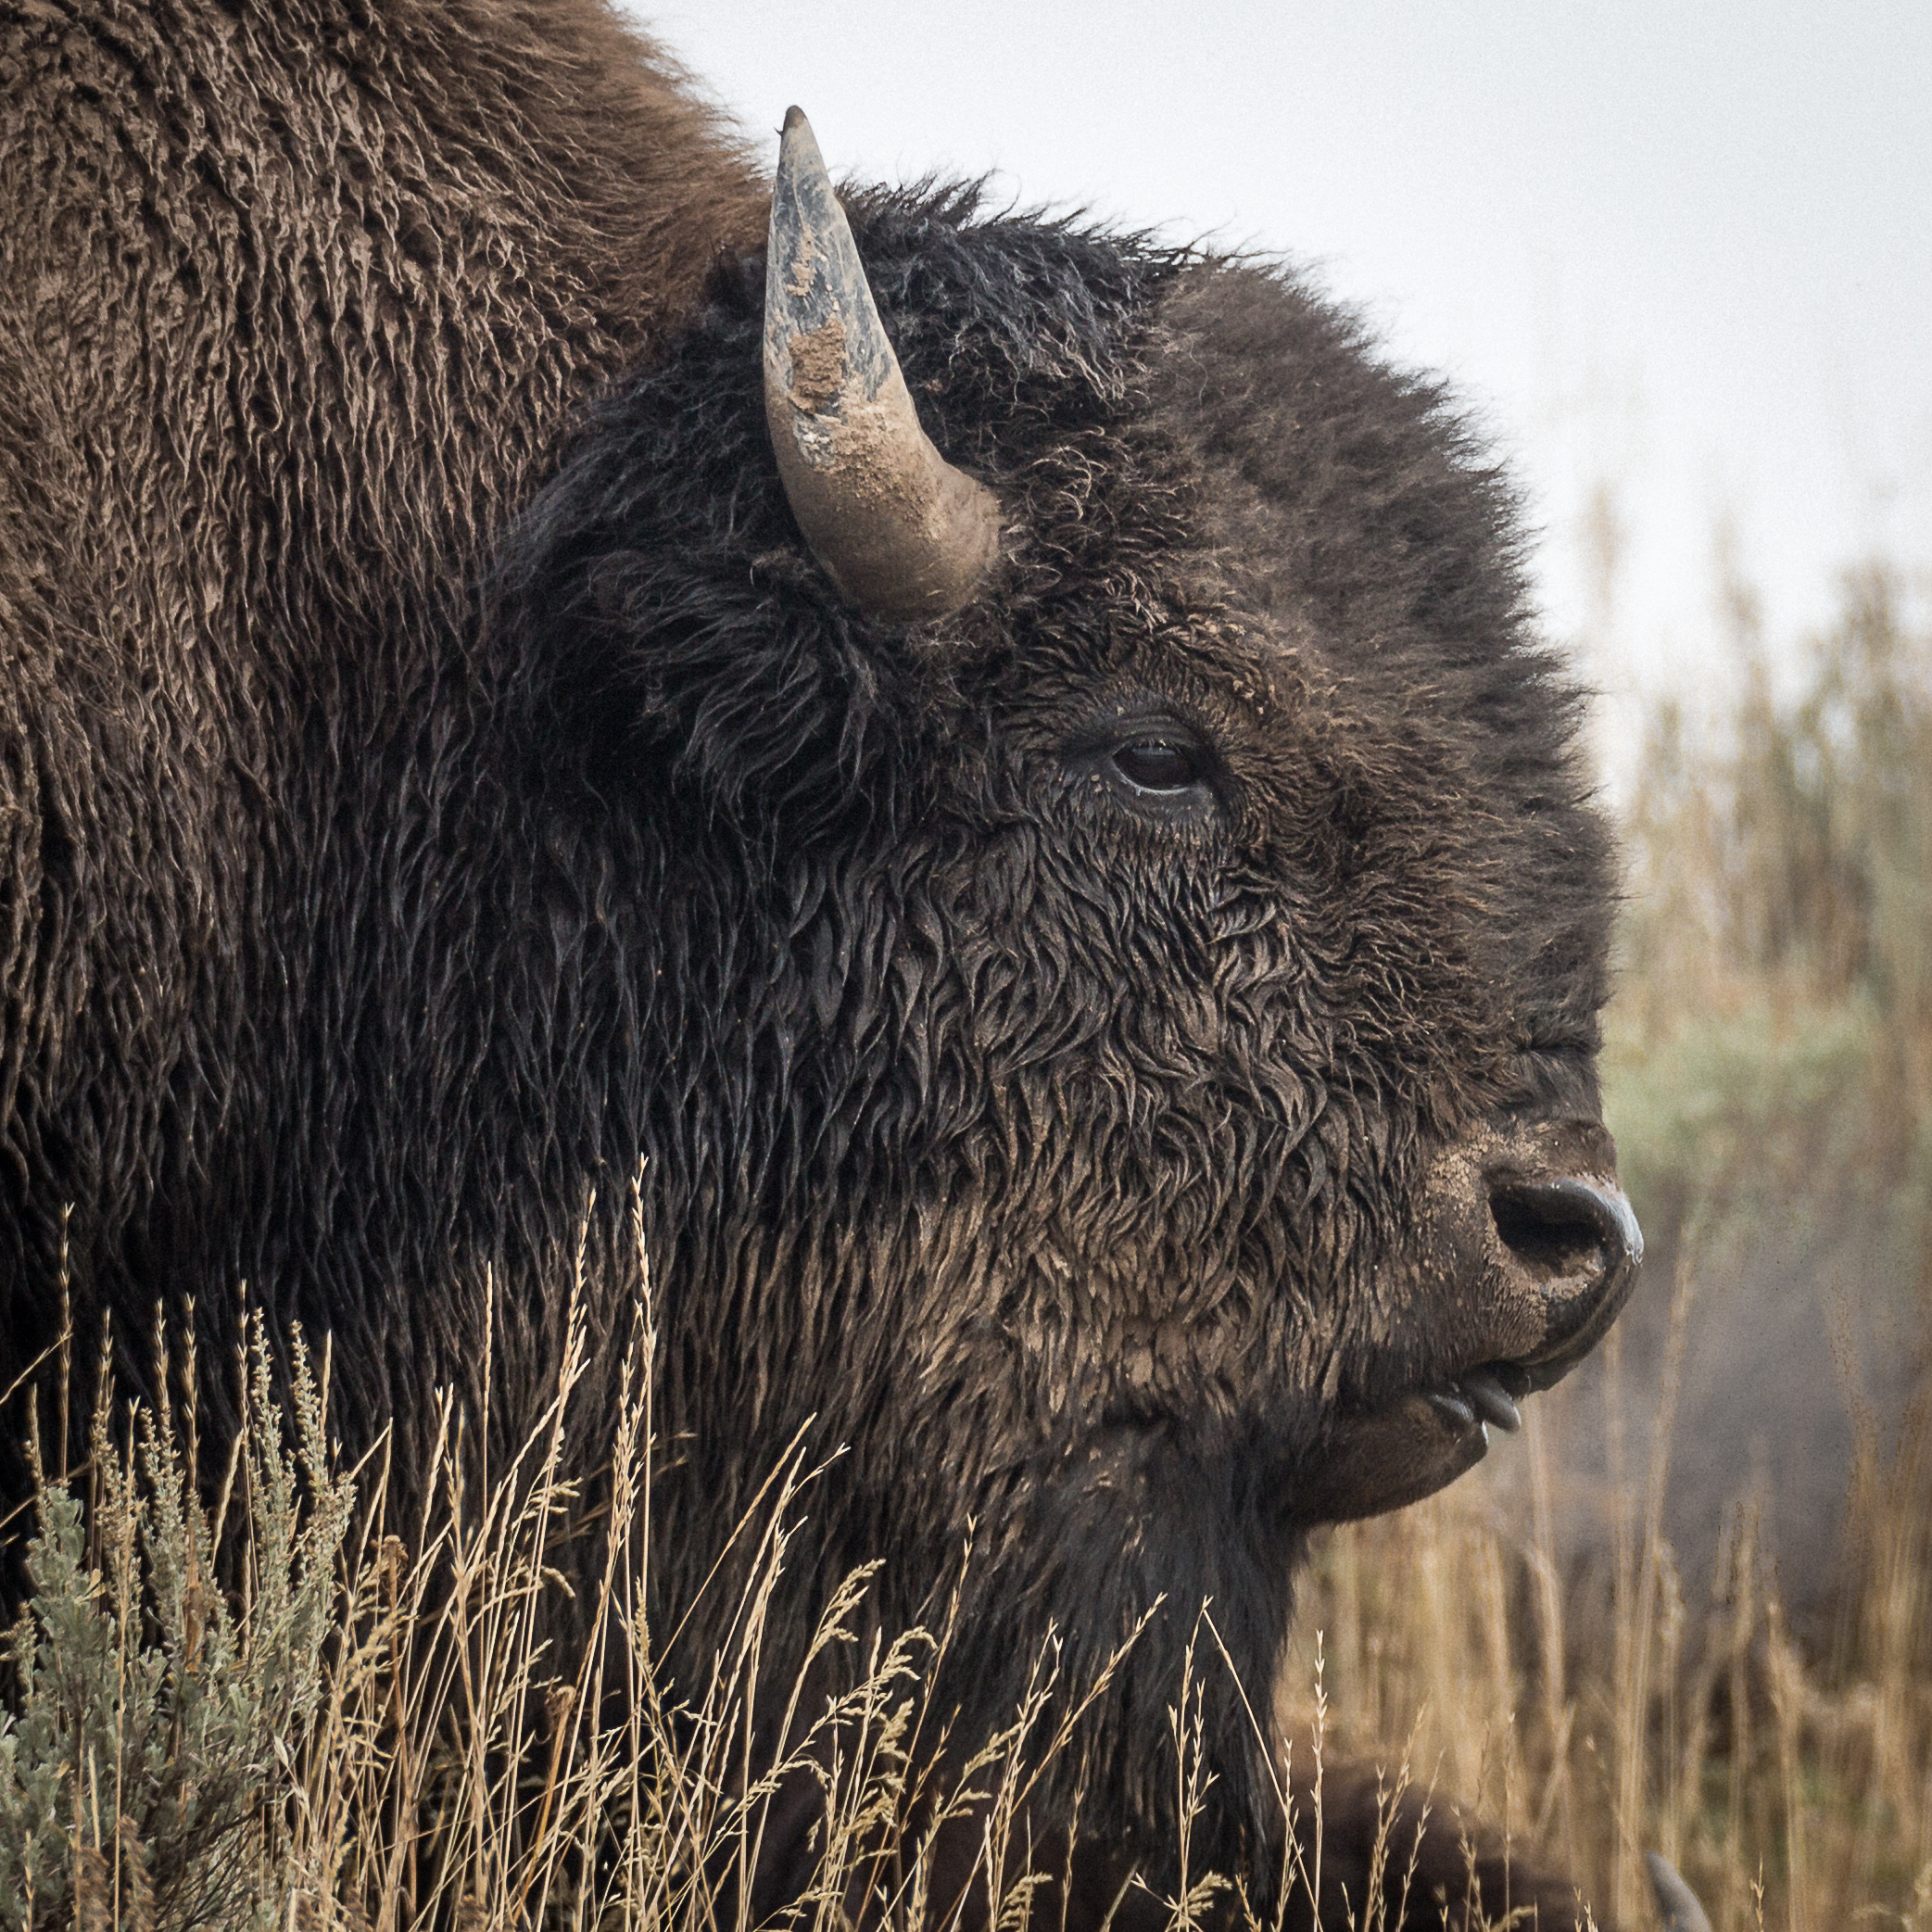
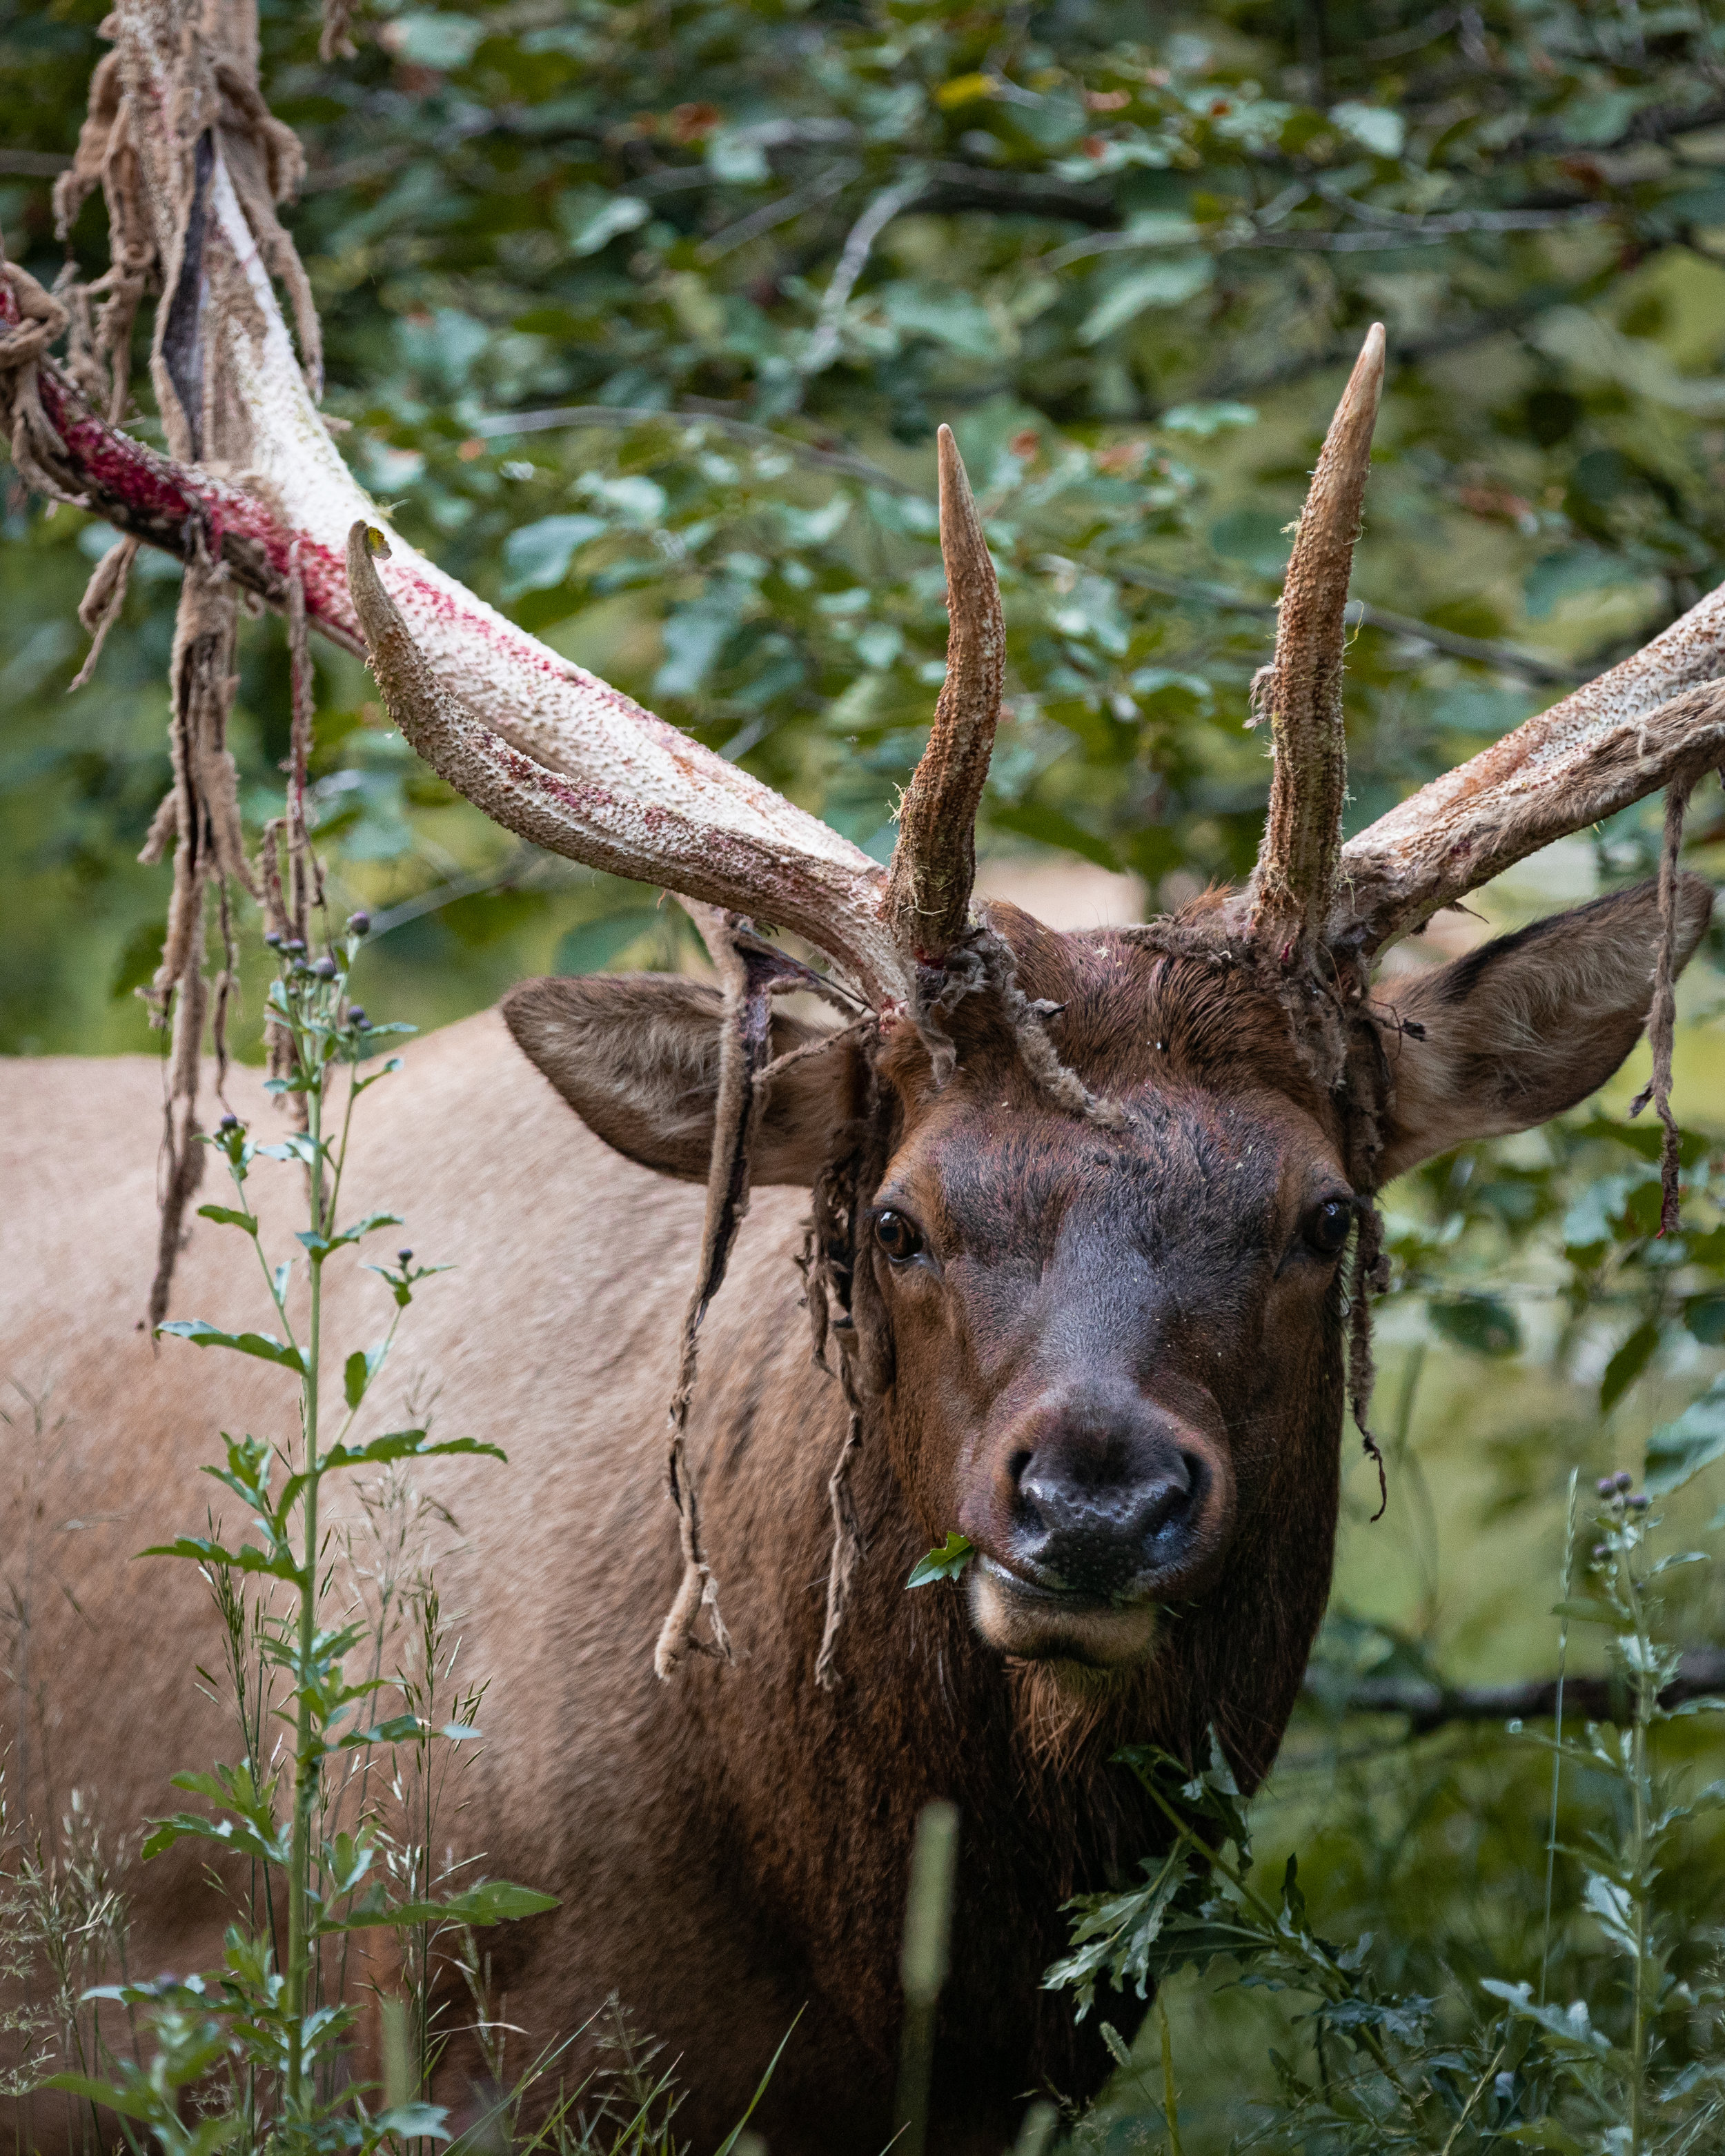
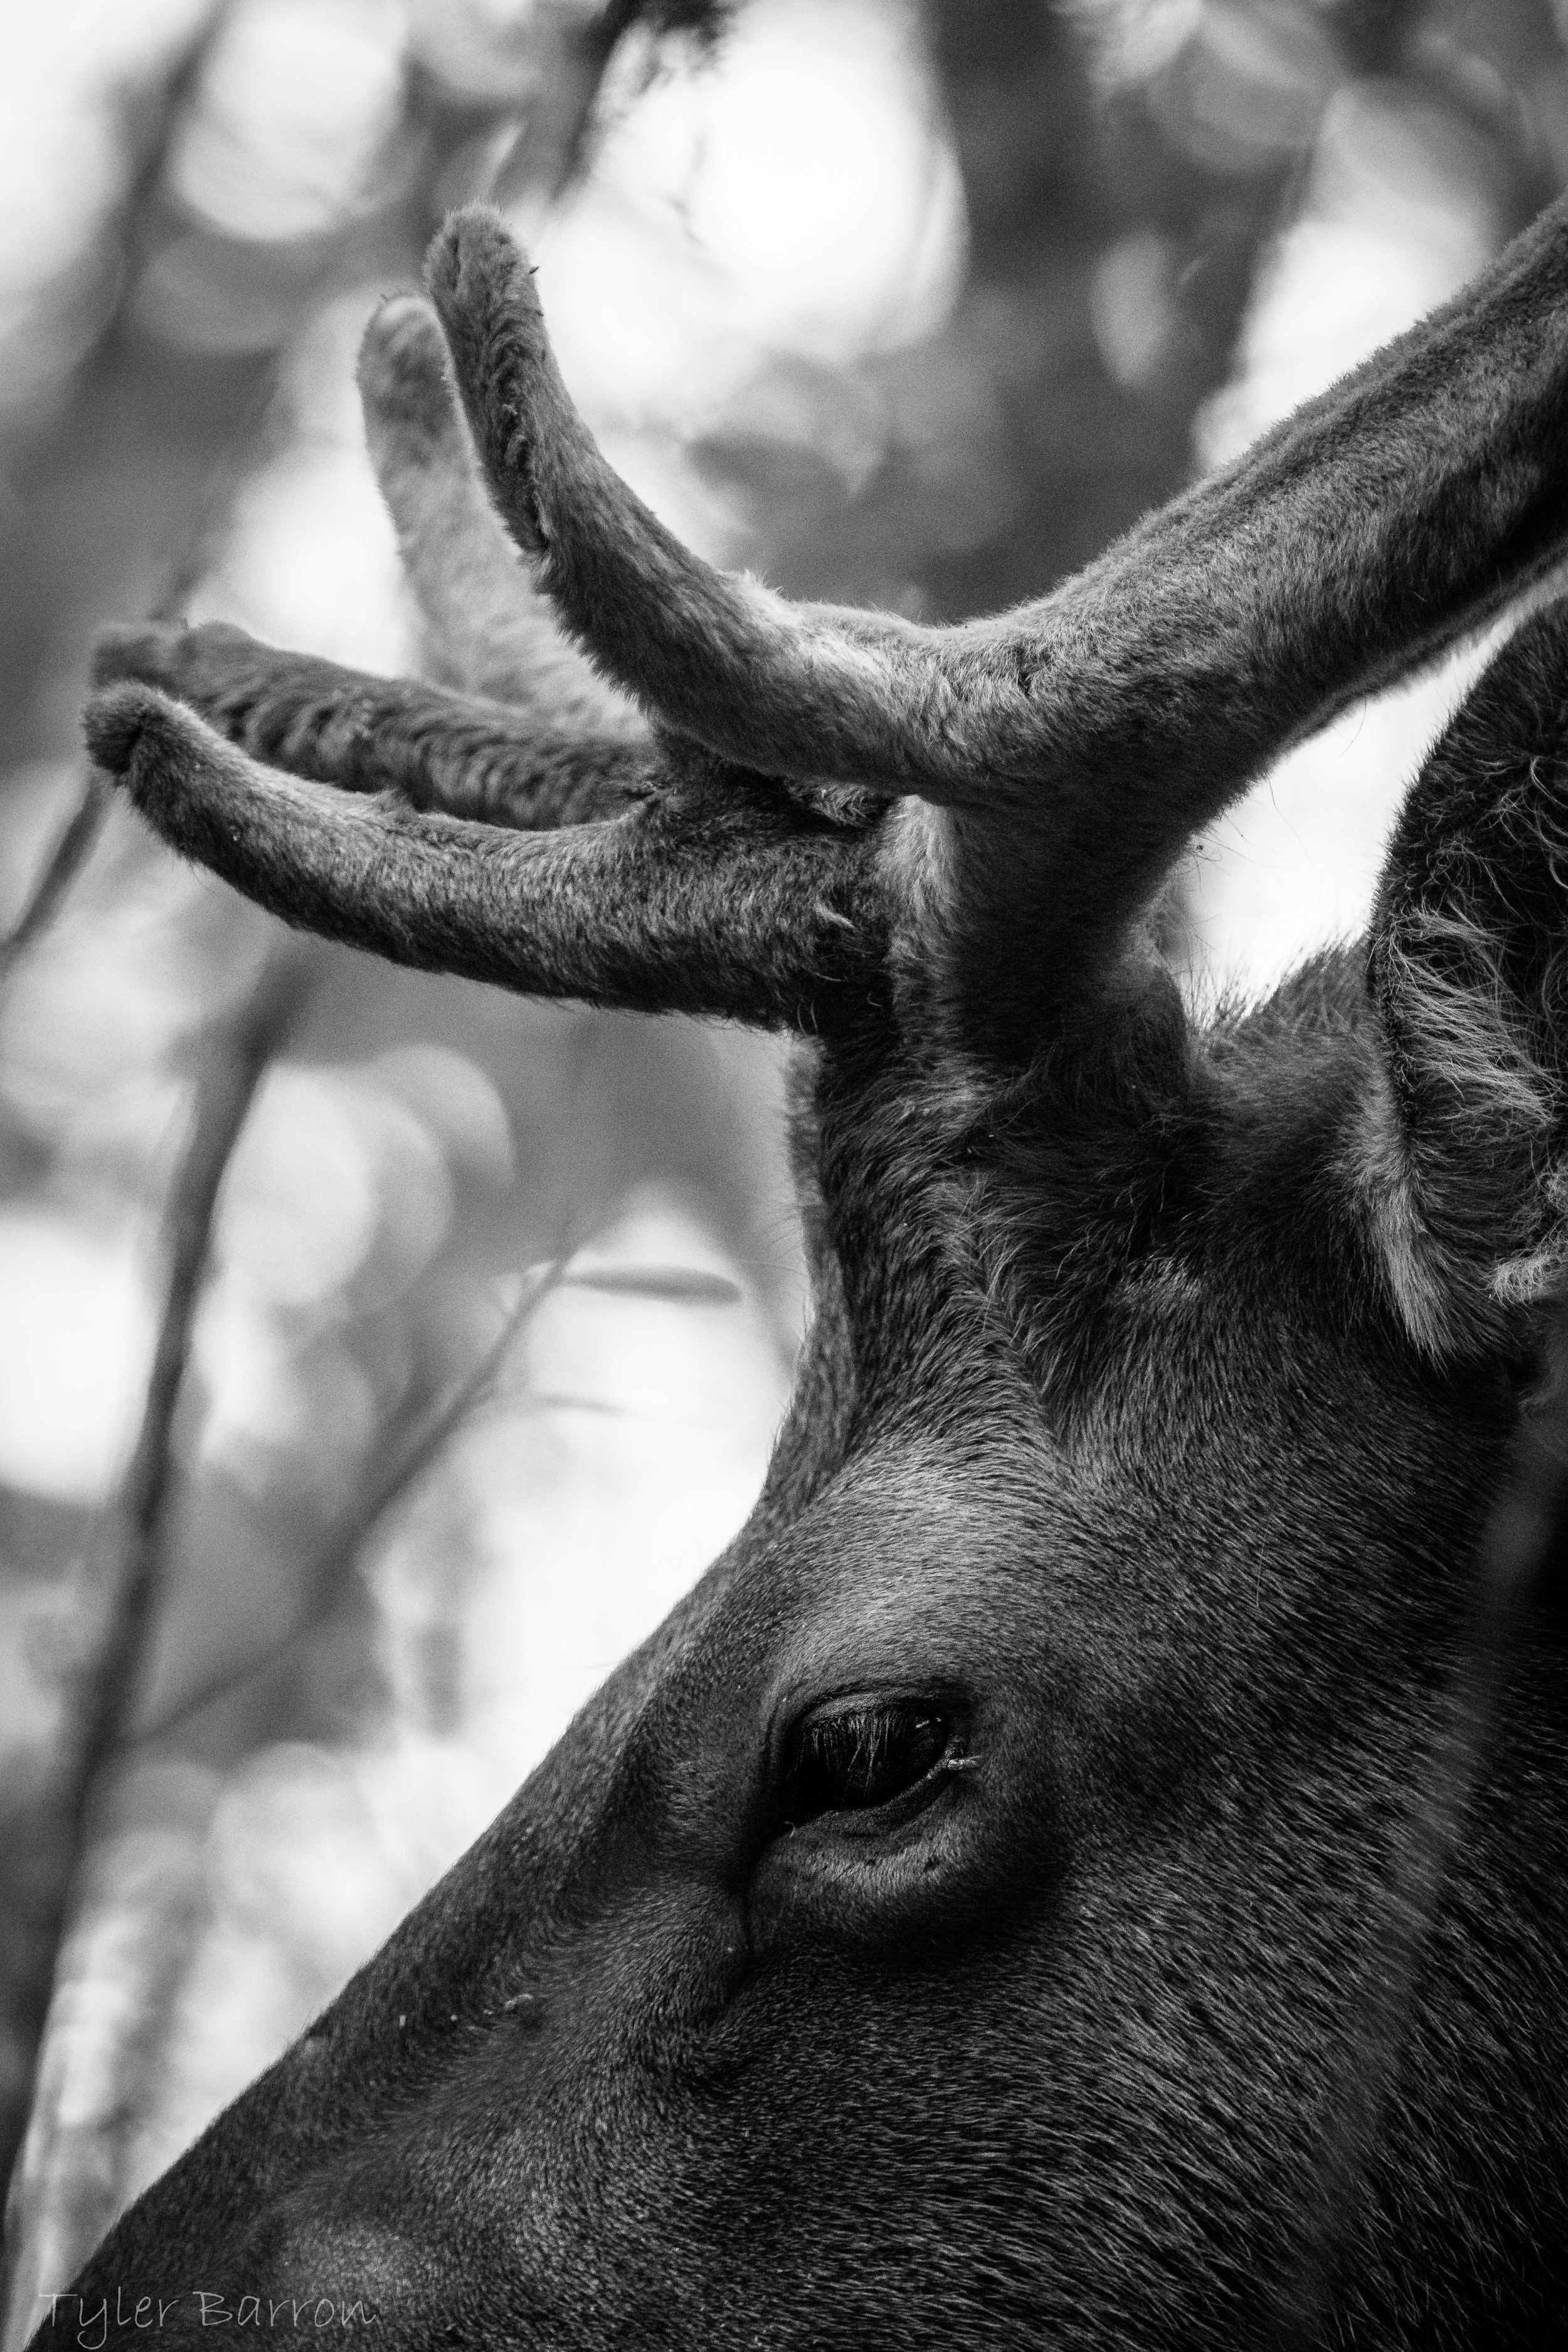
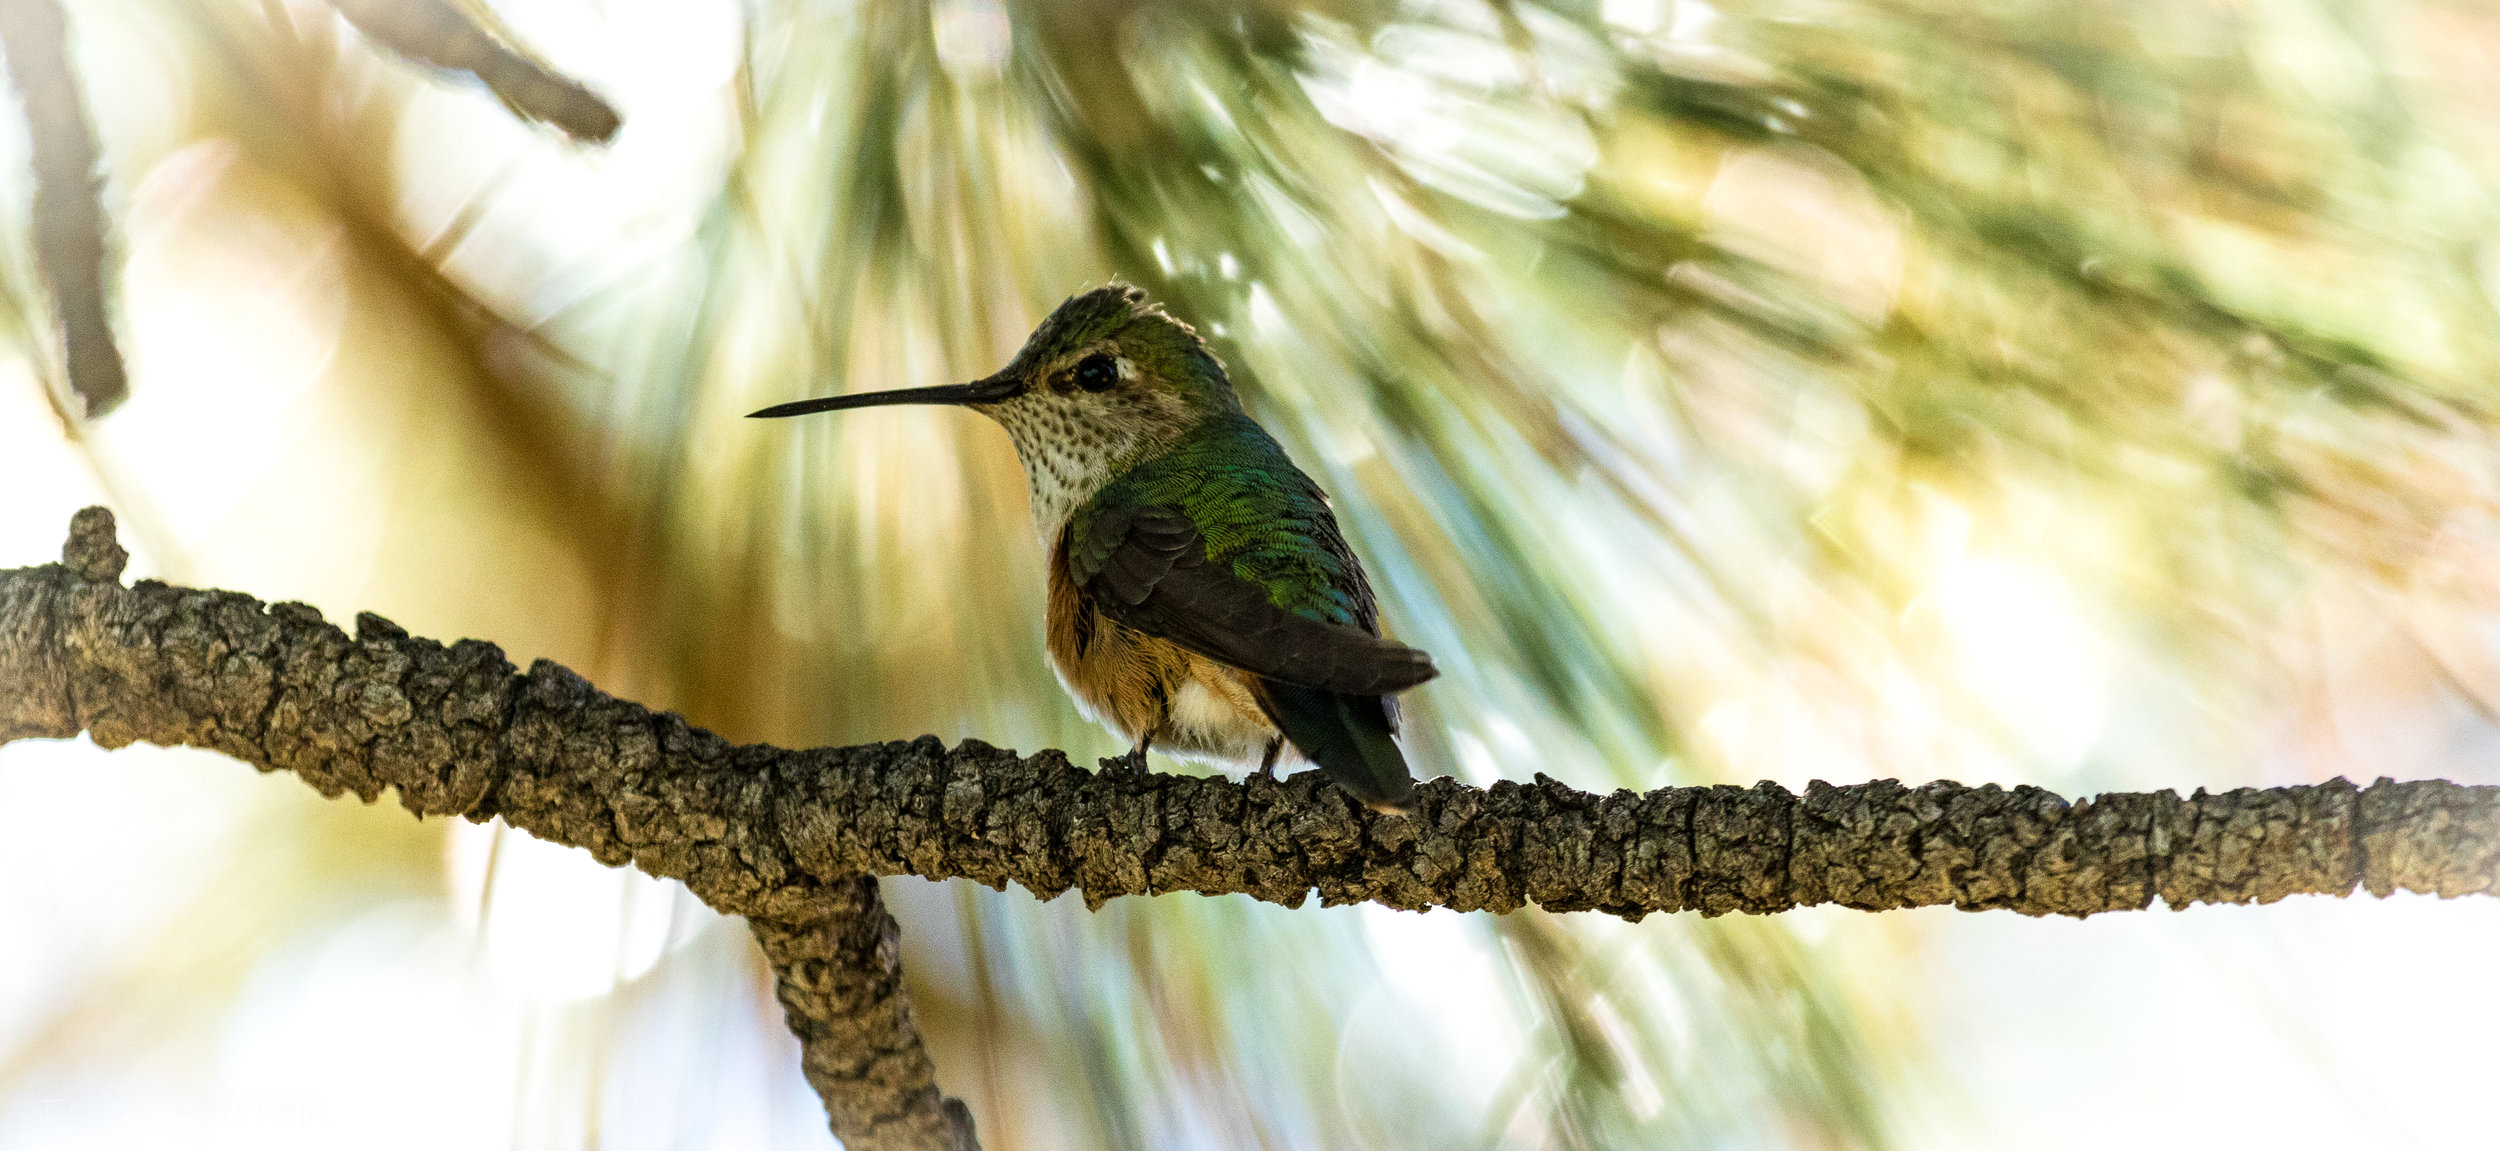
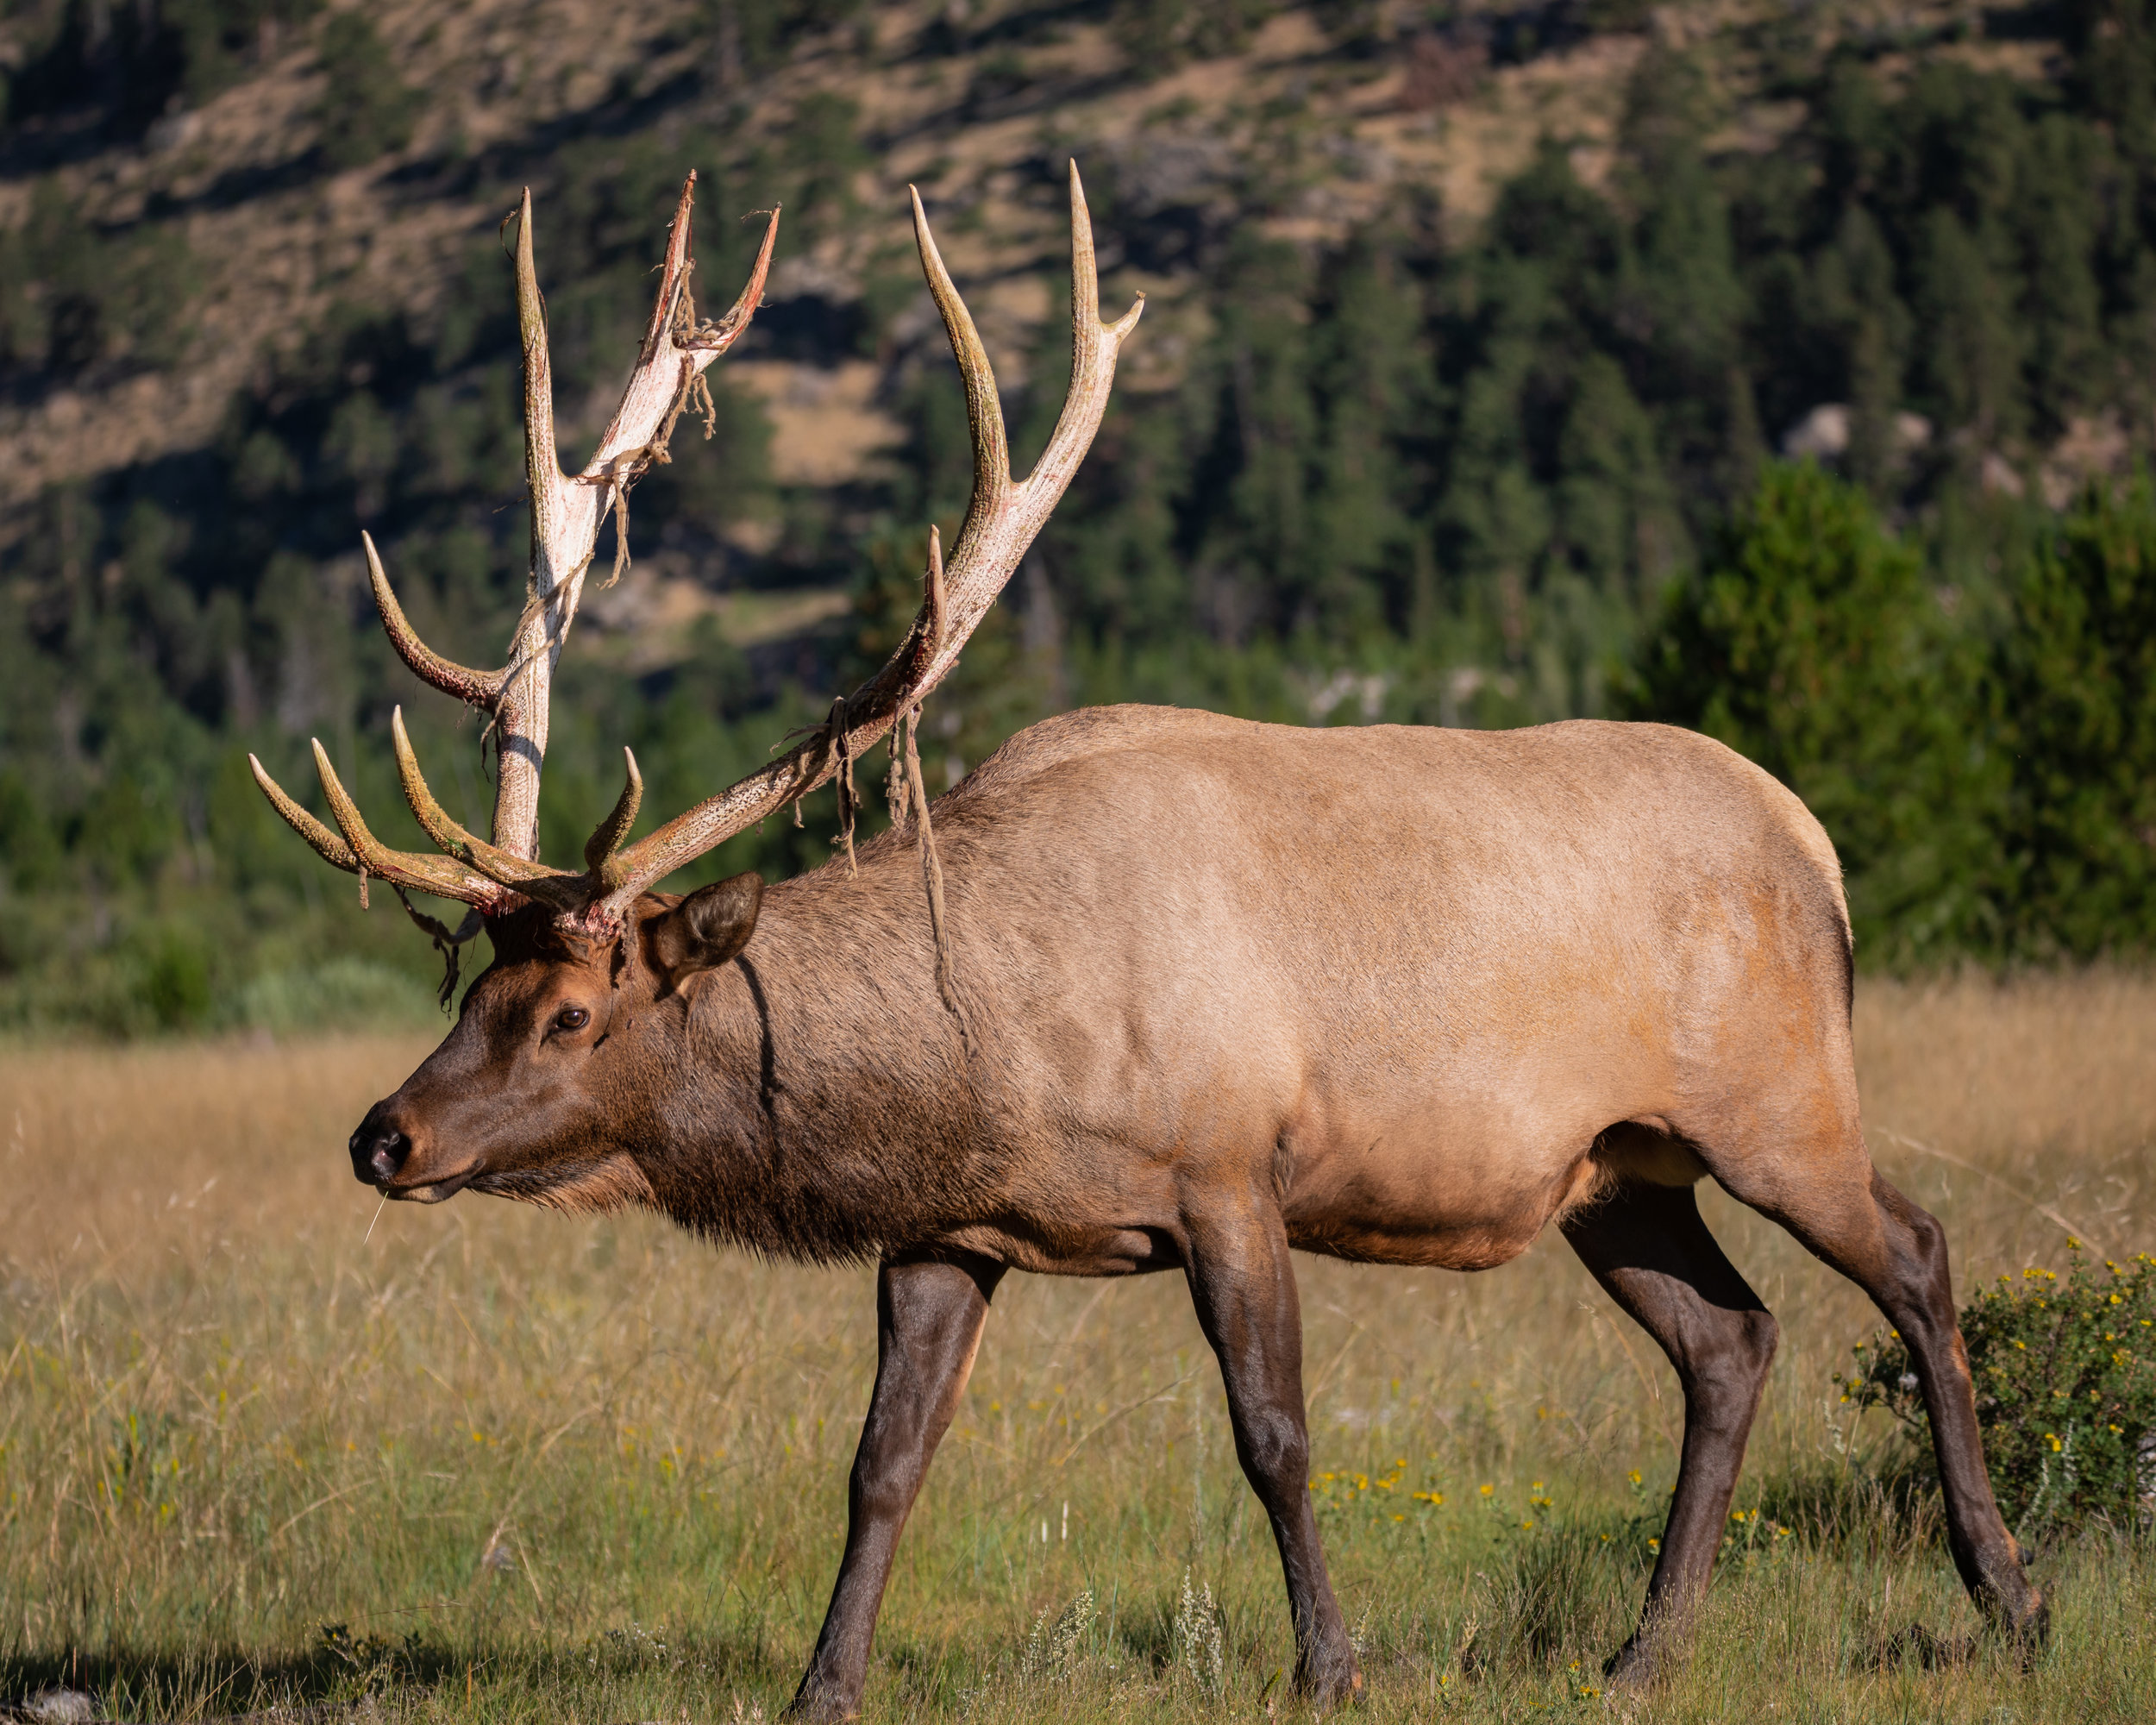
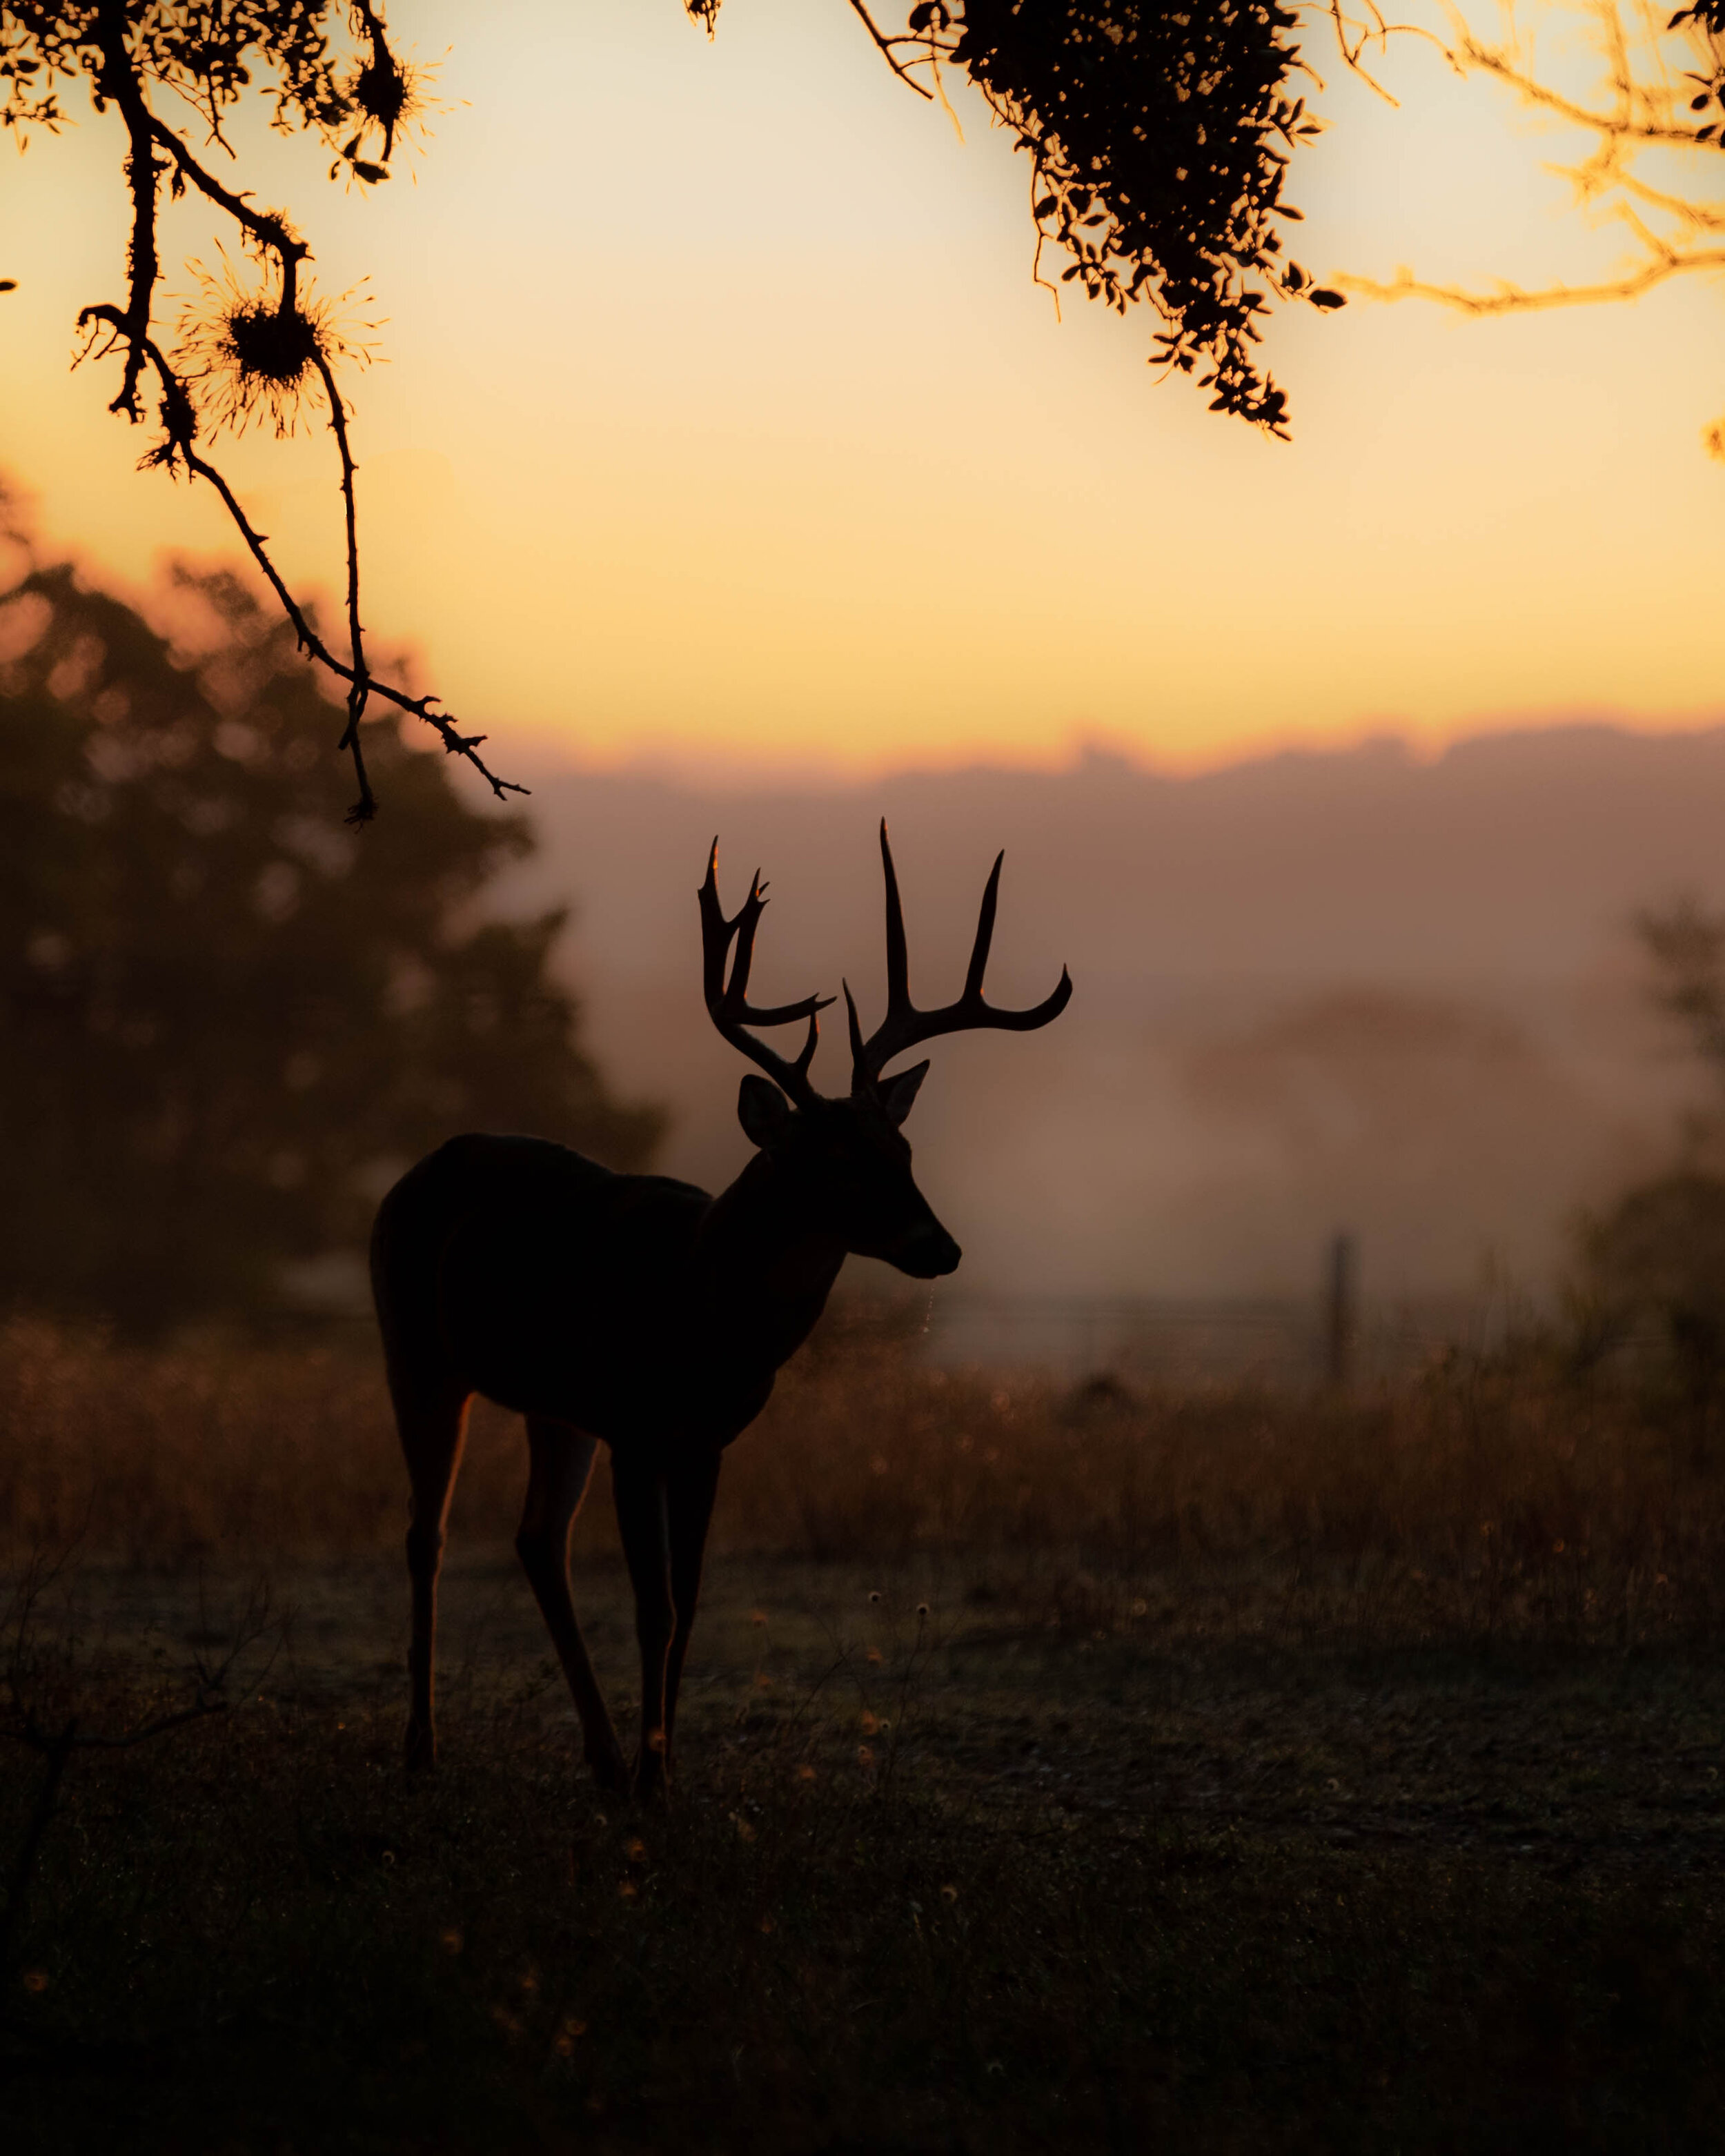
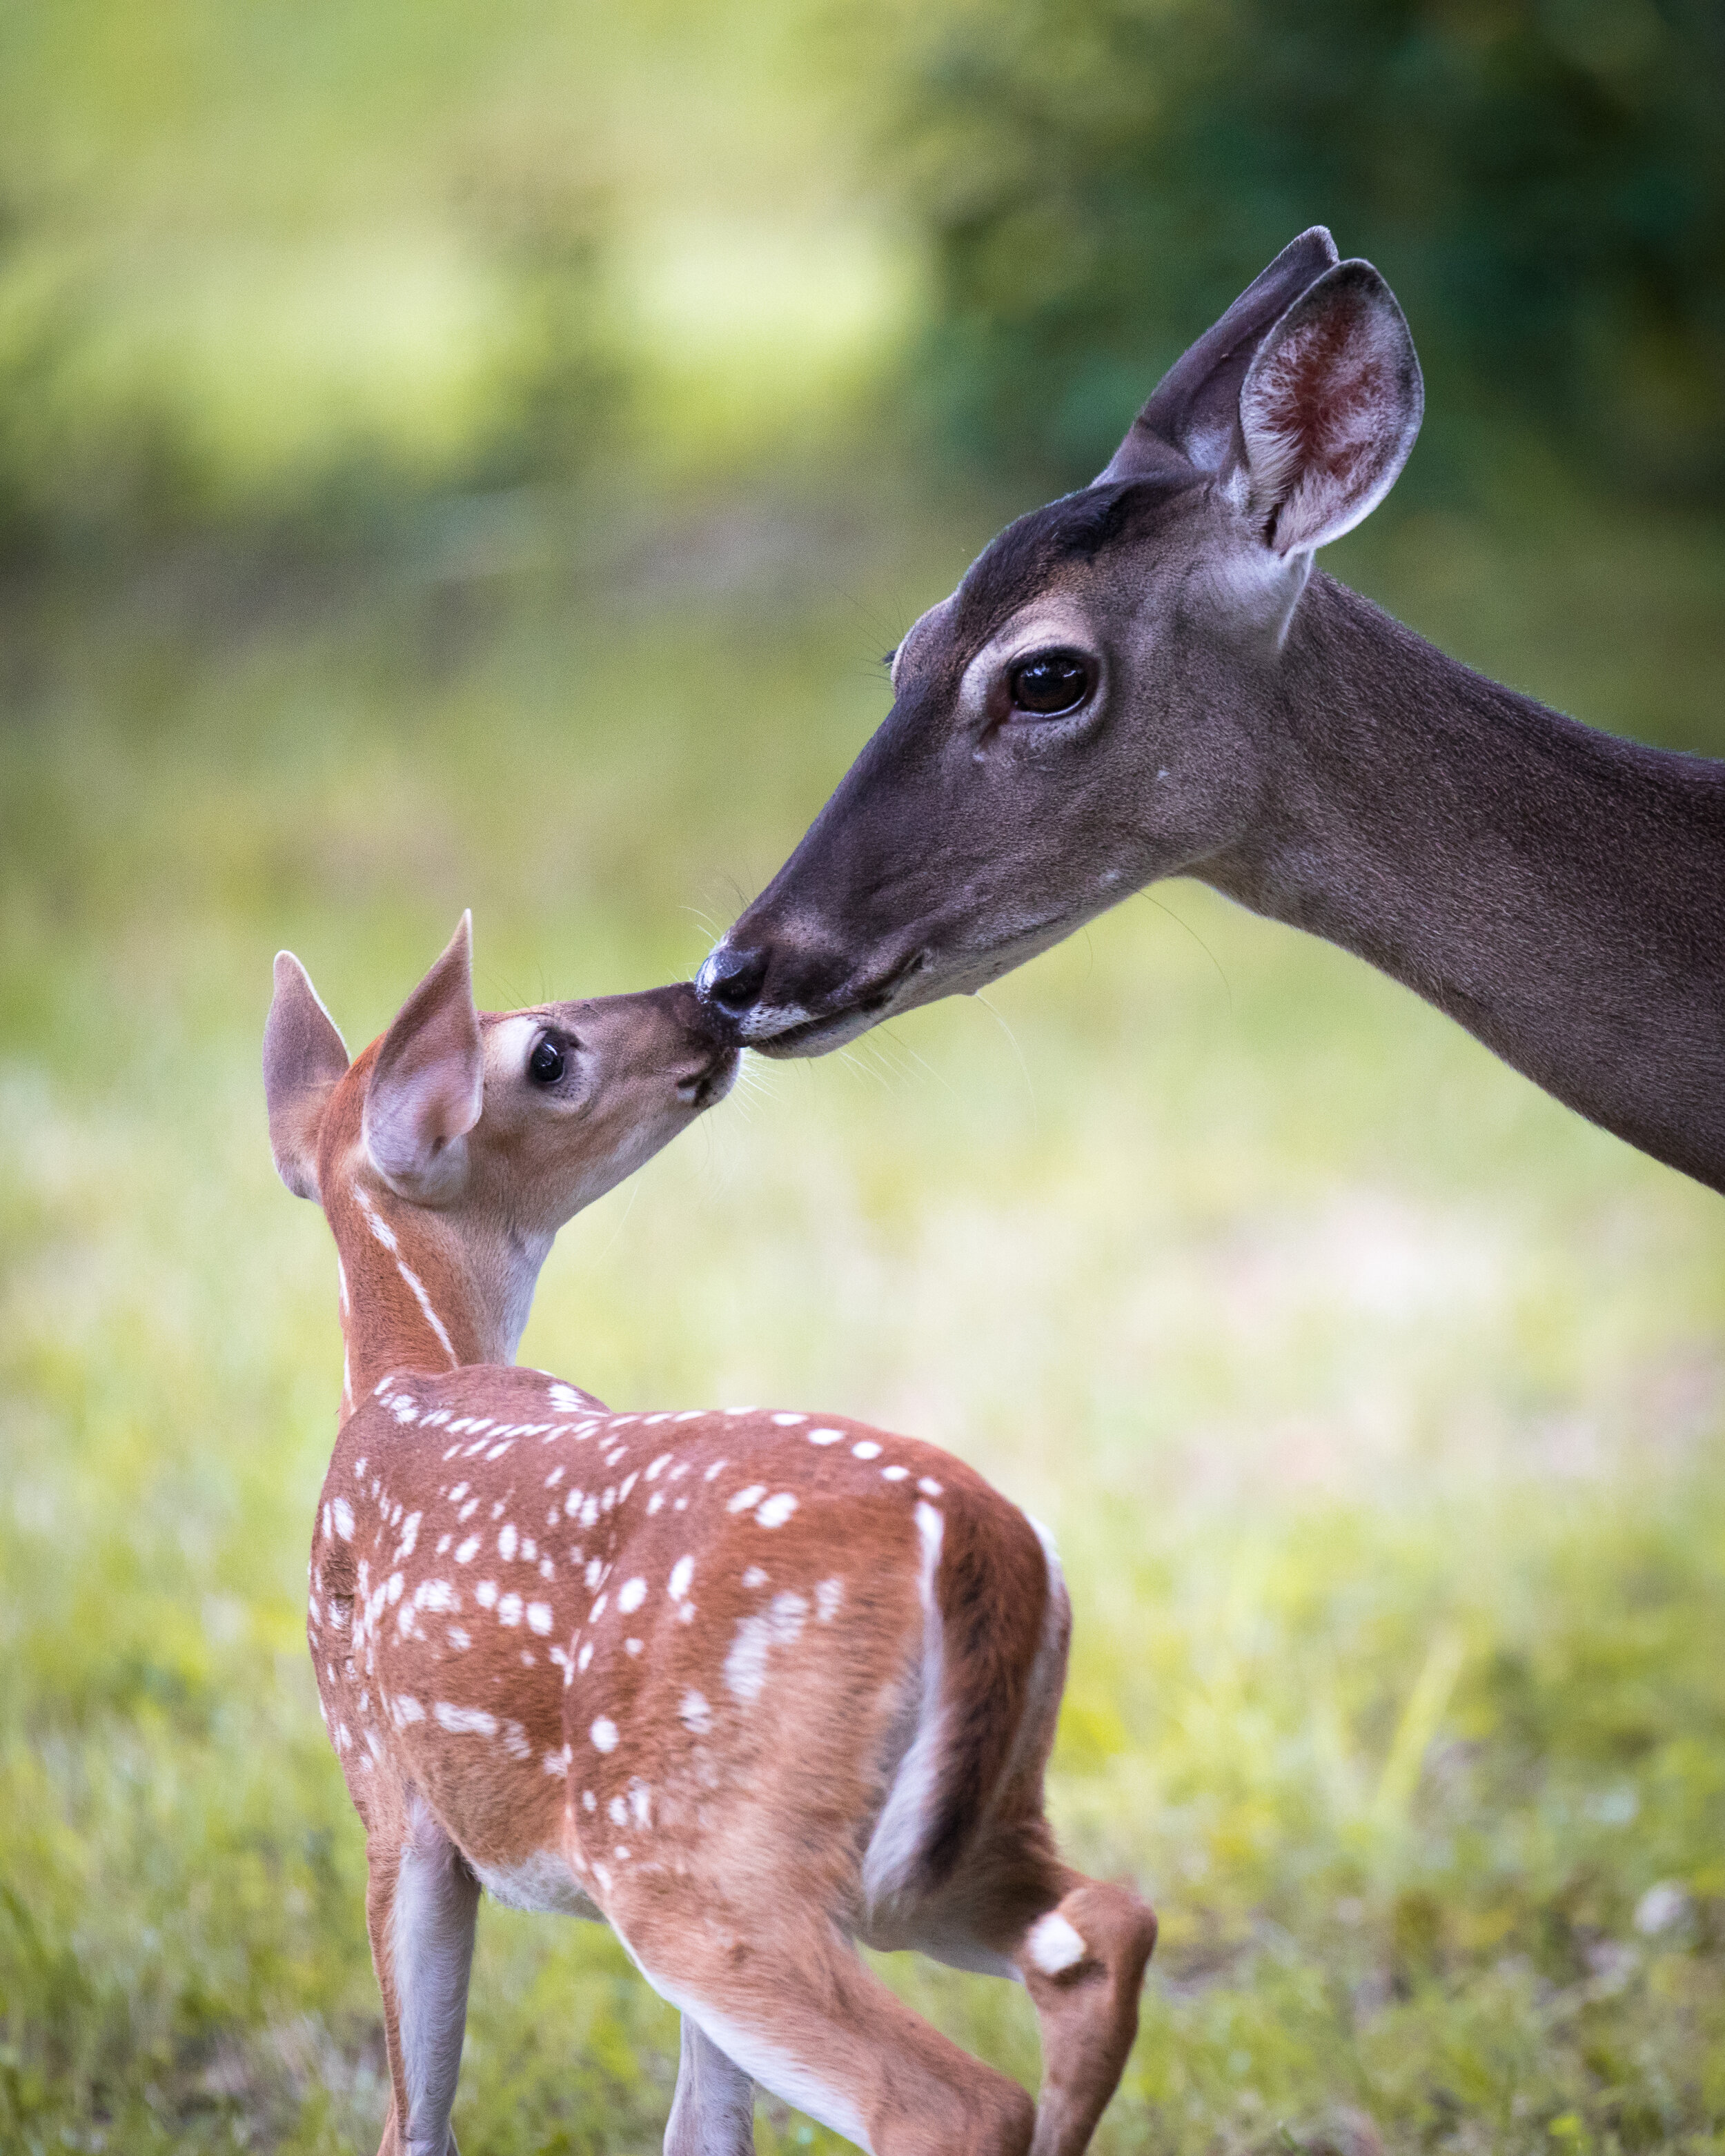
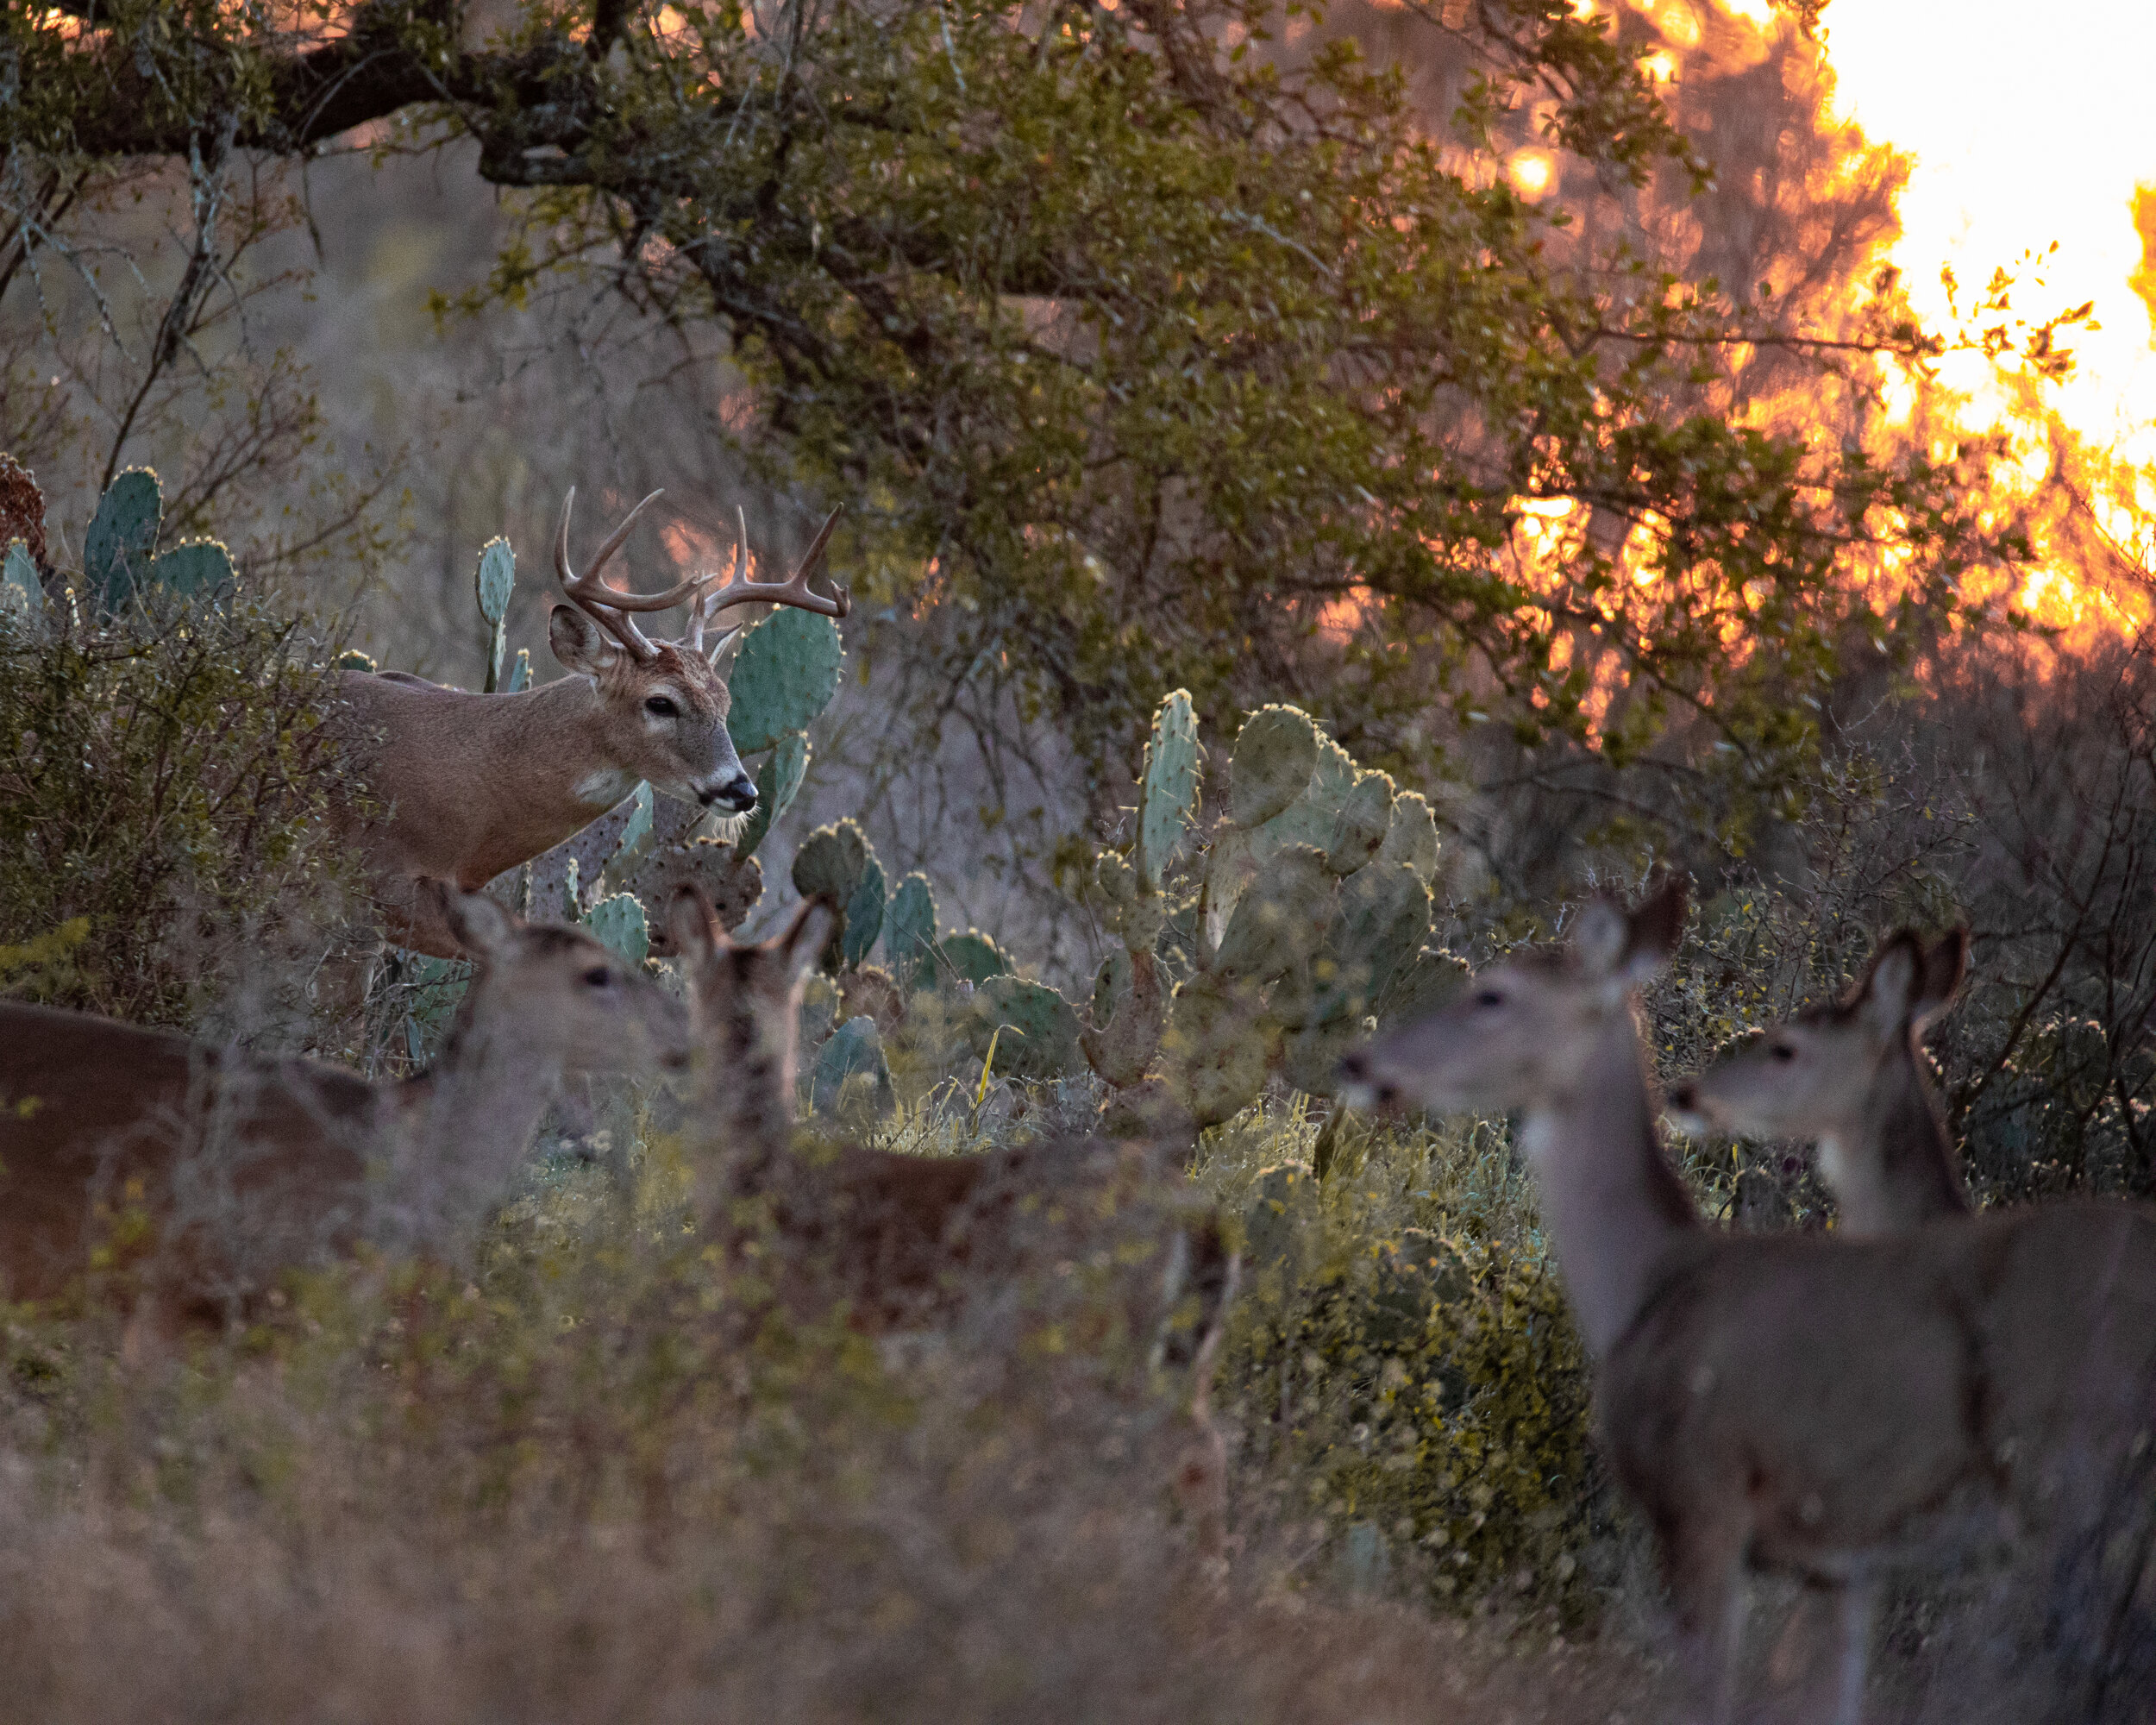
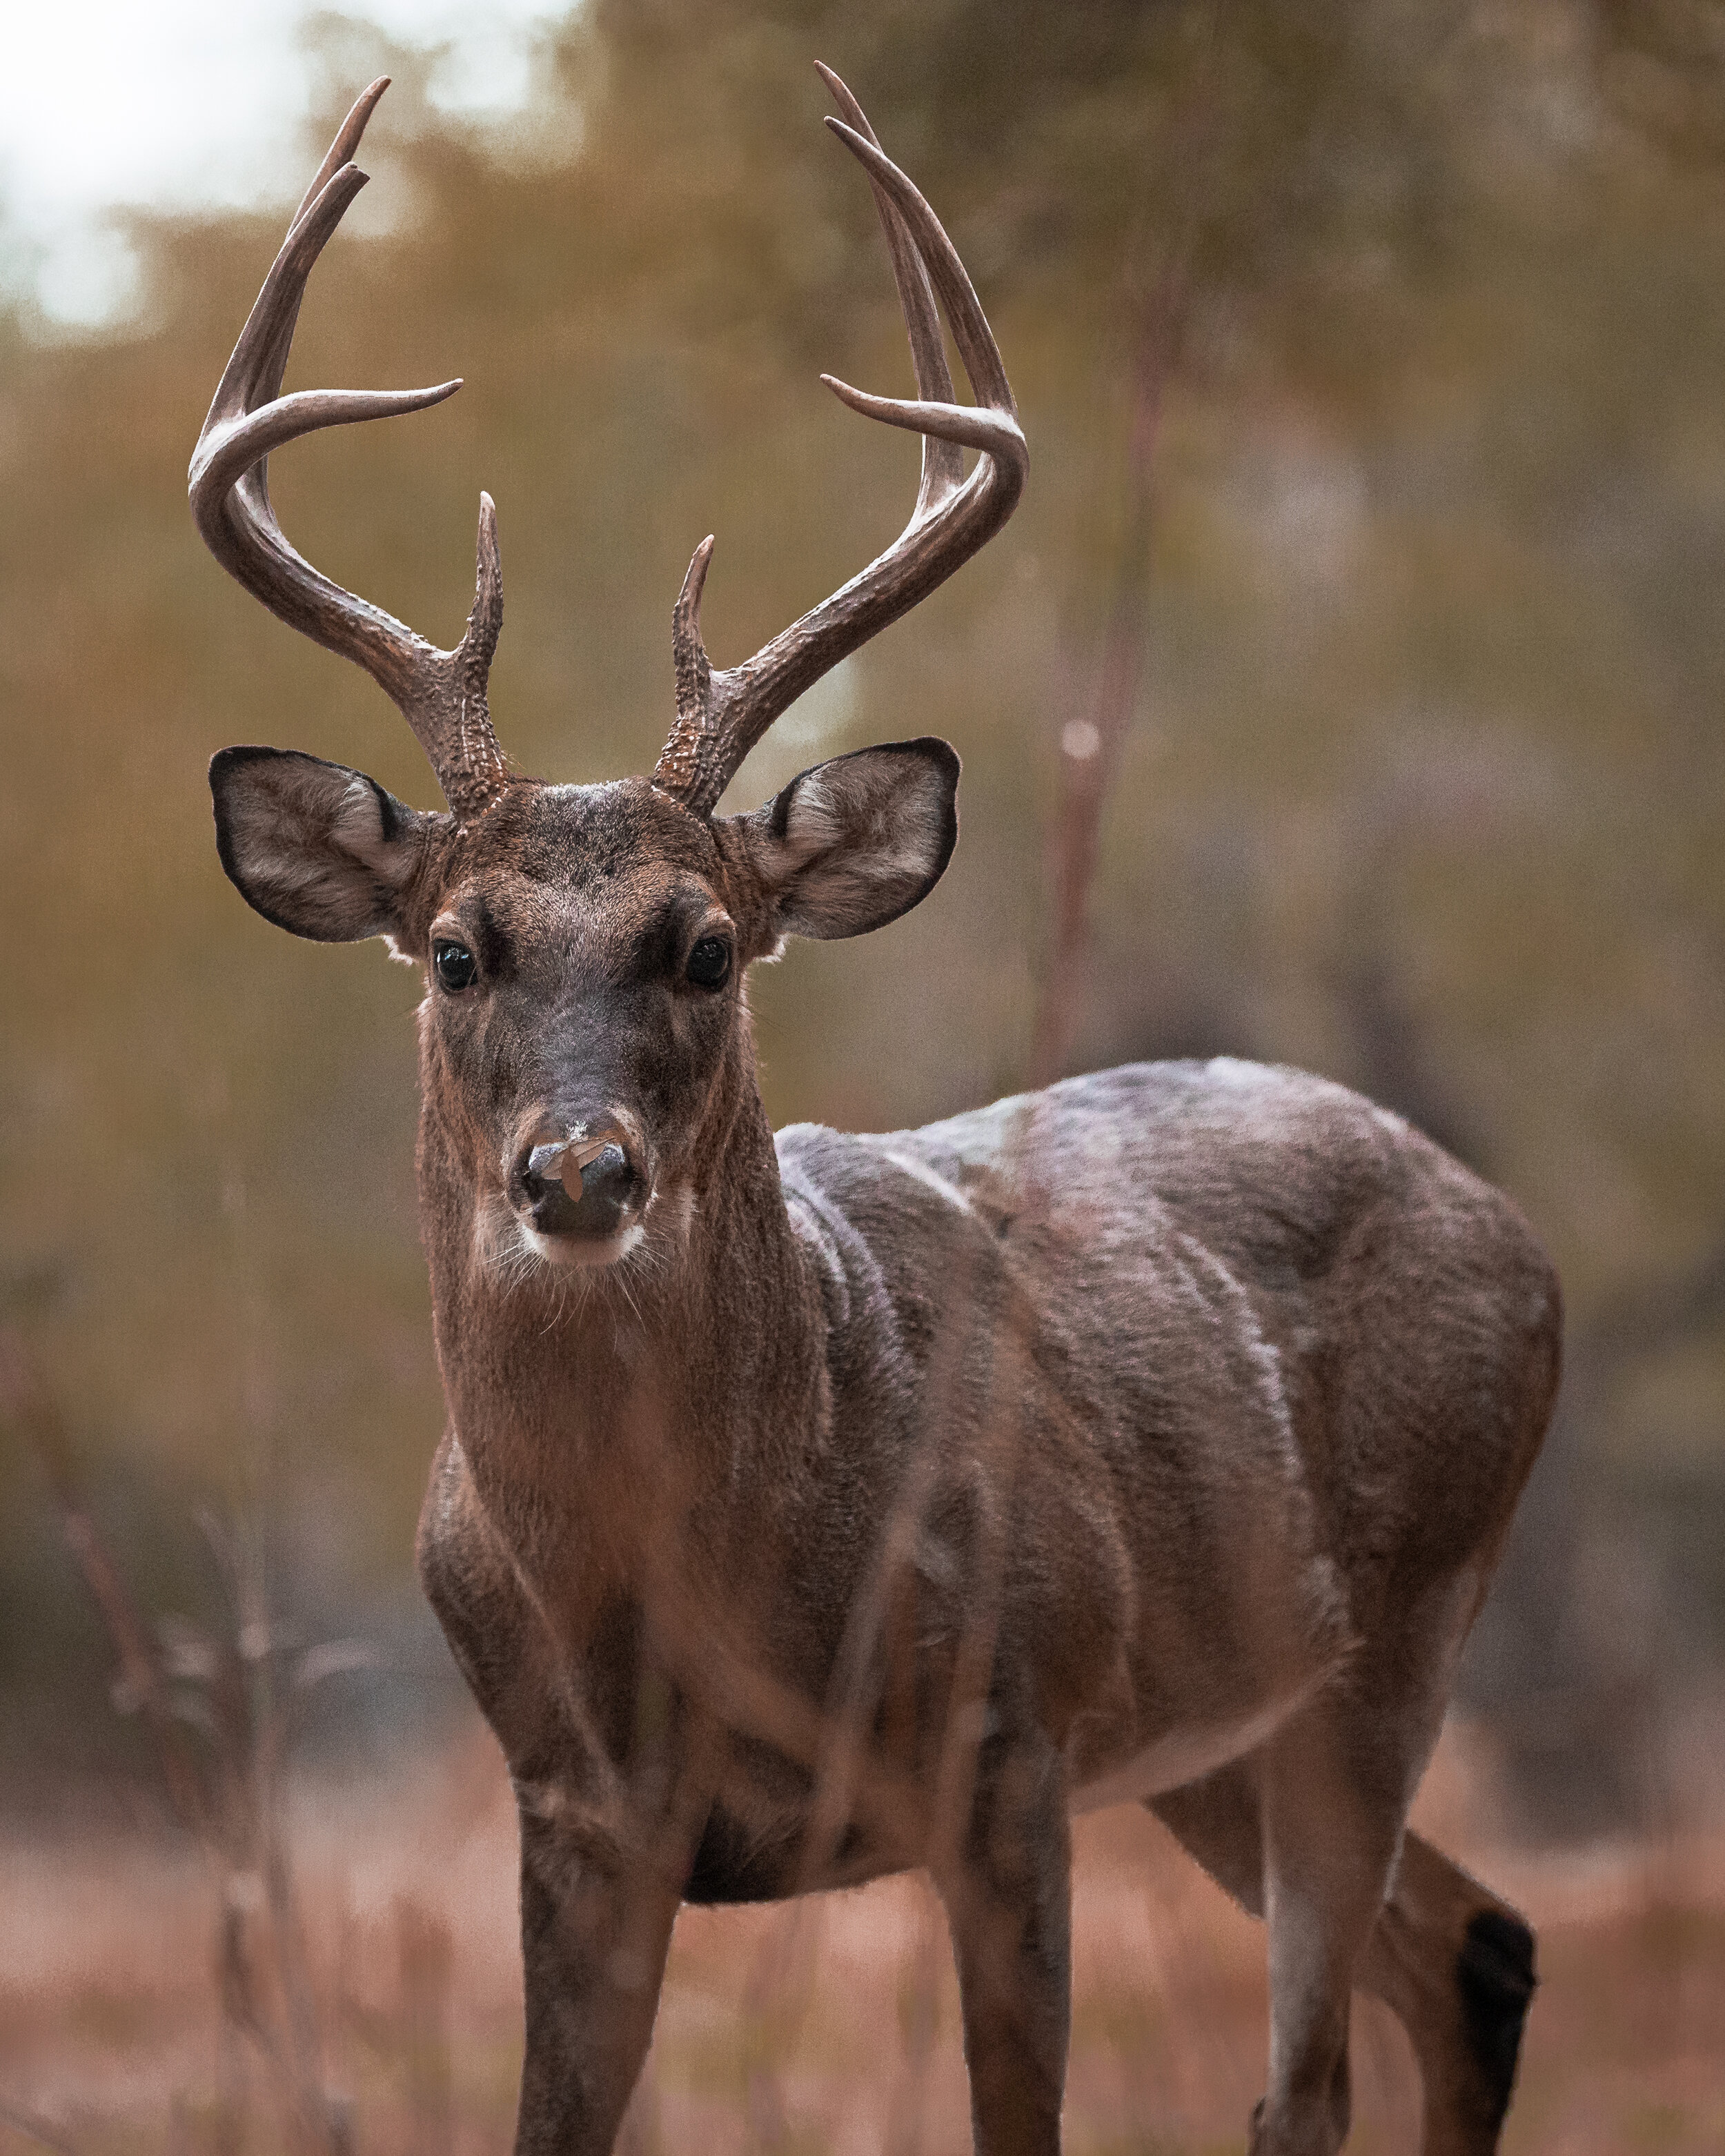
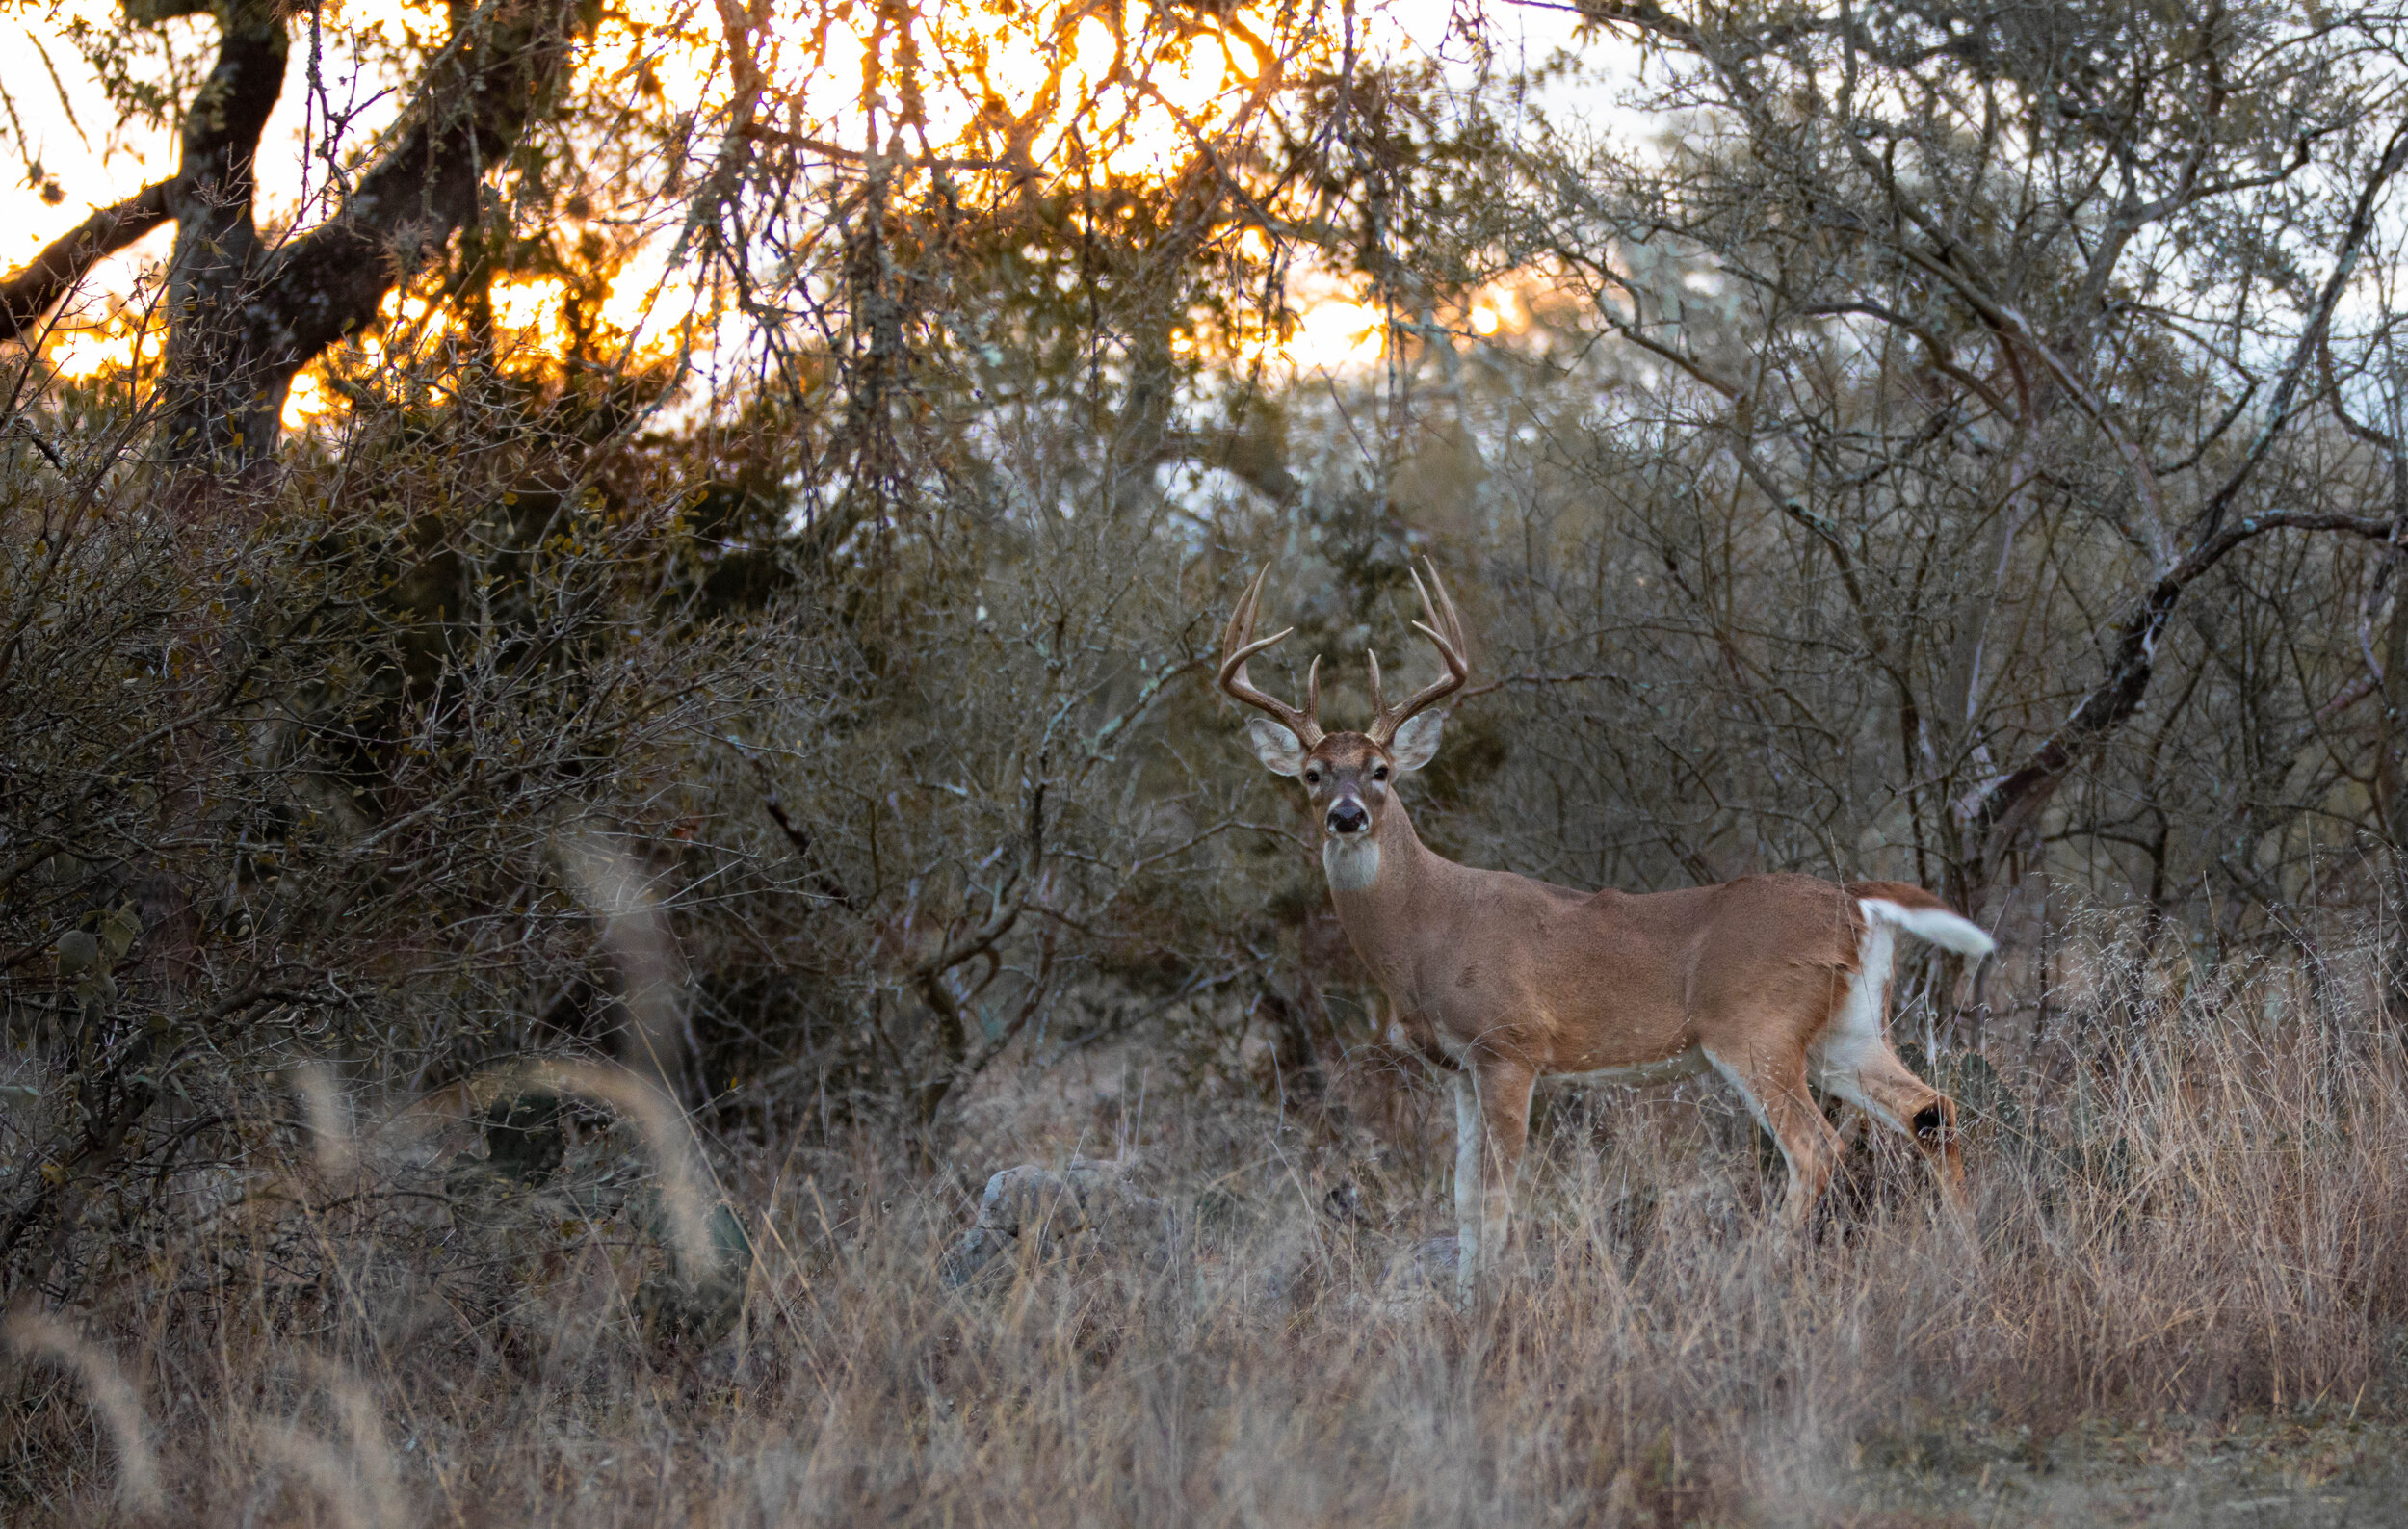
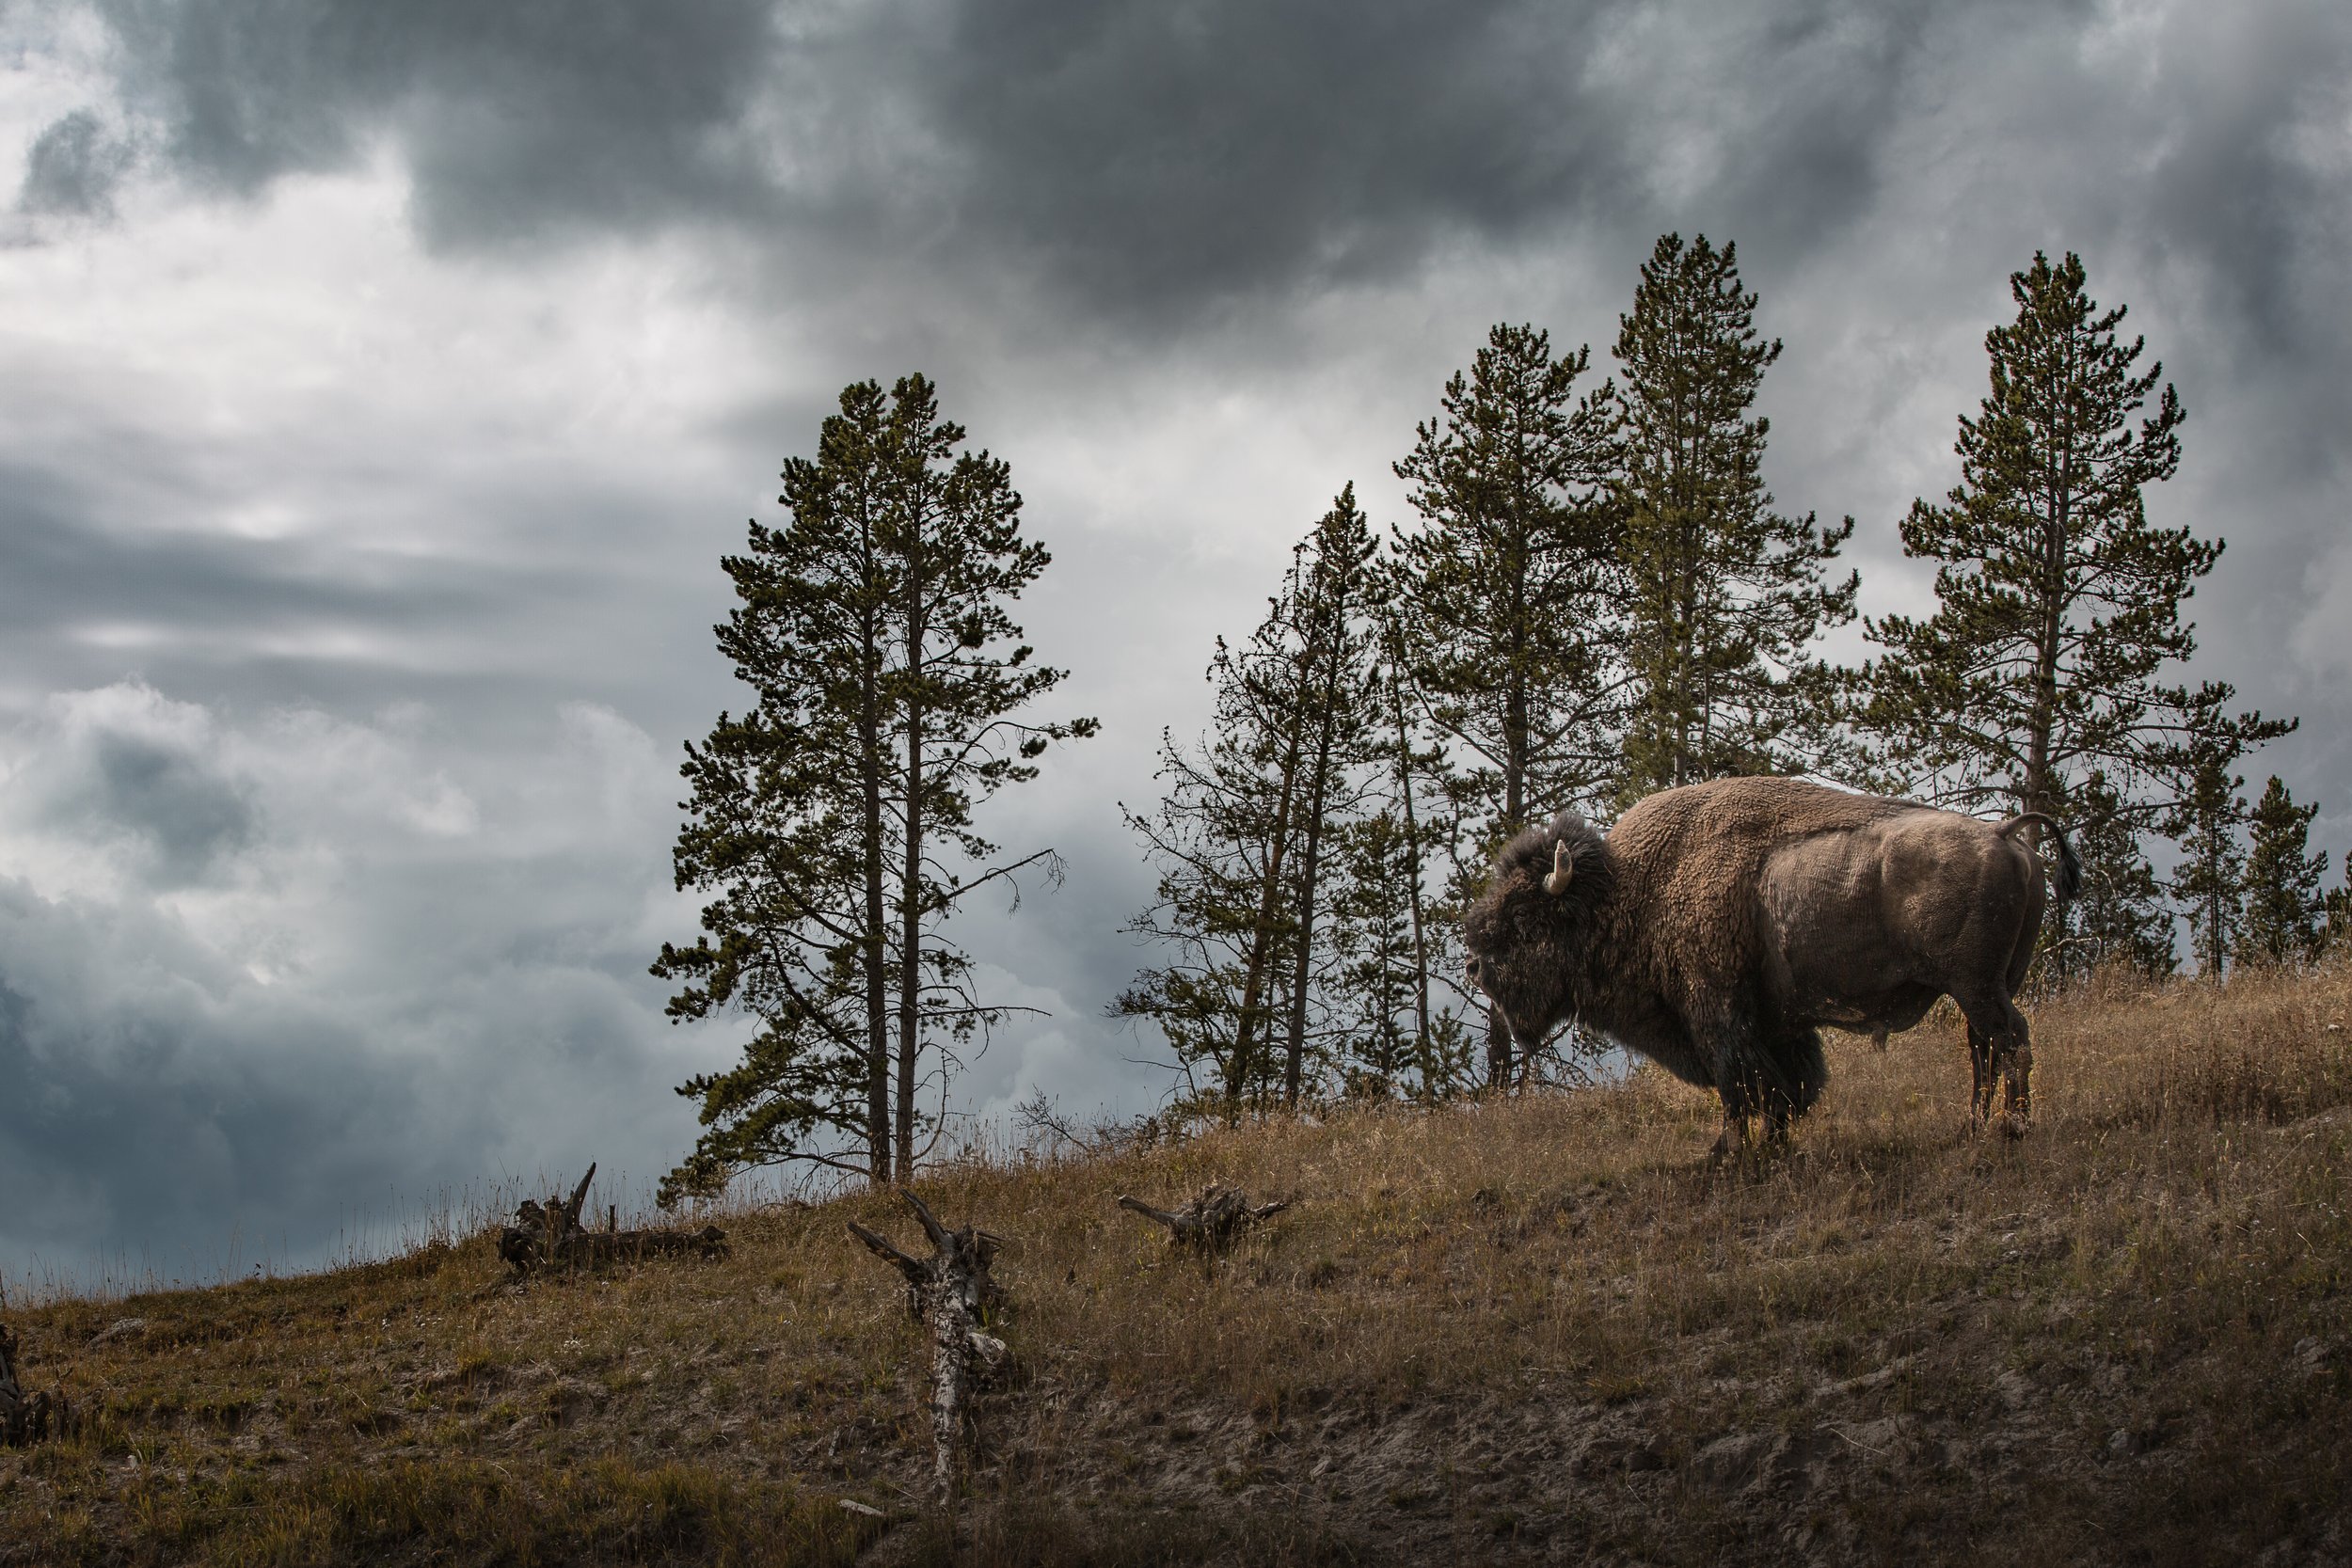
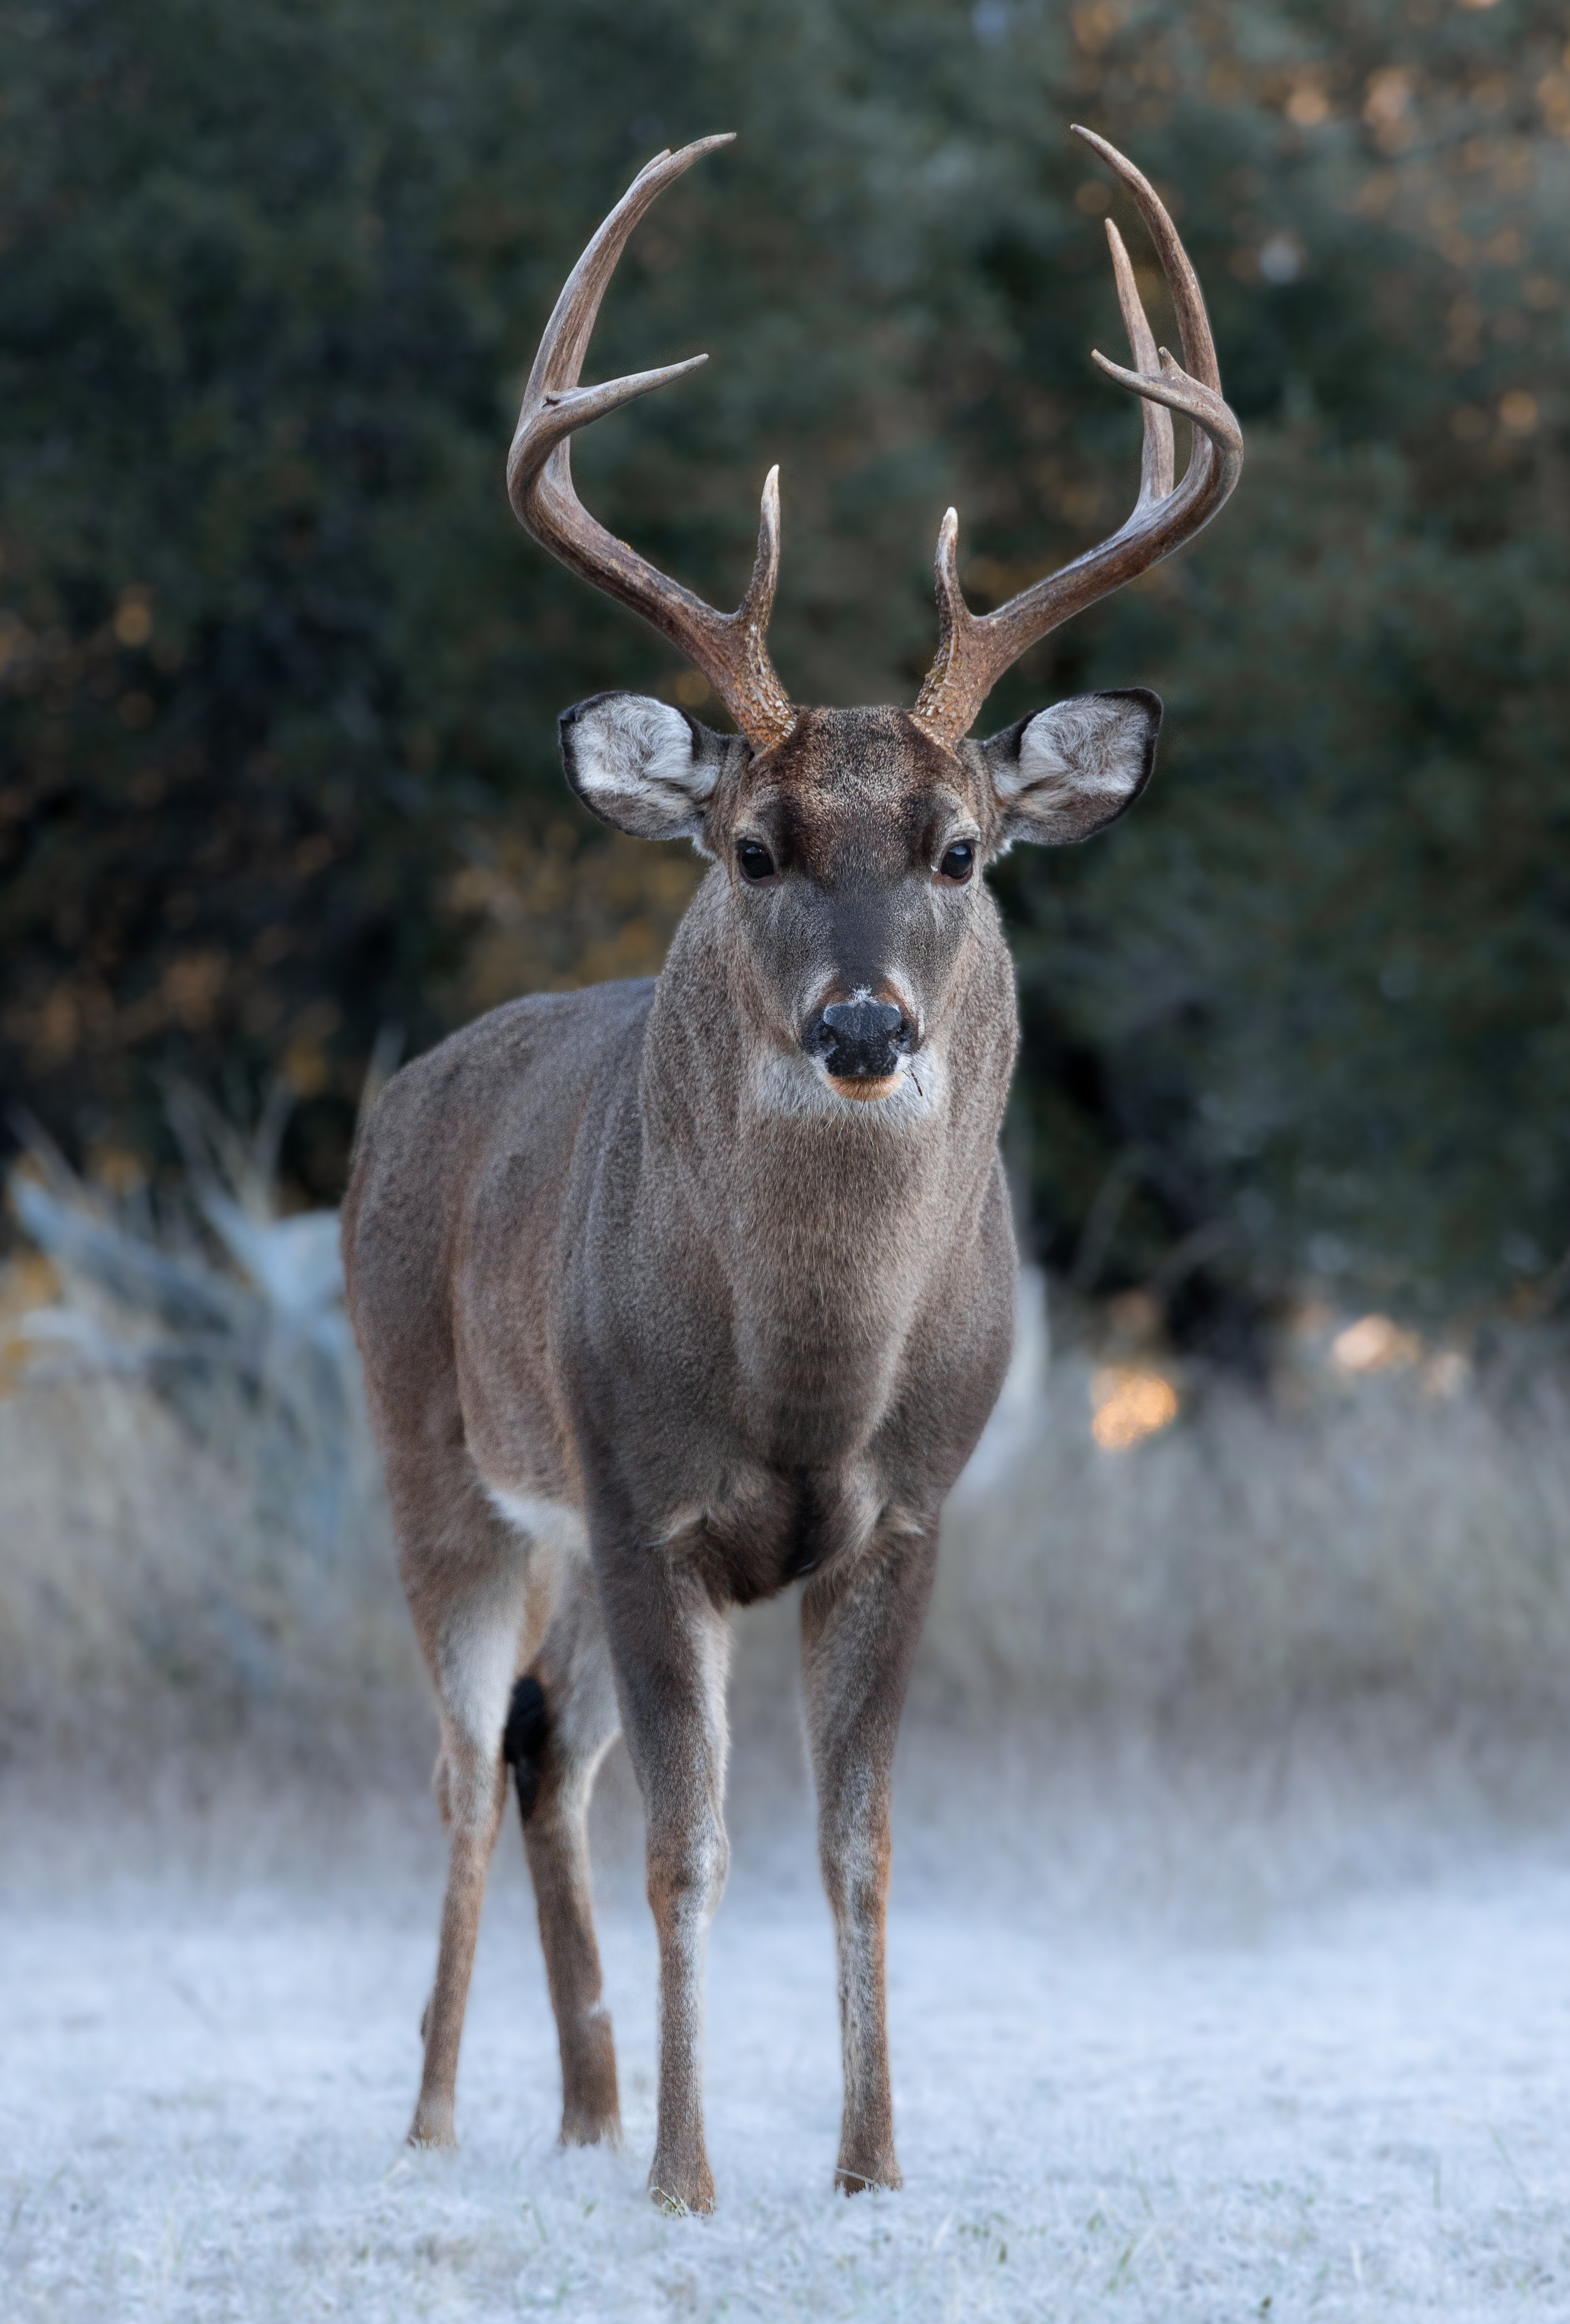
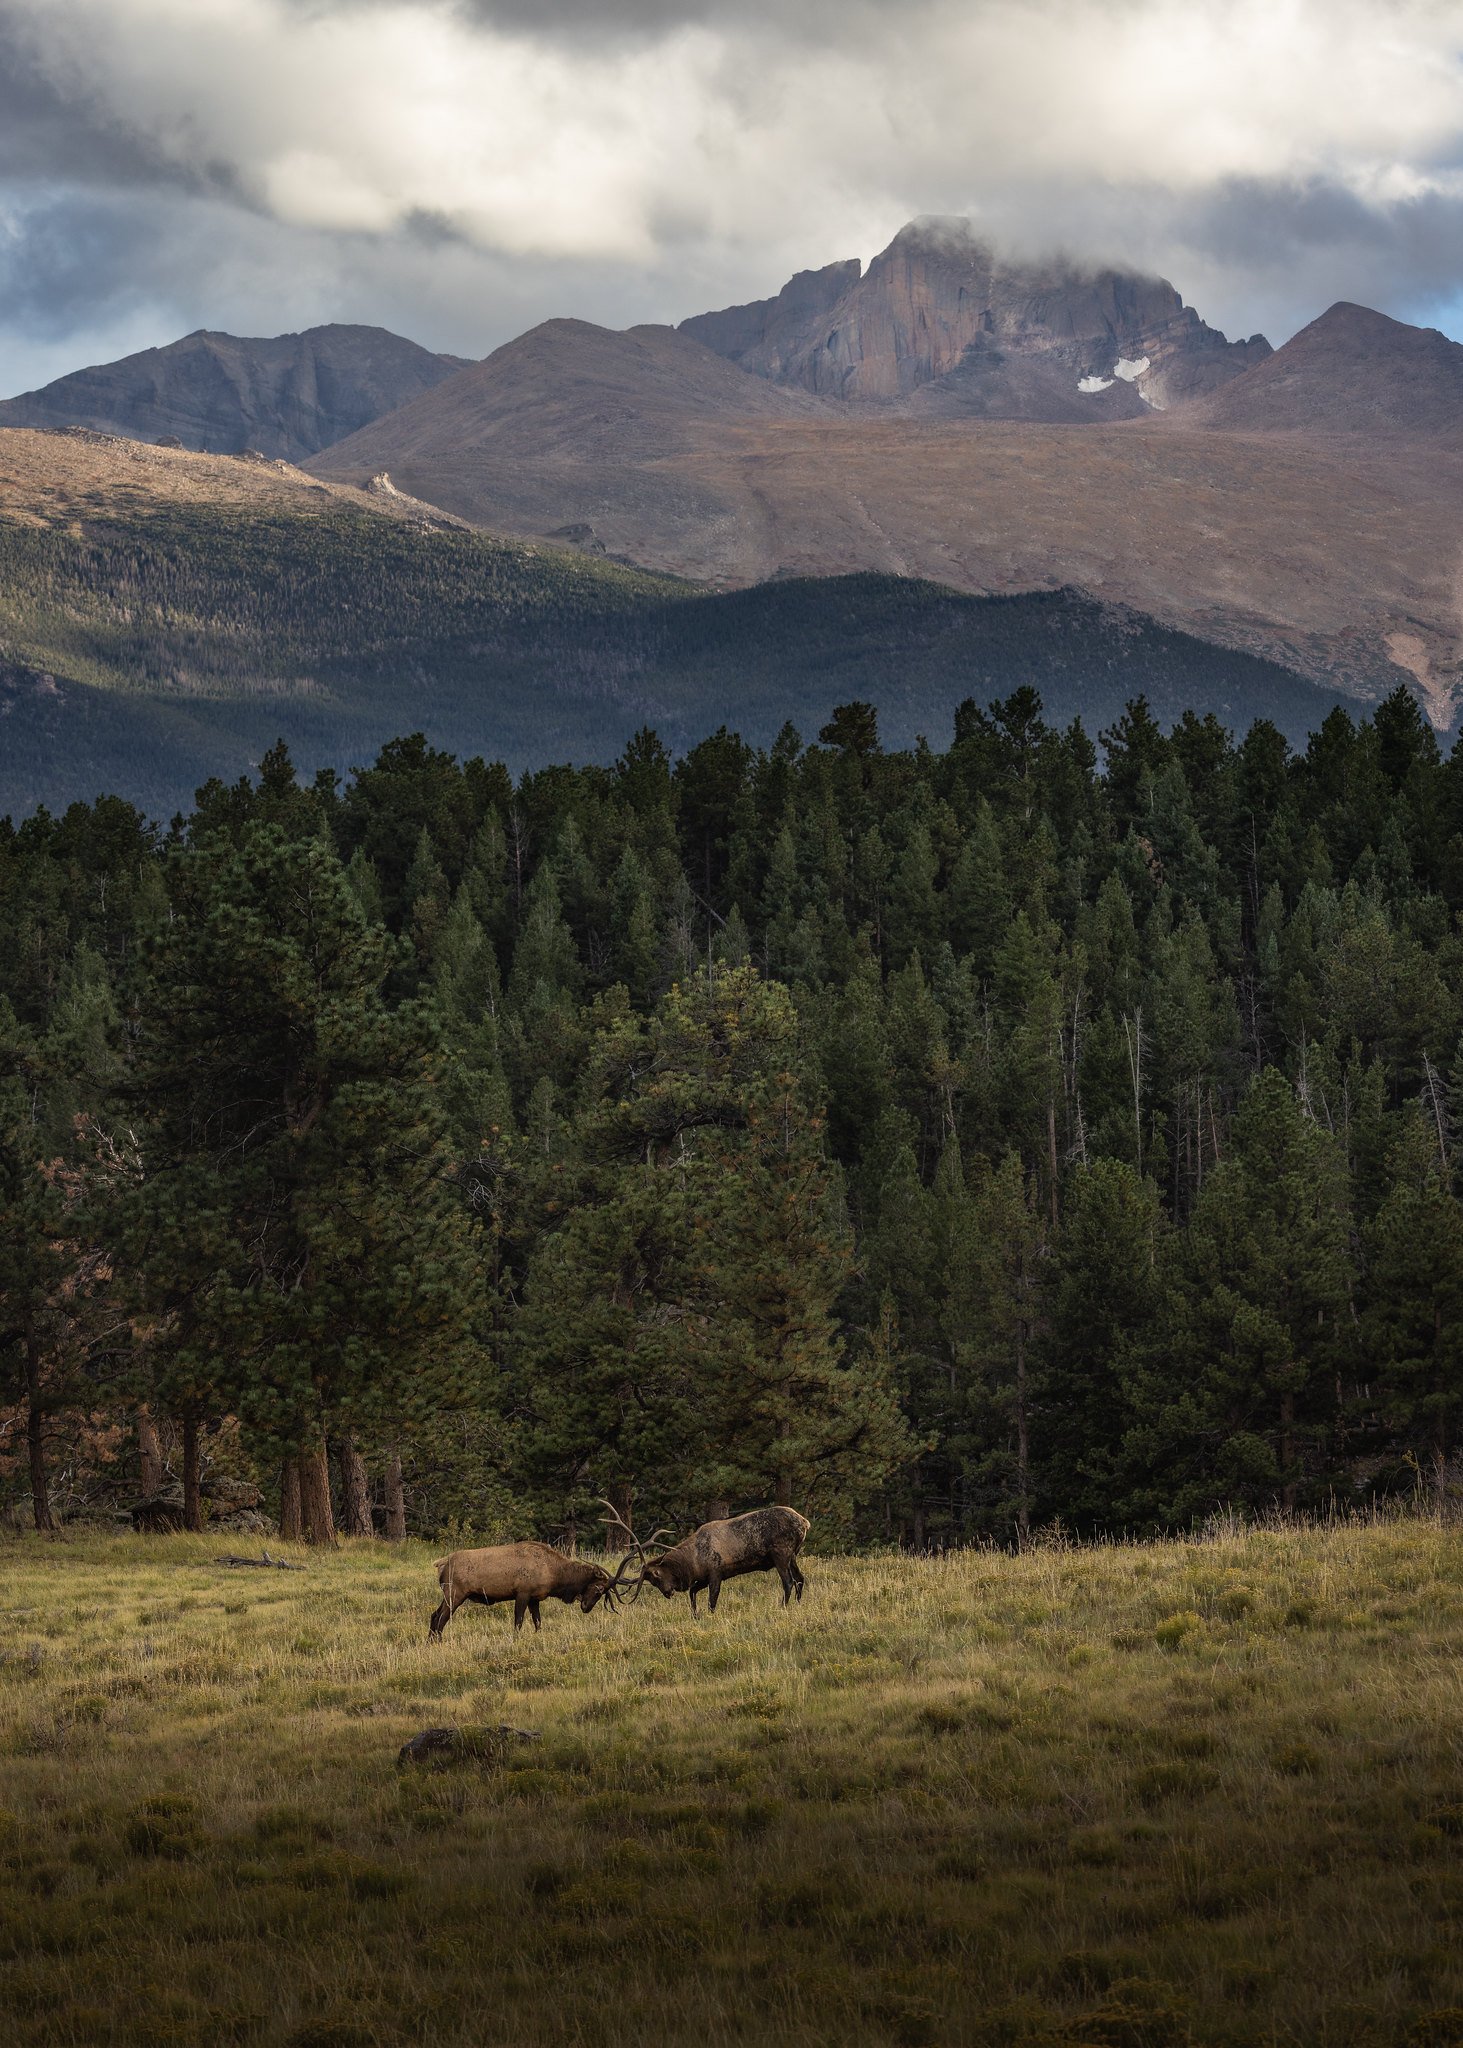
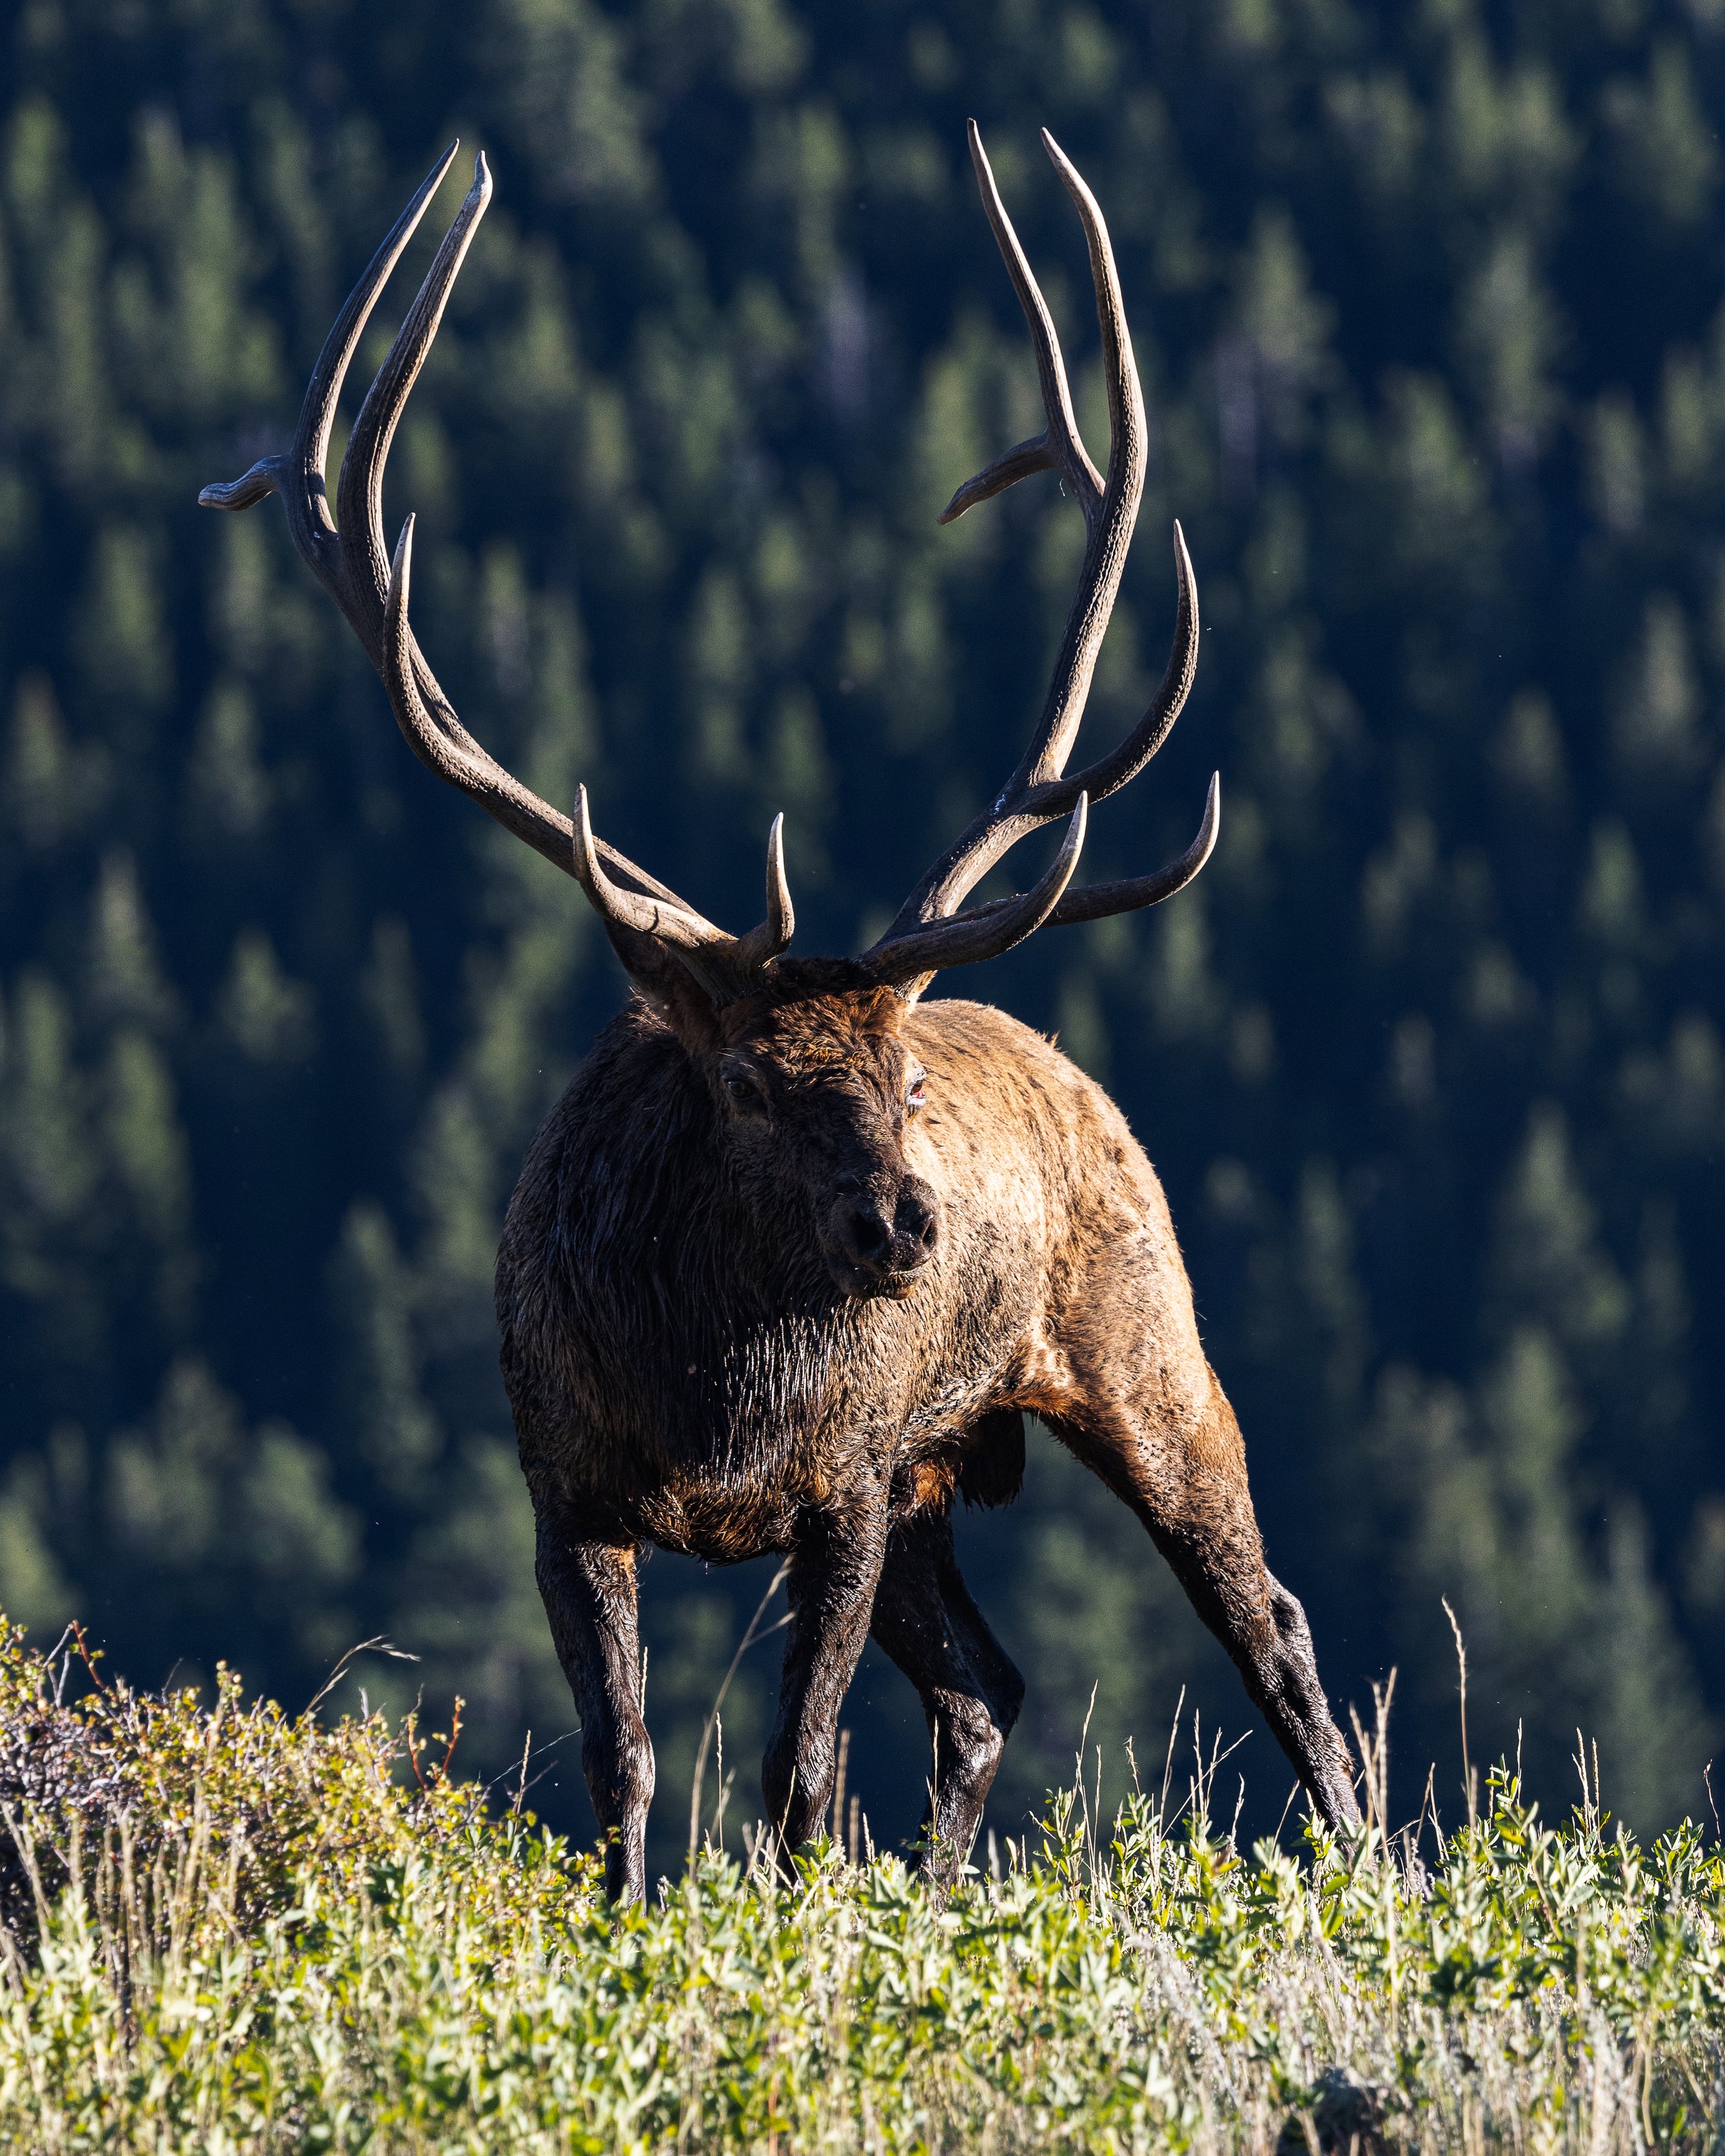
Here’s a sample of my wildlife gallery. Some (but not all) are shot with this kit.

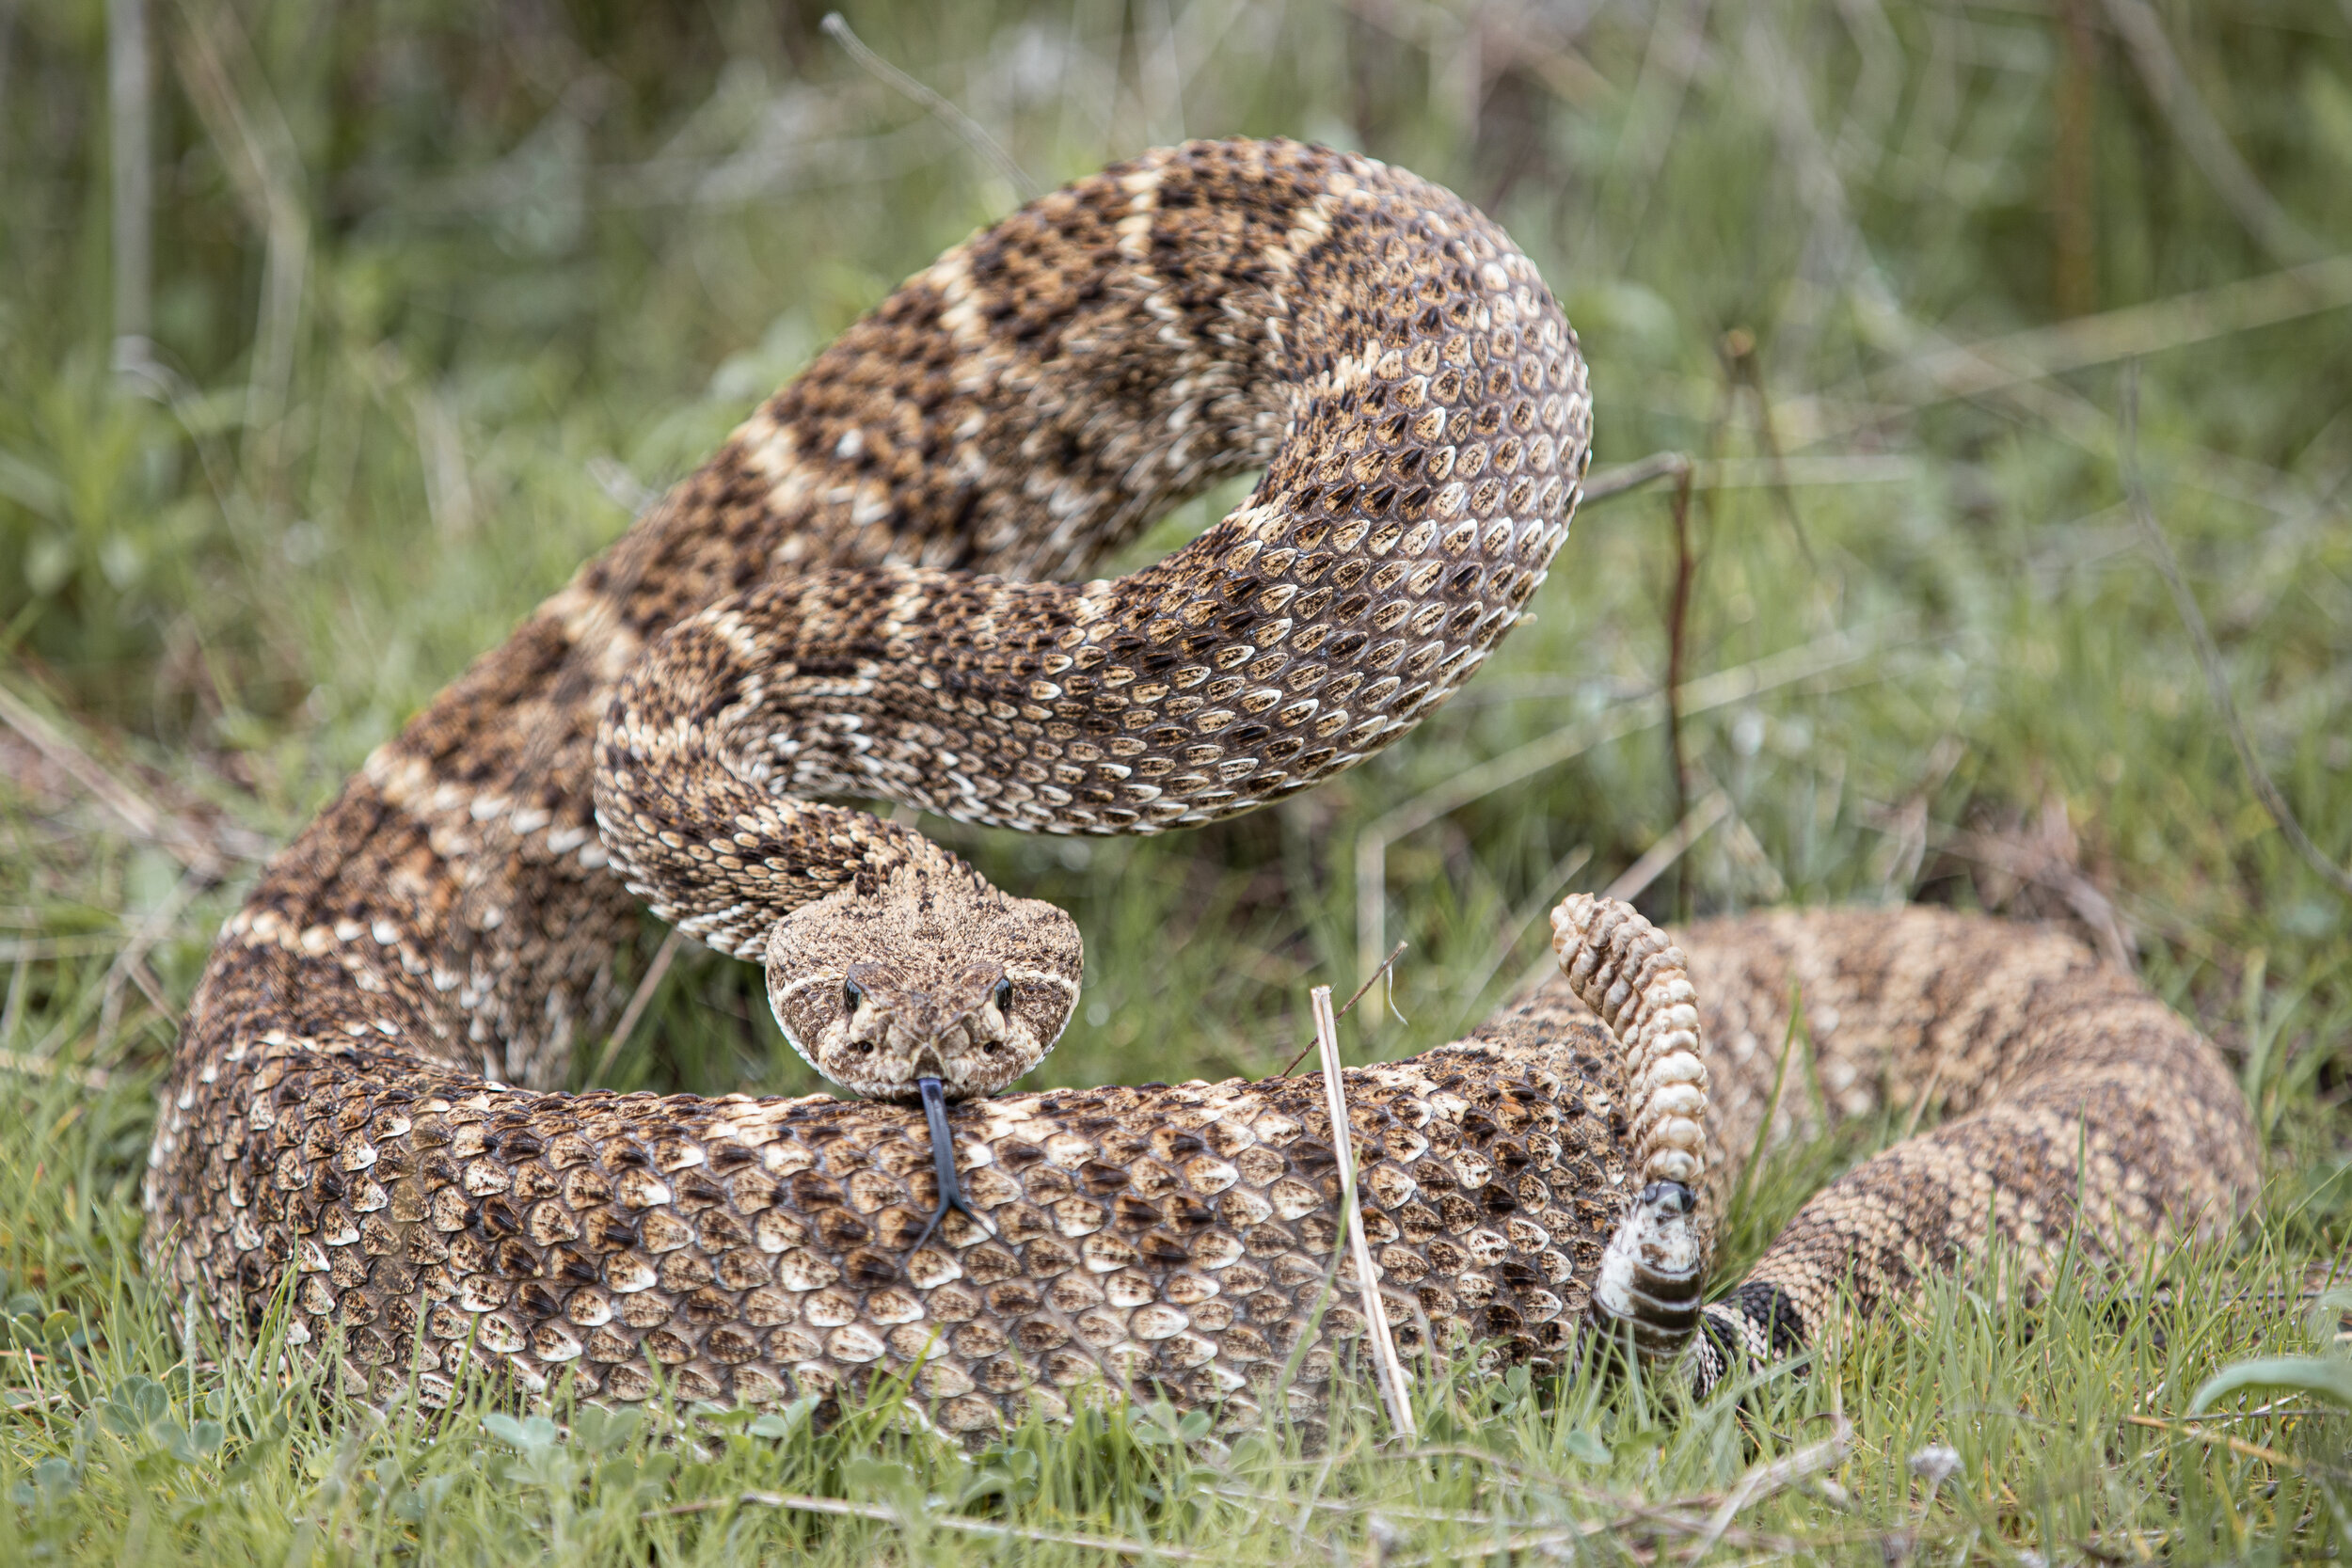
  1. The Camera: Canon EOS R5 Mirrorless Camera Body

    I could argue that this is less important than some other items (lenses primarily), but since it’s the star of the show, I’ll start here.

    Things I love:

    • Relatively small compared to DSLR bodies

    • Crazy good auto-focus (eye focus is superb)

    • Can shoot really high FPS for fast moving subjects

    • Really good in low-light and with handling noise

    • Video is solid, but has some drawbacks

    • Uses Canon’s new RF lens technology


    Things I don’t love:

    • Battery life is less than I expected

    • I can’t for the life of me find a way to disable the autorotation on the viewfinder (if you know, help!)

    • Pricey

    • Overheating issues with some video settings, and I even got an overheat warning when doing a lot of long exposures in a row shooting some fireworks over Austin. Kinda lame if you ask me for a $4K camera body. Get your sh*t together, Canon.

Canon R5

2. My Primary Lens of Choice: Canon RF 100-500mm f4.5-7.1

This little beauty has quickly become one of my all-time favorite lenses. The versatility it gives you is almost unmatched, and it comes with a fairly lightweight and small footprint relative to similar other lenses in this focal length. There are a few trade-offs, but that is to be expected with such a wide range and (relatively) inexpensive price point. It’s not cheap, but I’ll get into that more in a second.

Things I love:

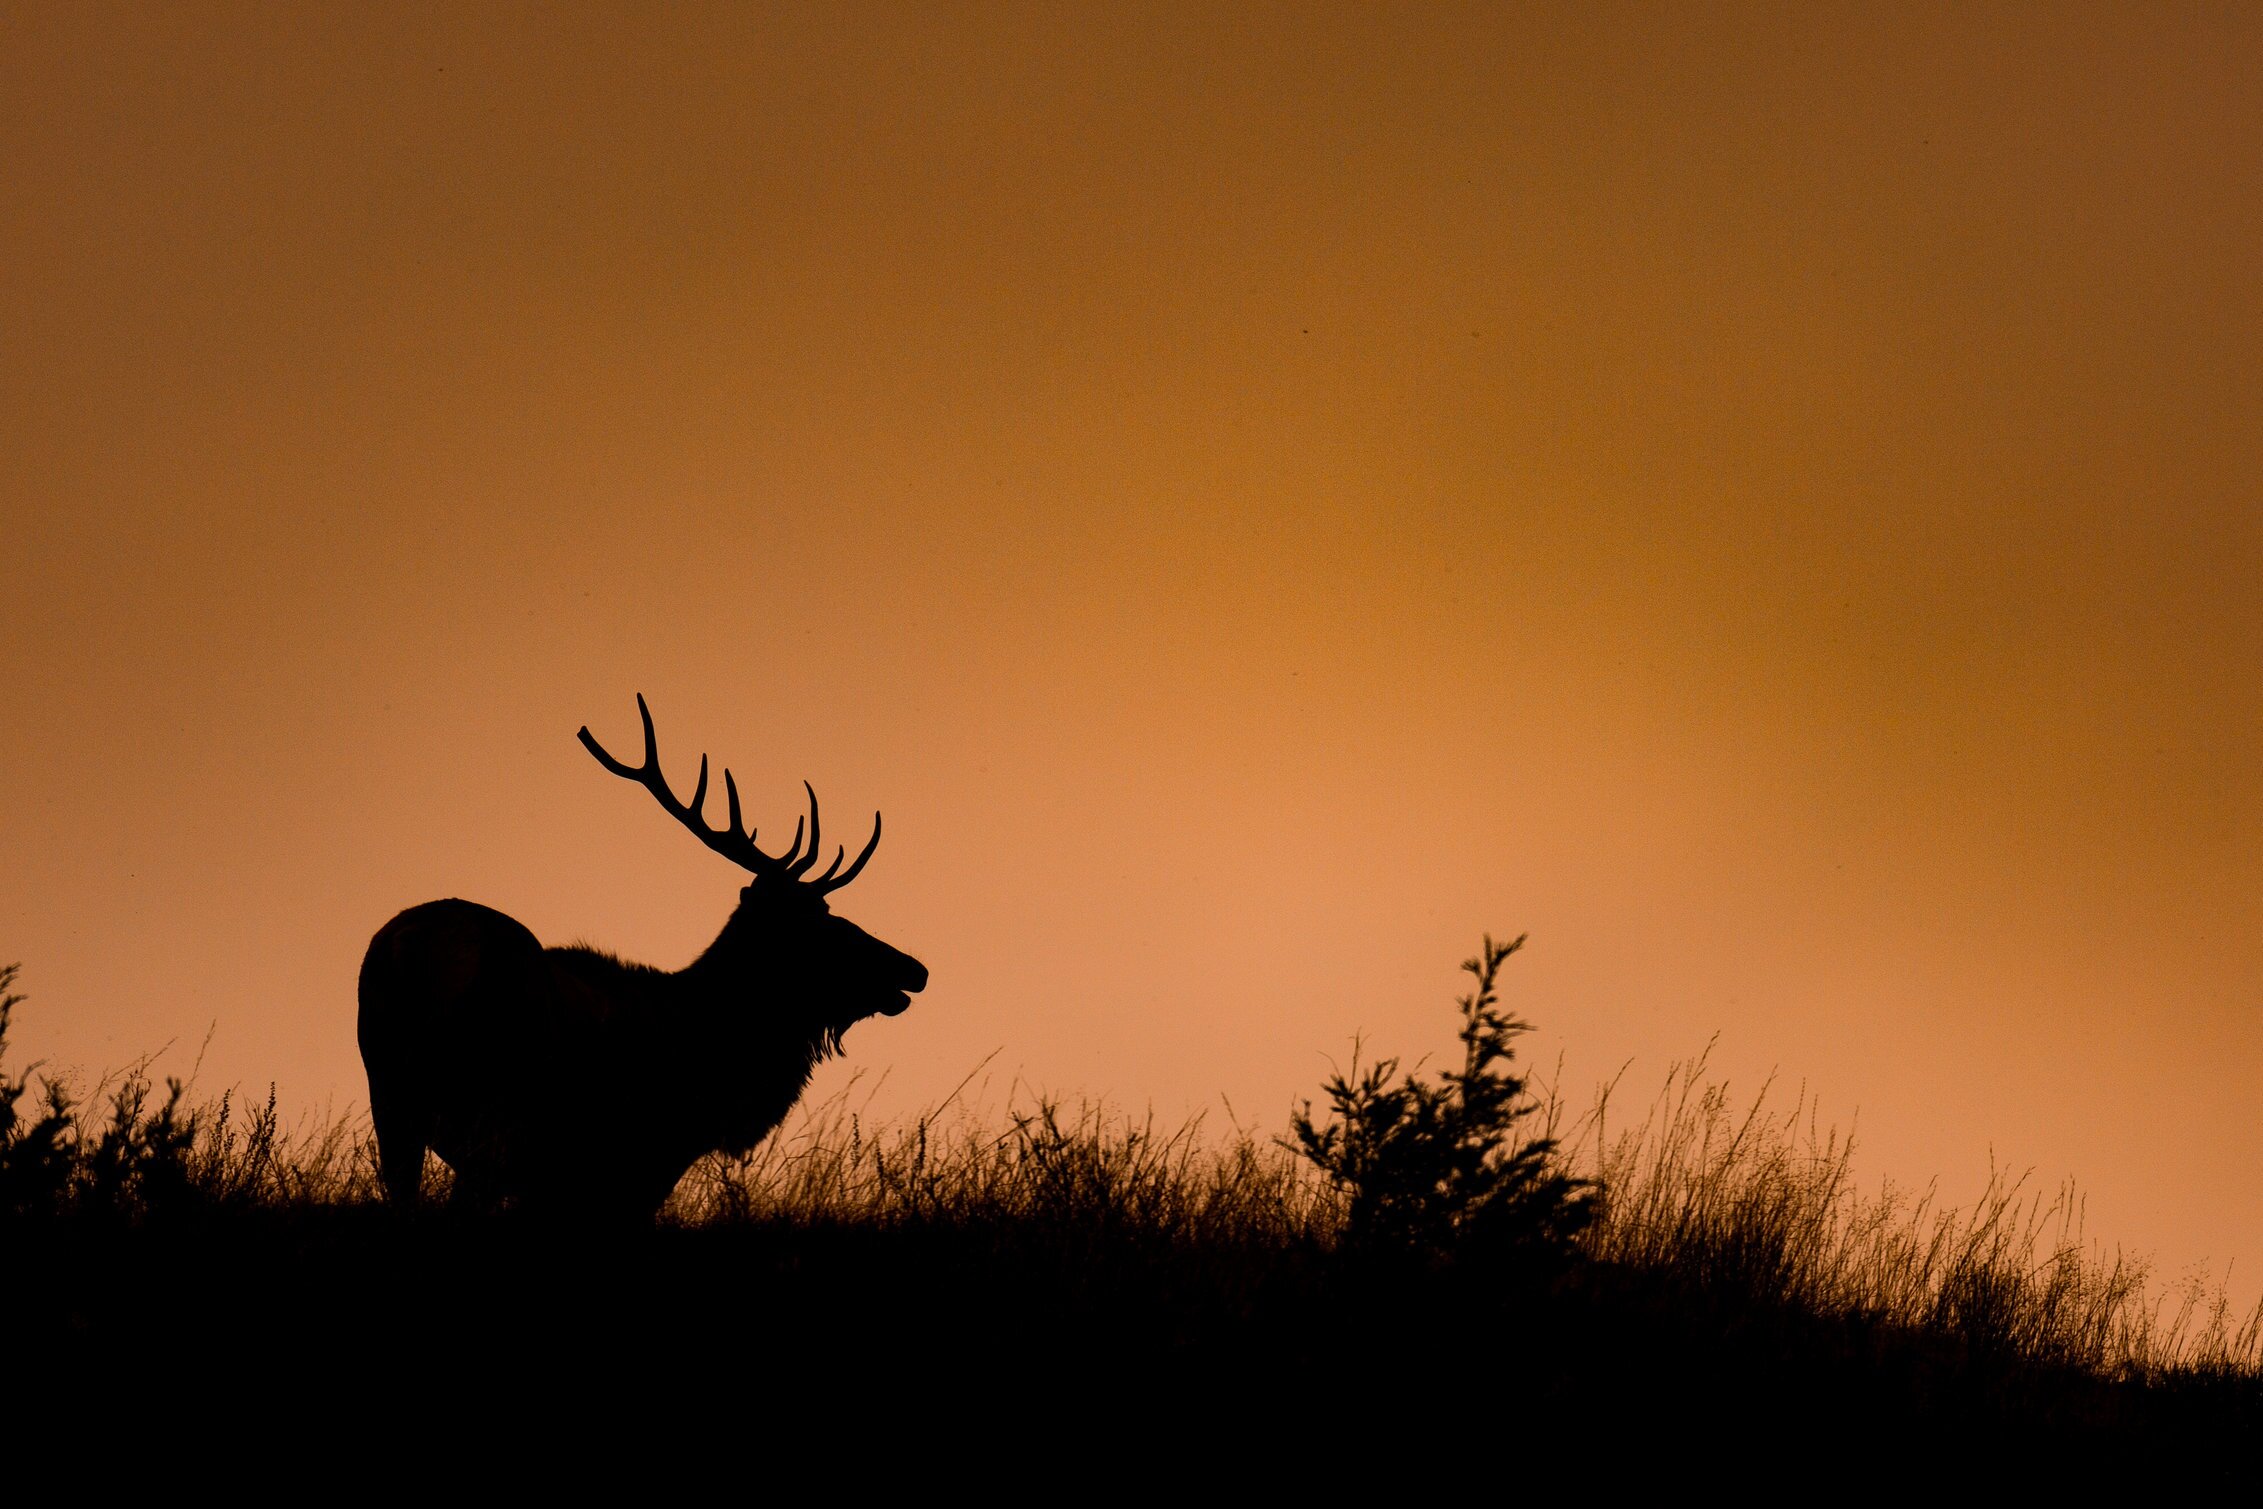
  • Versatility. Simply put, you can do a LOT with this lens. Wildlife obviously comes to mind given its reach at 500mm, but it’s also a very serviceable portrait lens if you’re outdoors, and even is a great option for landscape photography when you want to isolate parts of your scene vs. capturing everything with a wide angle option. Additionally, for wildlife, it’s occasionally preferrable in my opinion to capture more of the overall environment vs. just capturing your subject as close as possible. Example Image here. This lens gives you that option, while also letting you get in tighter when you want to. Try that with a 600 or 800mm prime.

  • Image quality - It’s sharp. Very sharp.

  • Size - when it’s at 100mm, it’s only slightly larger than a 70-200mm lens.

  • Weight - You can hand hold this bad boy vs. always needing a tripod. This means more creative angle opportunity, easier packability if you’re hiking in, and you’re much more likely to have it in your bag if you know it’s not a nightmare to transport. Coming from a GIANT Sigma 150-600mm sport lens, this is critical. The Sigma was nice, but massive, which meant it got left at home a lot.

Things I don’t love:

  • Price - It’s almost $3k with tax. Quite the investment, but compare that to any other RF lenses of “L” quality, and you’ll find it’s actually less of a punch to the wallet than it could be. I just think Canon has gotten drunk on profits on these newer RF L lenses. There are cheaper non L primes at 600 and 800mm, but you lose flexibility in range, weather sealing, light gathering, and likely image quality as well. I haven’t tested them personally, but specs seem to point to that.

  • Light Gathering - speaking of light, this lens is pretty slow at 4.5-7.1. Especially on the long end, you’re going to run into some issues at dawn and dusk especially with the 7.1 aperture. I may write another blog on some of my specific settings that I use to mitigate this, but it’s something to be aware of. You’re also not going to get that crazy good bokeh that you’d get with an f4 or faster lens. Photography is a game of trade-offs. One thing I’d ABSOLUTELY recommend to make your lens seem faster than it is - Topaz Labs DeNoise AI. I’m not affiliated with them at all (Get at me Topaz if you want to be!), but I’m amazed at what this software does to improve images especially when light is a challenge. Let me know if I should write a blog on how I use it.

  • Bokeh - The bokeh is mostly good with this lens. I’ve run into some issues that I can’t quite explain where sometimes the bokeh looks like it has squiggly lines in it? I especially saw this when I shot on the EOS R vs the R5, but either way, it’s a slower lens, so the bokeh i just not going to be as buttery smooth as something f4 or faster. Trade-offs again.

  • Extenders - I hate the fact that you can’t use a 1.4x or 2.0x teleconverter with the FULL RANGE of this lens. You’re basically forced into only using it at the long end, which is just annoying to me. Since the lens has to be extended when the extender is on, that means you can’t even leave it on the lens and shrink it down to its normal size with the externder while packing it around. It’s dumb.

Canon 100-500mm f4.5-7.1 L

In summary, I love this lens, but yet I know at some point when funds are available, I’m going to go with a true dedicated wildlife lens that is much larger, heavier, faster, and likely has better image quality. For me, I just can’t stomach the cost right now, so the 100-500mm is the ticket for me. If you’ve got the coin, go for one of those big RF primes. I’m sure they’re amazing.

So this is it. As crazy as it sounds, this is pretty much all I bring with me when I’m out photographing wildlife. The only other piece of gear that I occasionally use is the Canon Battery grip for the R5. Obviously it doubles your battery capacity, but the real benefit of this piece of kit is the option to easily flip to a vertical composition while maintaining the ergonomics of normal shooting. This is a game changer if you shoot a lot of vertical stuff.

Leave a comment if you found any of this valuable, and shoot me a message if you have any questions. I’m not a technical wizard, but just a normal dude using all this stuff in the real world as a hobbyist, so I’ll shoot you straight with everything I know!

-Tyler

My Wildlife & Landscape Photography Kit & Why I Buy Used

As I’ve delved further into this world of photography, I’ve inevitably tried a lot of equipment and gear to help improve my photography. I’m not a full-time professional photographer, so most of my equipment was purchased used, and the majority of it is not the latest nor the greatest on the market and I’m 100% okay with that.

20181202_203952.jpg

If you have ever taken a photography class or done a workshop, you’ve probably heard someone say some variation of, “it’s not the camera that makes the photo, but the photographer” and that is totally true. However, that doesn’t mean you shouldn’t have the best possible equipment for your unique style of photography as long as it fits within your financial means. If you’re like me, that might mean buying used vs new to help get more bang for your buck, or it could mean focusing more on “all in one” type of body/lens combos to cut costs that way.

Anyways, I’m digressing from the subject of this post, which is my gear list for wildlife and landscapes, but I wanted to sort of set the record on how I feel about posts on camera gear. This is just MY list - if you have different or less equipment, it doesn’t at all mean you can’t go out and get phenomenal photos in cool locations.

Without and further adieu, here’s my stuff with links:

Camera Body & Lenses:

  • Canon 5D Mark III (link)

  • Canon 16-35mm f/4L IS USM (link)

  • Canon 24-70mm f/4L IS USM (link)

  • Canon 70-200mm f/2.8L IS II USM (link)

  • Canon 100-400mm f/4.5-5.6L IS II USM (link)

  • Sigma 150-600mm f/5-6.3 DG OS HSM | S (link)

Tripod, Bag(s), and Misc :

  • Three Legged Thing Billy Carbon Fiber Tripod (link)

  • Three Legged Thing L Bracket (If you don’t have an L Bracket, GET ONE! It will change your life link)

  • Vanguard Veo Monopod (link)

  • Lowepro Rover Pro 45L AW Backpack (unfortunately discontinued link)

  • B+W Filters (mainly just a Polarizer and a 6 stop ND)

  • Cleaning Cloth, brush, air blower

  • Car window bean bag (a must for Yellowstone)

There are a bunch of other little accessories and things that I’m not thinking of, but this covers most of the big stuff. As I’ve typed this out. I realized that I really wasn’t kidding when I said I get most of this stuff second hand. The retail amount of these items is definitely a shock to the system but the good news is that I realistically paid about 60% of the MSRP on this gear just by doing some research and finding deals. Anyone can do this if you’re willing to put in some time and take on a little risk.

The camera body came from Craigslist from a college student who used it for a project and decided they weren’t THAT into photography. The other lenses mostly came from Craigslist and eBay and all work like they are new and look the part too. I’ll be totally transparent here, the Sigma lens was an eBay product and it did arrive with a problem. It wouldn’t focus at any distance past about 10m. The result was that I had to ship the lens to Sigma’s repair facility, and I paid about $250 to have it repaired, cleaned, and shipped back to me. Even with all that, it still was cheaper than retail and it literally functions as new, but I didn’t ultimately save as much as I typically do from buying new.

Best advice I can give you on buying used is to be cautious. If a deal seems too good to be true, it probably is. Test as much stuff as you can before you buy, and you’ll likely be able to build up a pretty legit kit without breaking the bank.

The Park that Started it All - Yellowstone! (part 1)

Ah… Yellowstone!

Lower Falls.jpg

This was my pilgrimage to the Mecca of National Parks. A bucket list visit that I hope to make many more times over the span of my life. It’s not just the first National Park, but one of the absolute best (in my humble opinion).

The park itself is dauntingly large. I must confess, I 100% underestimated the size of this place when I was planning this trip. For some reason I had it my head that one could drive the “figure 8” (more on this later) of the park in relatively short order. Trust me you can’t. The place is massive.

If you take a look at the park website, they estimate the size of the park to be a little shy of 3,500 square miles, but it’s so damn big that that is still up for debate. Clearly measuring something of those proportions is easier said than done. For those of you who have trouble grasping land size in square miles, that is about 2.2 MILLION acres. If acres or square miles is not your thing, it’s roughly the size of Delaware and Rhode Island combined.

I say all that just to make sure you know what you’re getting yourself into if you plan a trip here. Don’t make the mistake of thinking that you can just “drive thru” this park and take in all the sights in a day or so. If you only have a day, then so be it, but just know that you’re only going to experience a fraction of what this amazing place has to offer.

Figure 8 highlighted.

Figure 8 highlighted.

Now back to that “figure 8” thing. The park itself is so huge that having road access to everything is impossible, but they did a pretty darn good job of getting you close to some of the most popular areas via a circuit of sorts that is shaped… you guessed it… like a big figure 8. The nice thing is that this route lets you hit all the major attractions such as Old Faithful and the Grand Canyon of Yellowstone fairly easily. But again, don’t think you’re going to drive this loop in one day and enjoy yourself. Each of the “loops” take anywhere from 3 to 4 hours to drive with very little stopping.

The figure 8 is in the interior of the park, and obviously if you’re going on a trip to the park, you’ll need to pick an entrance that you’ll be using to access it. There are essentially 5 entrances to the park aptly named by the direction you’ll be coming from.

  • The North Entrance - located nearest to Gardiner, MT

  • The Northeast Entrance - located nearest to Silver Gate, MT

  • The East Entrance - not much out there, but good if you’re coming from Cody, WY

  • The South Entrance - best if you’re coming from Grand Teton NP

  • The West Entrance - located nearest to West Yellowstone, MT

For us, we were coming from Grand Teton, so we used the South Entrance, and since we booked a little late (best recommendation is to look at least a year before you want to go), we ended up staying in West Yellowstone, MT at a sweet little place called the Moose Creek Inn (https://www.moosecreekinn.com/). There are plenty of lodging options inside and outside of the parks, so definitely do your research on where you’d like to stay, and if I could do one thing differently, I’d try to spend a night or two in West Yellowstone, and then a night or two inside the park, and maybe even a little time in the town of Gardiner to the North.

If you do end up in West Yellowstone like us, I’d definitely recommend the Moose Creek Inn. It’s not going to have amazing views or 5 star accommodations, but it’s clean, staff is friendly, the beds were comfy (handy after all the hiking and travel), and it’s smack in the middle of town. Plus it’s cheap! Regarding the town itself, there are plenty of touristy little shops that are worth checking out during your evenings, and there are a few spots that are definitely worth grabbing some food or a drink at. Our favorites below:

Slippery Otter Pub - I was sold as soon as I saw the name, but truthfully it’s a good place to grab a beer or a cocktail after spending a nice day in the park and watching a game on TV. (4.2 stars on Google)

Wild West Pizzeria - Really solid pizza, cool environment, and it’s half bar half restaurant. It’s a busy place and for good reason. Go here. (4.3 stars on Google)

The Cordon Bleu Skillet - Delicious

The Cordon Bleu Skillet - Delicious

Running Bear Pancake House - Our favorite breakfast that we had while we were here. It’s small, cozy, and super friendly staff. I got this thing called the Cordon Bleu Skillet. It’s got everything you need to fuel you in the park for the day. (4.3 stars on Google)

We’ve covered a lot on this post, and we really haven’t even gotten to any of the epic stuff inside the park itself, so I’m going to call this good for now, and we’ll actually visit the park’s many sights and sounds in the next post. Trust me when I say, it’s a LOT to cover.